64MP OwlSight

Introduction
Arducam has released the highly influential and industry benchmark Arducam 64MP Hawkeye autofocus embedded camera for Raspberry Pi platform in 2022. Since the product was released, it has been widely praised. However, the camera, which is completely based on Arducam's independent research and development, cannot be natively supported by the Raspberry Pi platform. Users need to download the corresponding driver installation package to drive and use the camera.
Now, Arducam is coming with the latest Arducam 64MP OwlSight OV64A40 autofocus camera module. The biggest feature of the new 64MP OV64A40 OwlSight camera is that it will be fully supported by the mainstream software libcamera in the next updated version. In next version, You don't need to install any more drivers to plug in your camera and complete your project.
In addition, we have created a complete ecosystem for it, with accessories, products, and solutions available, which will greatly save you the energy and time spent in developing and implementing projects. We also support a deeper freedom in customization. You can share any of your ideas with us, and we will use our expertise and services to help you realize any project.
Highlight Features
| Highlight Features |
|---|
| + Native Supported by libcamera: Raspberry Pi mainstream software libcamera directly drives the camera, eliminating the need to install the camera driver and simplifying user access. |
| + Ultra-high resolution: ultra-clear picture quality, maximum resolution 9248x 6944 (64MP). |
| + Excellent photosensitive performance: larger optic format (1/1.32). The largest pixel size among sensors of the same level. |
| + Higher frame rate: Higher frame rate can still be obtained at high resolution. (Sensor Max Frame Rate: 9248x6944@15fps). |
| + Dual mode Focus: CDAF Autofocus & software control manual focus. |
| + Rich peripheral accessories: one-stop supporting parts and the overall industry ecosystem. From modules -> products -> solutions. |
Specifications
Basic Specs
| Image Sensor | |
|---|---|
| Image Sensor | OV64A40 |
| Still Resolution | 64 Megapixels |
| Color Filter Type | Color |
| Shutter Type | Rolling |
| Optical Size | 1/1.32″ |
| Pixel Size | 1.008 µm x 1.008 µm |
| Sensor Active Area | 9248(H)×6944(V) |
| Output Format | JPEG/YUV/RGB/RAW10 |
| Video Modes (on Raspberry Pi) |
1080p30,720p60 and 640×480p60/90 |
| Video Modes (Camera Module) |
9152×6944@2fps, 8000×6000@2.5fps, 4624×3472@7.6fps, 3840×2160@14.8fps, 2312×1736@26.7fps, 1920×1080@45fps. |
| IR Sensitivity | Integral IR-cut Filter, visible light only |
| Lens | |
| Focus Type | Manual/Auto |
| Focal Length | 6.65mm |
| F.NO | F1.9 |
| Field of View (FOV) | 84°(D)×68°(H)×56°(V) |
| Lens Mount | Stock Lens |
| Default Focus Range | 12cm~∞ |
| Electrical and Mechanical | |
| Power Requirements | 3.3V/300mA |
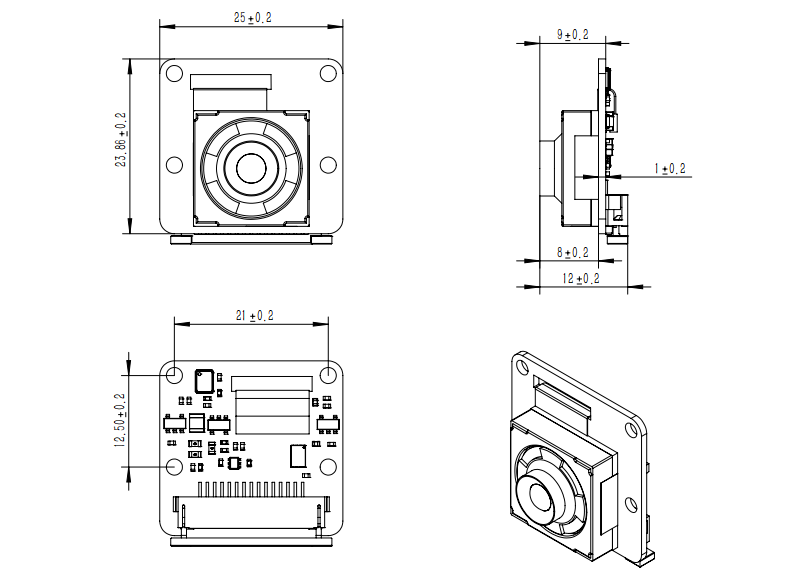
| Camera Board Size | 25×24 mm |
| Functionality and Compatibility | |
| Supported OS | Raspberry Pi OS |
| Supported Platforms* | Raspberry Pi 5/4B/3B+/3/2/CM3/CM4/Zero W/Zero 2 W |
Note: Capturing maximum resolution on the Pi 4 and CM4 may be impacted by CMA, which can be fixed by switching the GUI mode to terminal mode.
Resolution & Frame Rates
| Sensor | Transfer Speed | Resolution | Frame Rate |
|---|---|---|---|
| OV64A40 | High Speed* | 9152×6944 | 2.6fps |
| 8000×6000 | 2.5fps | ||
| 4624×3472 | 10fps | ||
| 3840×2160 | 20fps | ||
| 2312×1736 | 30fps | ||
| 1920×1080 | 60fps | ||
| Low Speed* | 9152×6944 | 2fps | |
| 8000×6000 | 2.5fps | ||
| 4624×3472 | 7.6fps | ||
| 3840×2160 | 14.8fps | ||
| 2312×1736 | 26.7fps | ||
| 1920×1080 | 45fps |
High speed/Low speed: It is supported to adjust the link-freq speed with Arducam OwlSight OV64A40 Camera, for details, please refer to Adjust link-freq speed with Arducam OV64A40 Camera.
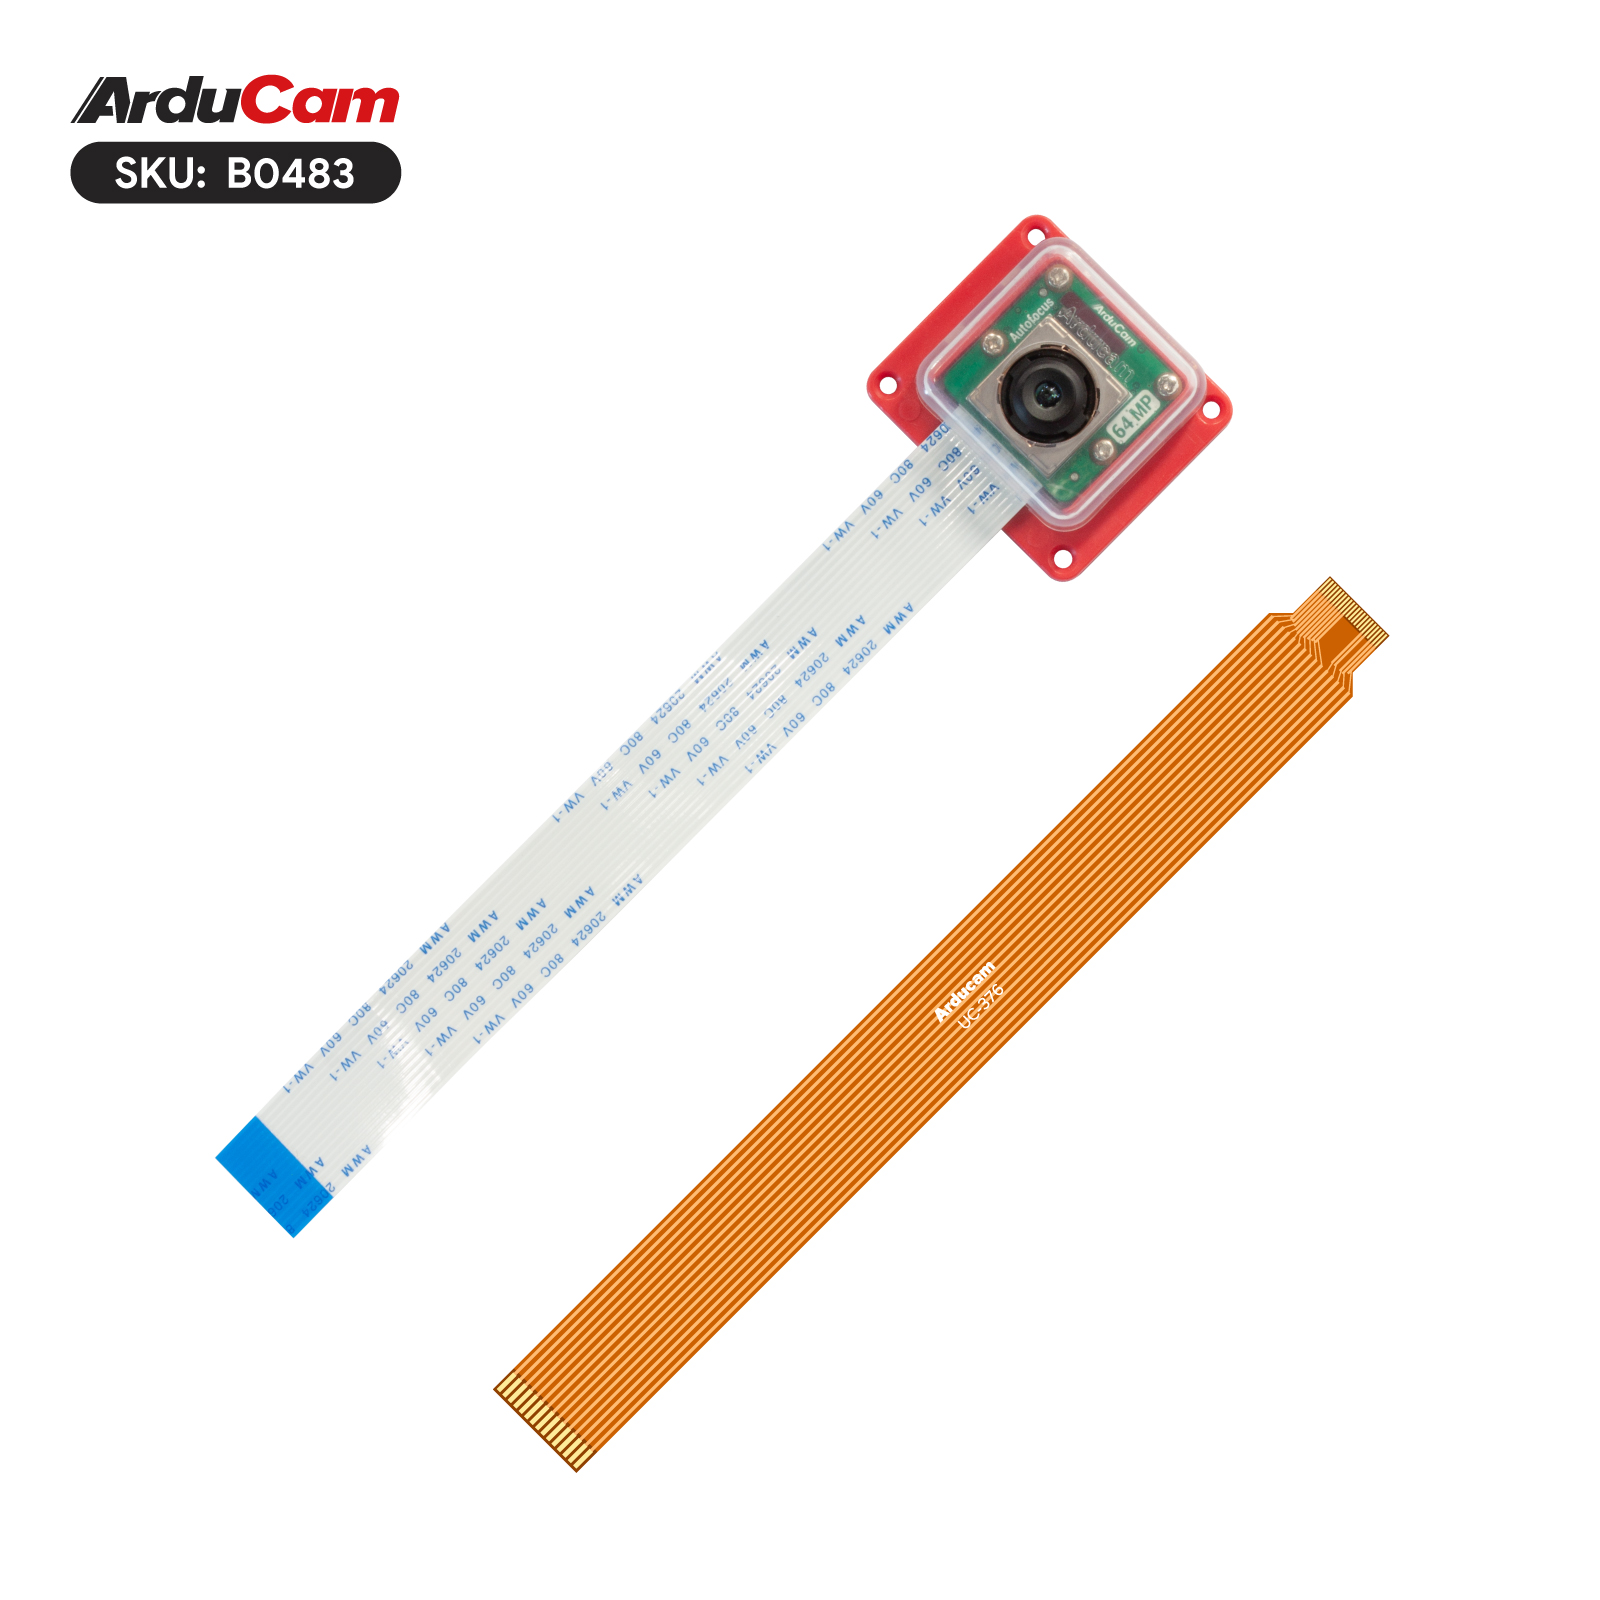
Product
| Product Image | SKU | Resolution | Sensor | Interface | Features | Focus Type | Focus Distance | Field of View(DxHxV) | IR Sensitivity |
|---|---|---|---|---|---|---|---|---|---|
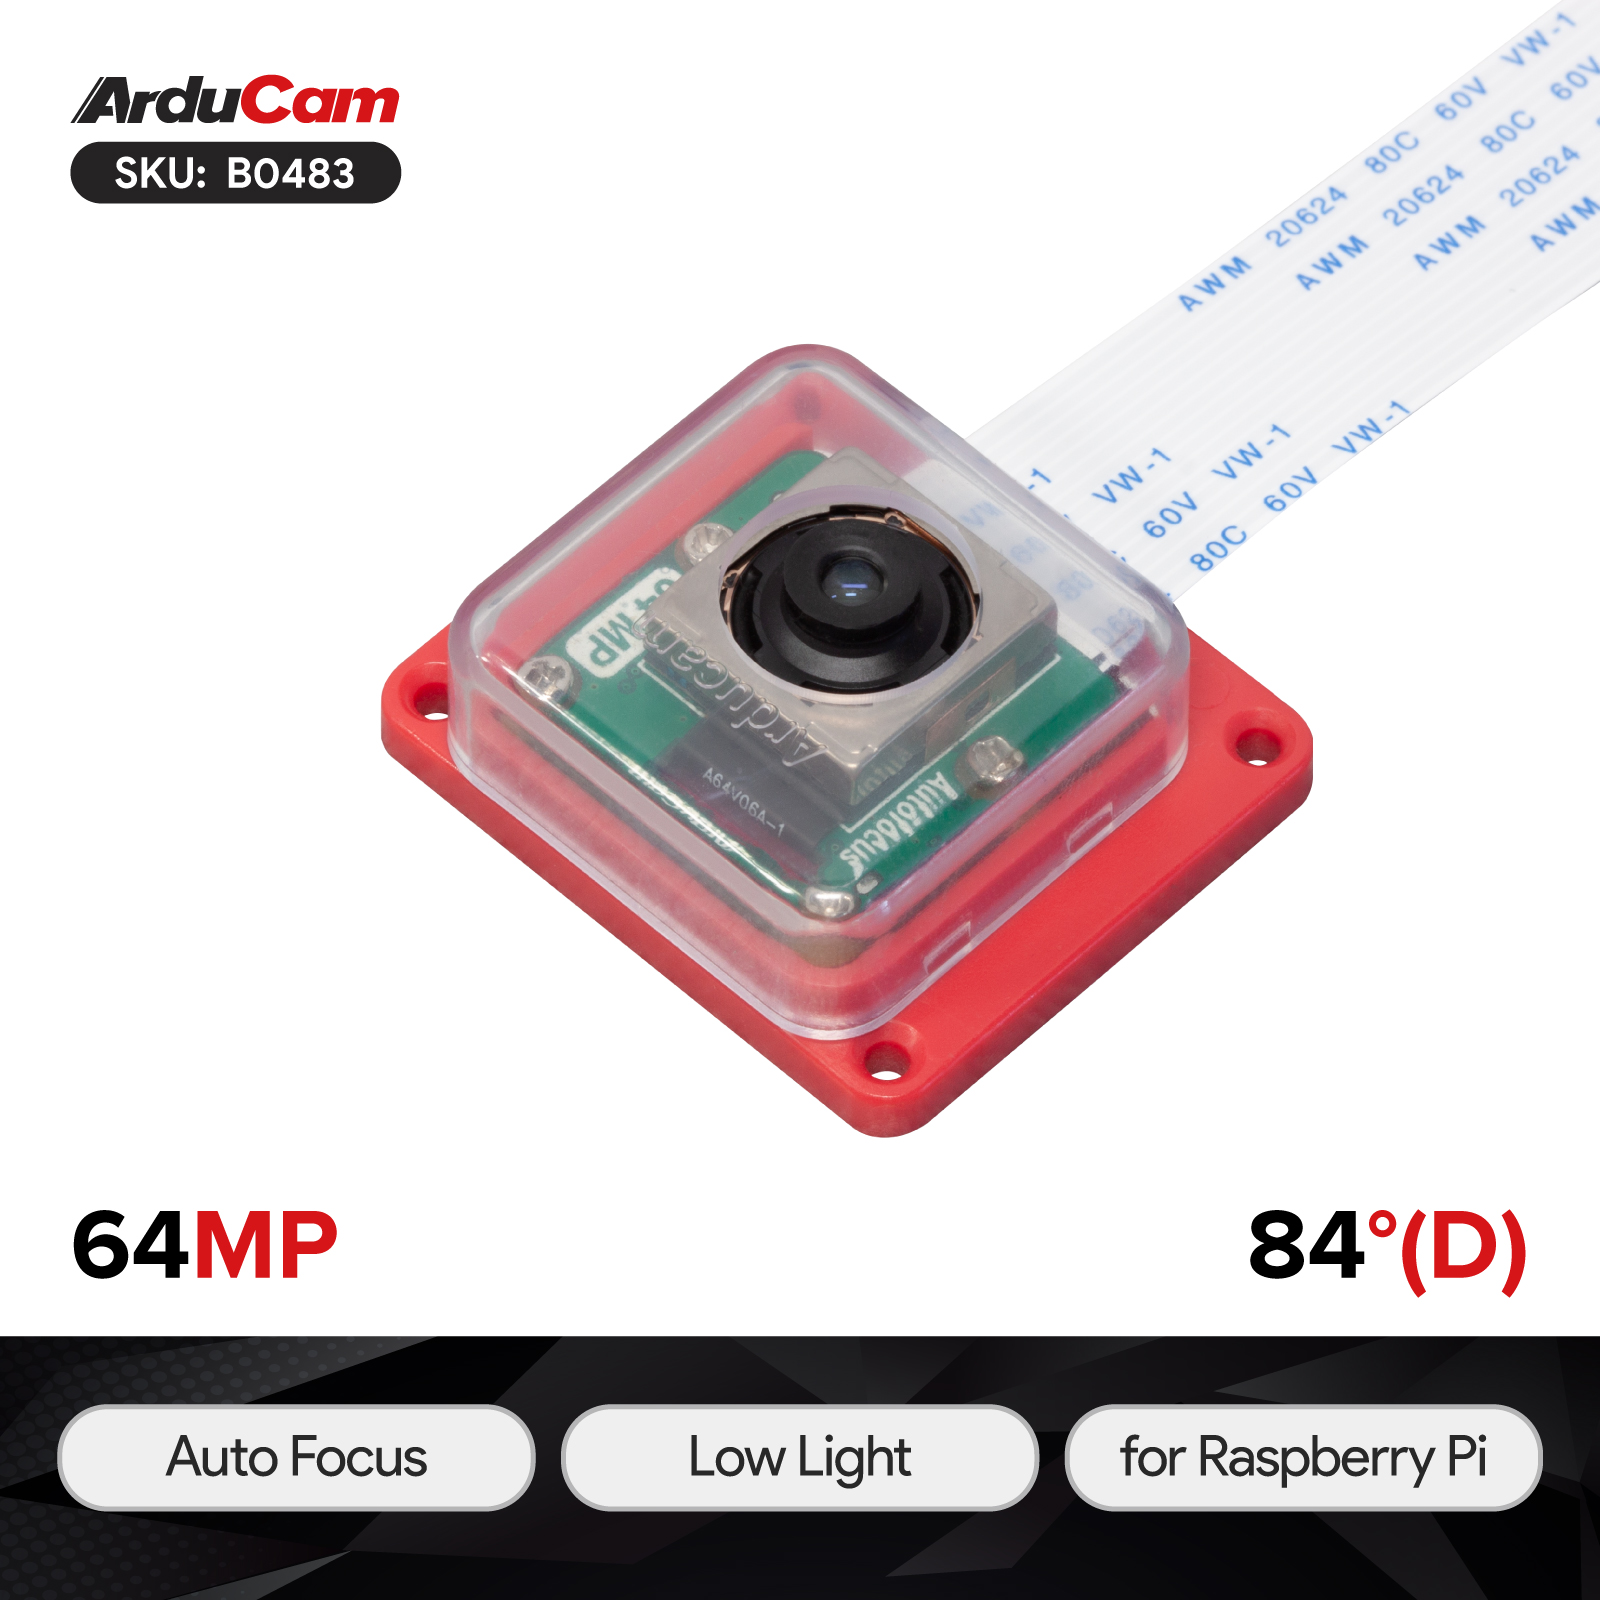 |
B0483 | 64MP | OV64A40 | MIPI CSI-2 | Ultra High Resolution | Manual/Autofocus | 12cm-infinite | 84°(D)x68°(H)x56°(V) | Integral IR-cut Filter |
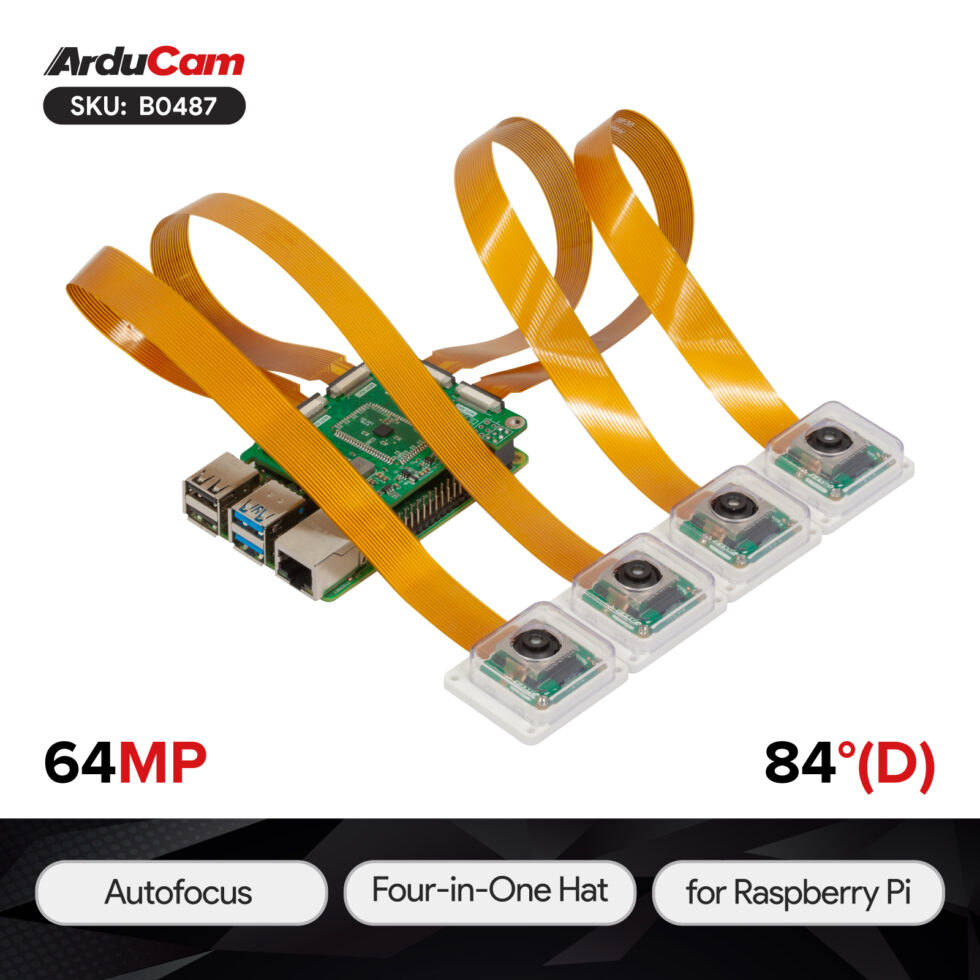 |
B0487 | 64MP | OV64A40 | MIPI CSI-2 | Quad-Camera Kit | Manual/Autofocus | 12cm-infinite | 84°(D)x68°(H)x56°(V) | Integral IR-cut Filter |
Note
Please refer to the following doc if you need to access the Arducam 64MP OV64A40 Quad-Camera Kit:
Quick Start Guide for Arducam 64MP OV64A40 Quad-Camera Kit
Accessory List
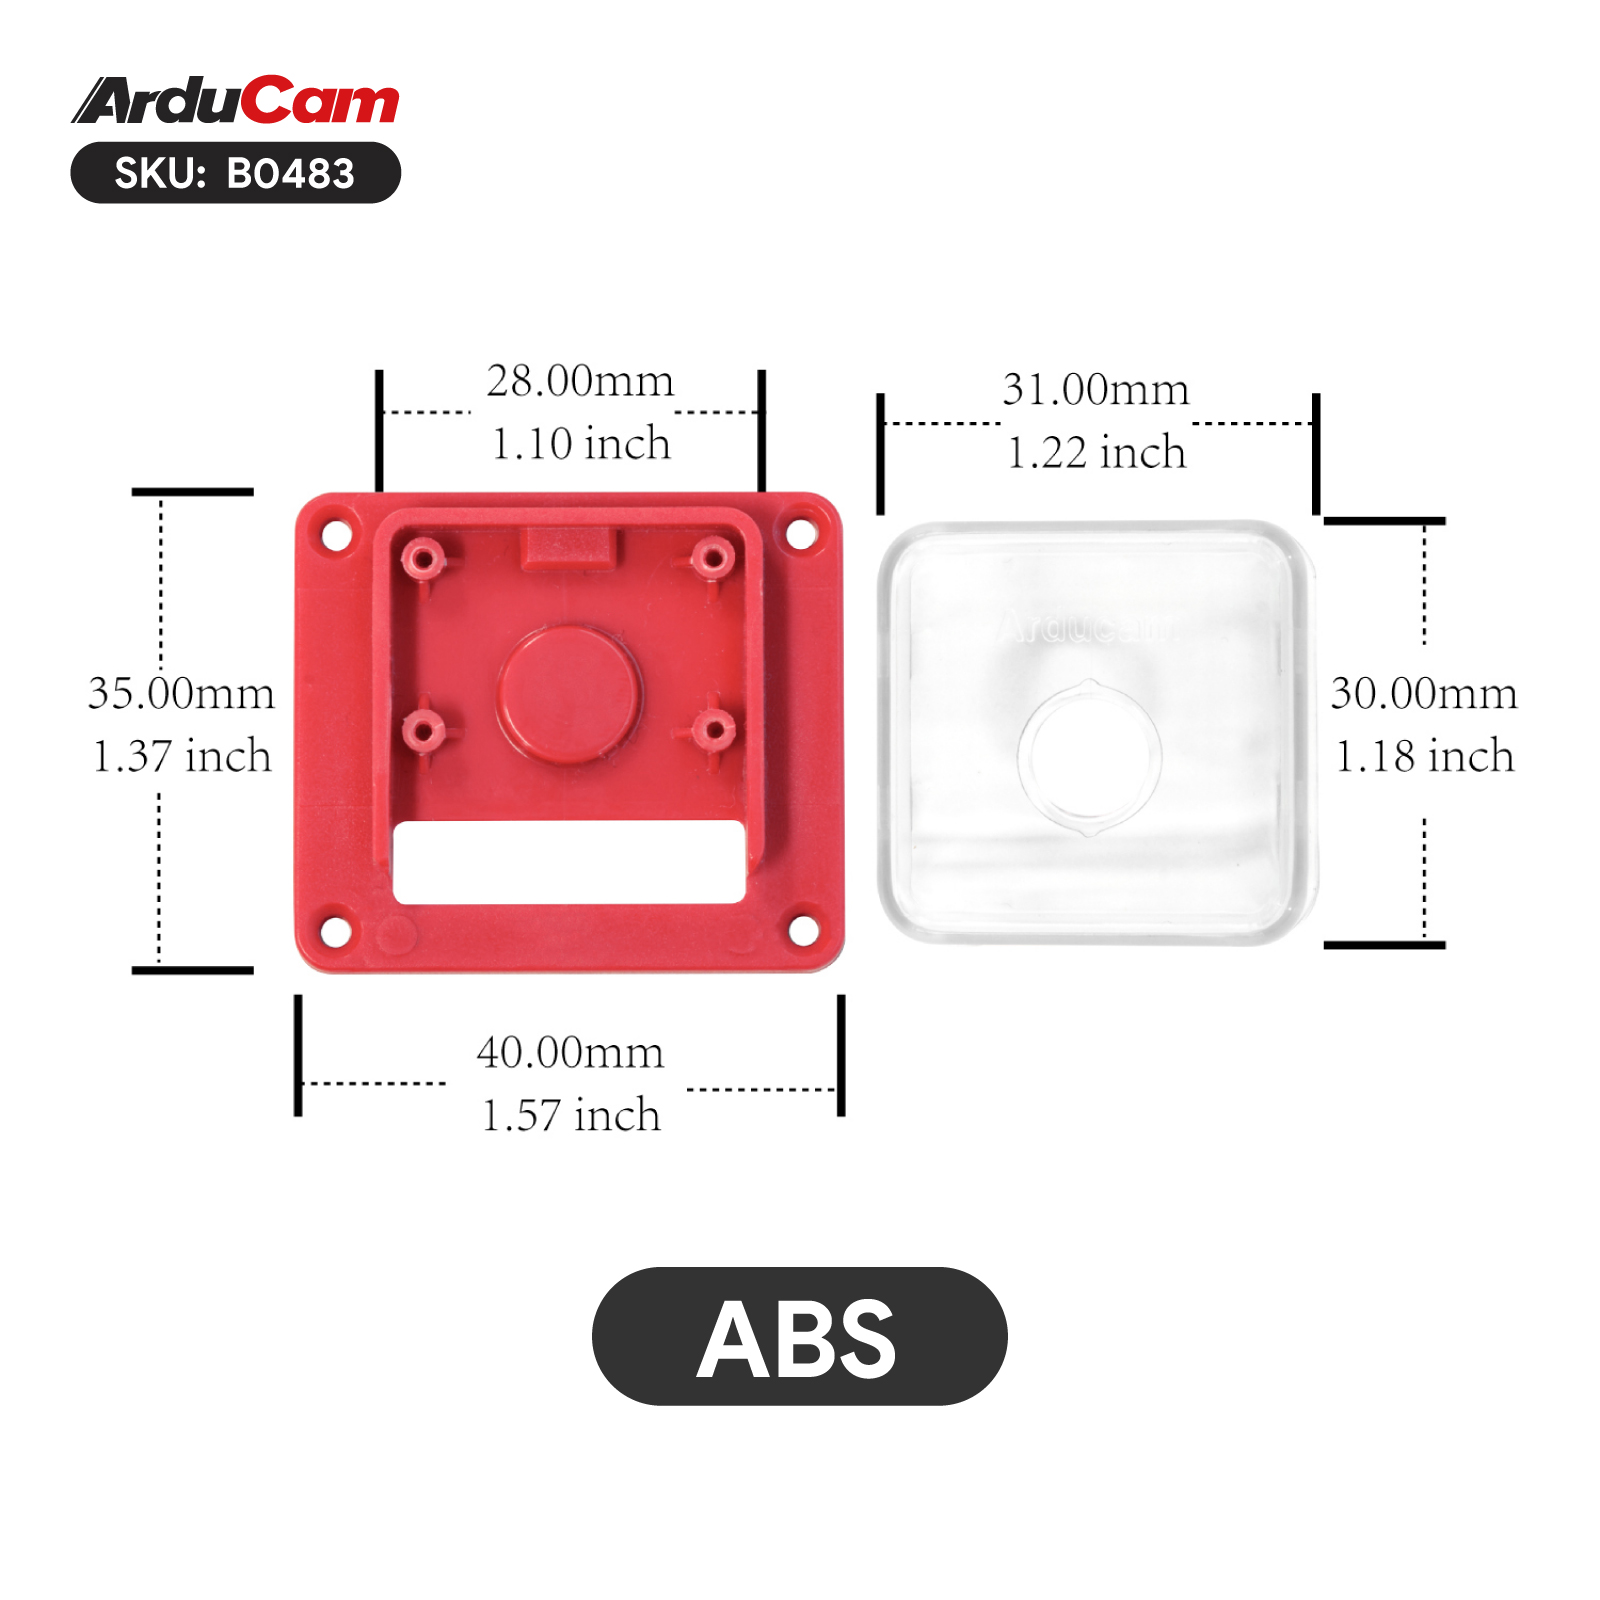
ABS Camera Case
SKU: U6251
 |
 |
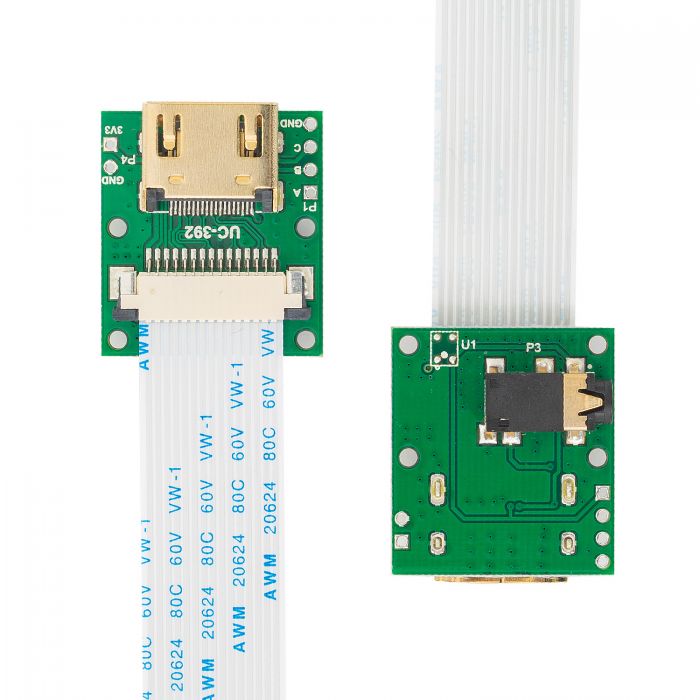
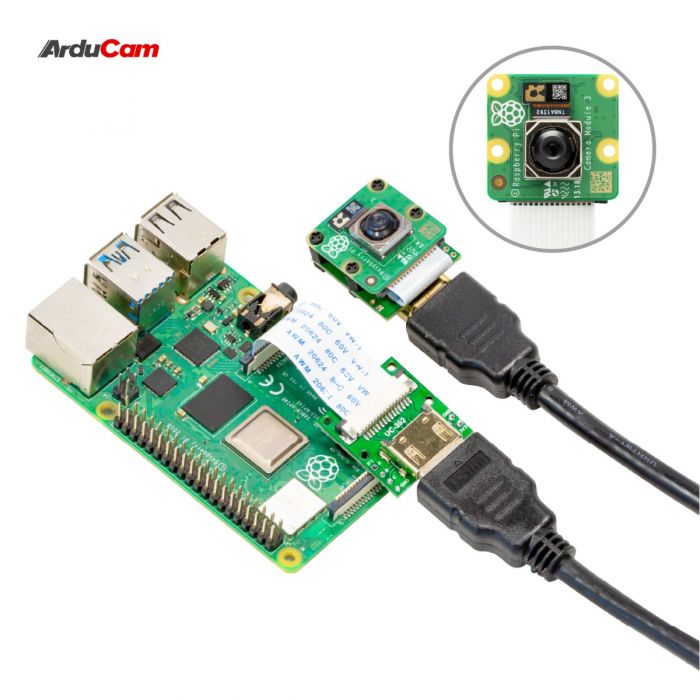
HDMI Camera Extension Kit
SKU: B0091
 |
 |
Ethernet Cable Extension Kit
SKU: U6279
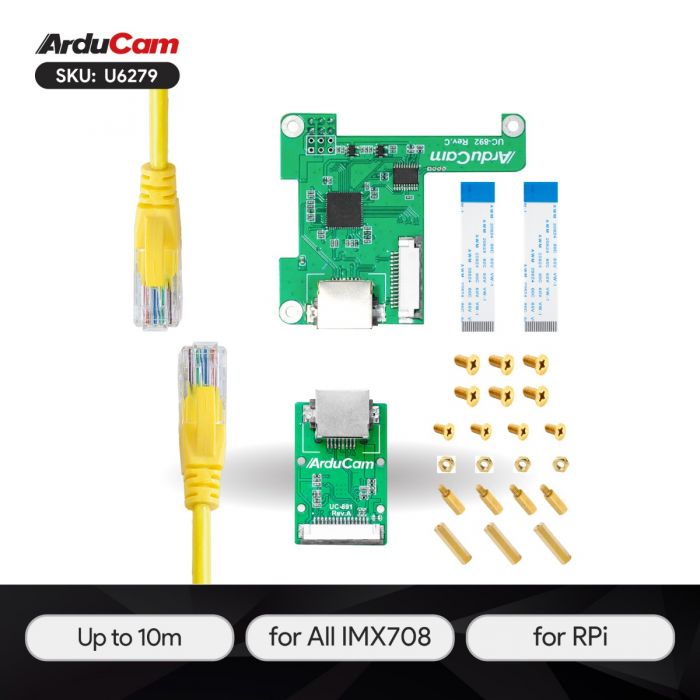 |
 |
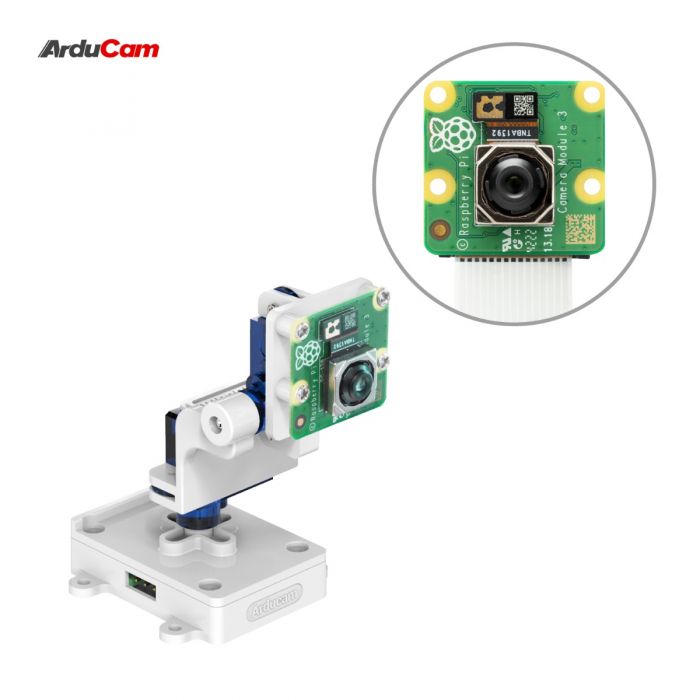
Pan-Tilt Kit
SKU: B0283
 |
 |
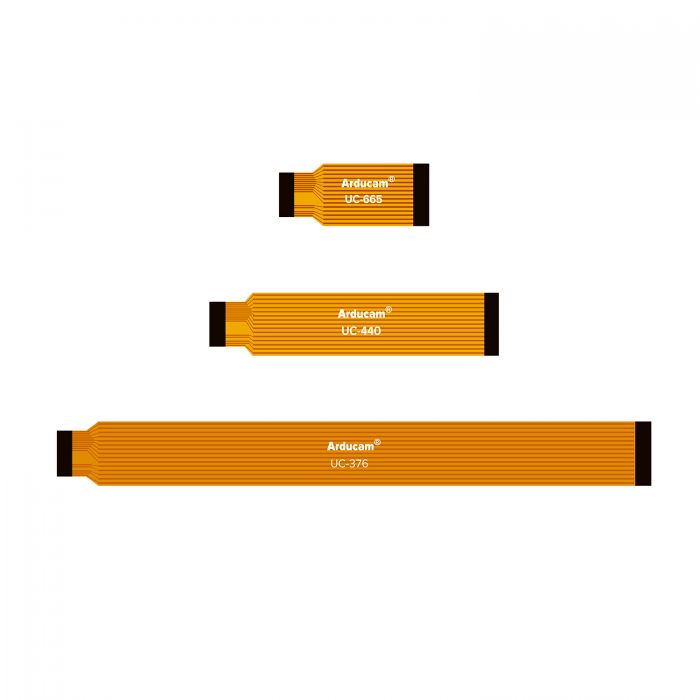
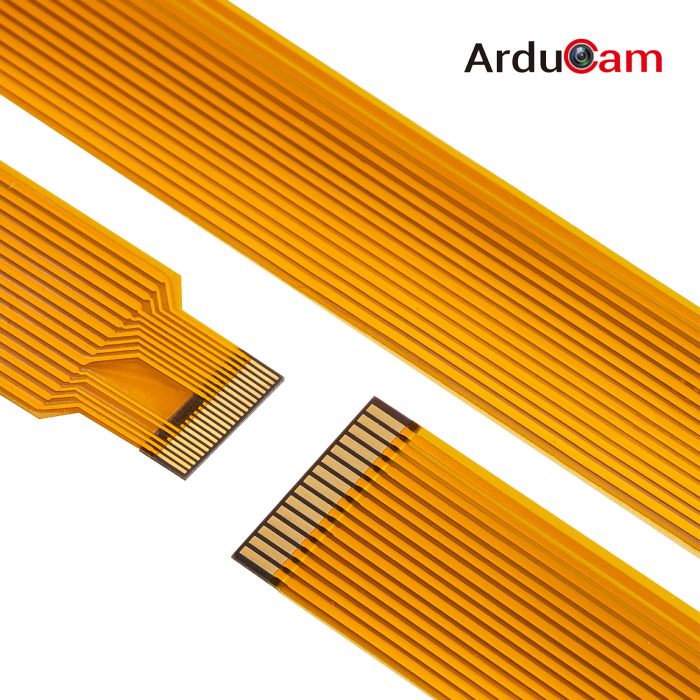
15pin-22pin FPC Cable
SKU: B0210
 |
 |
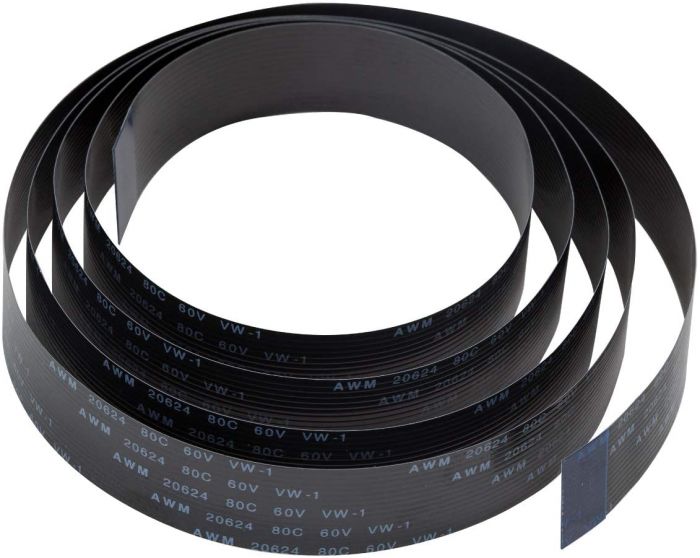
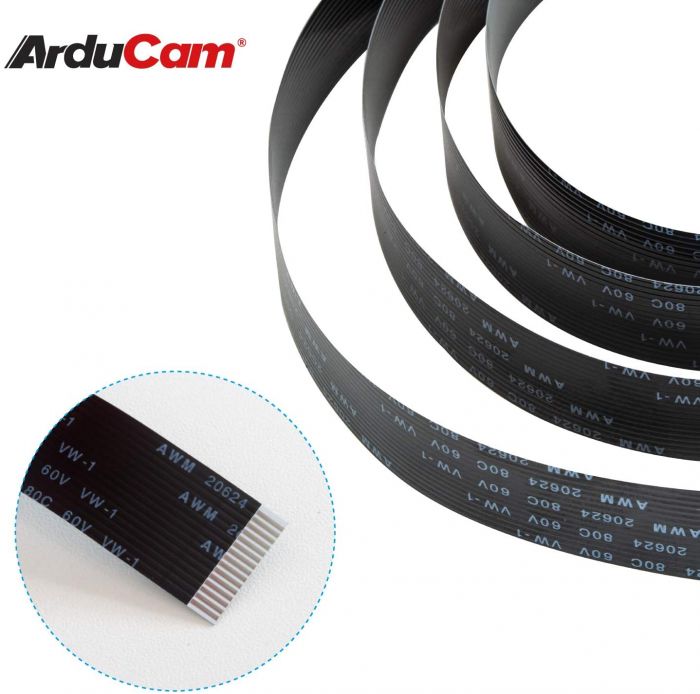
100cm 15pin-15pin Camera Extension Cable
SKU: CB012
 |
 |
Quick Start Guide
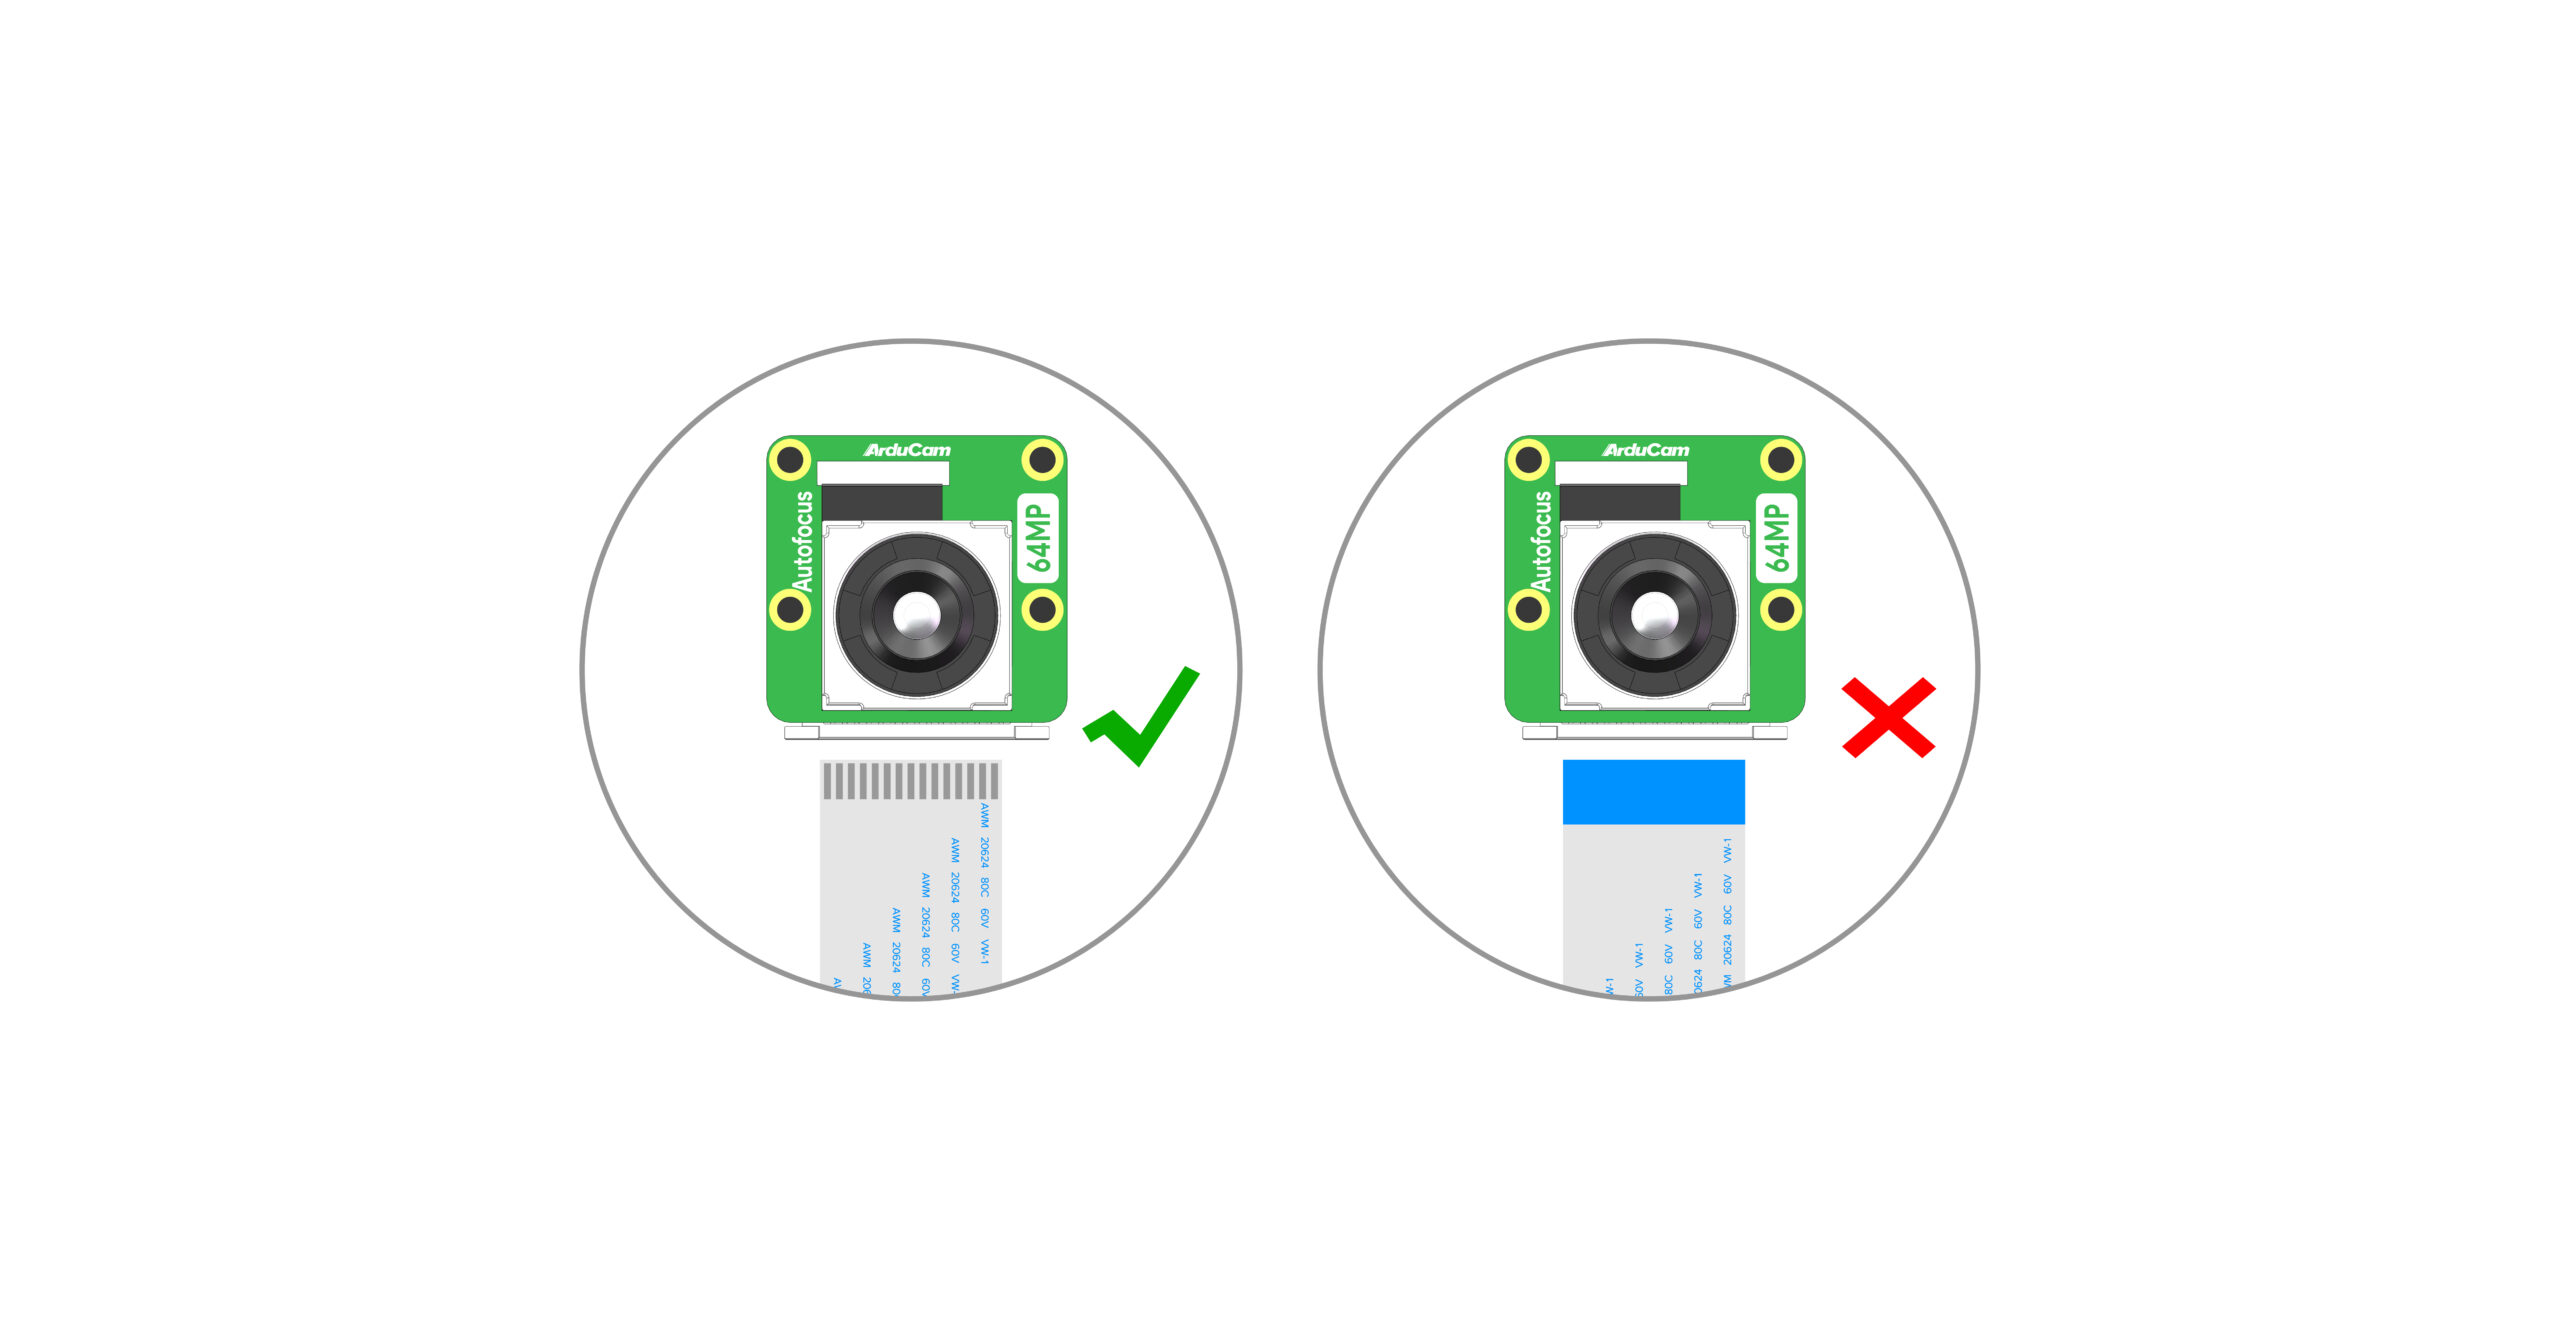
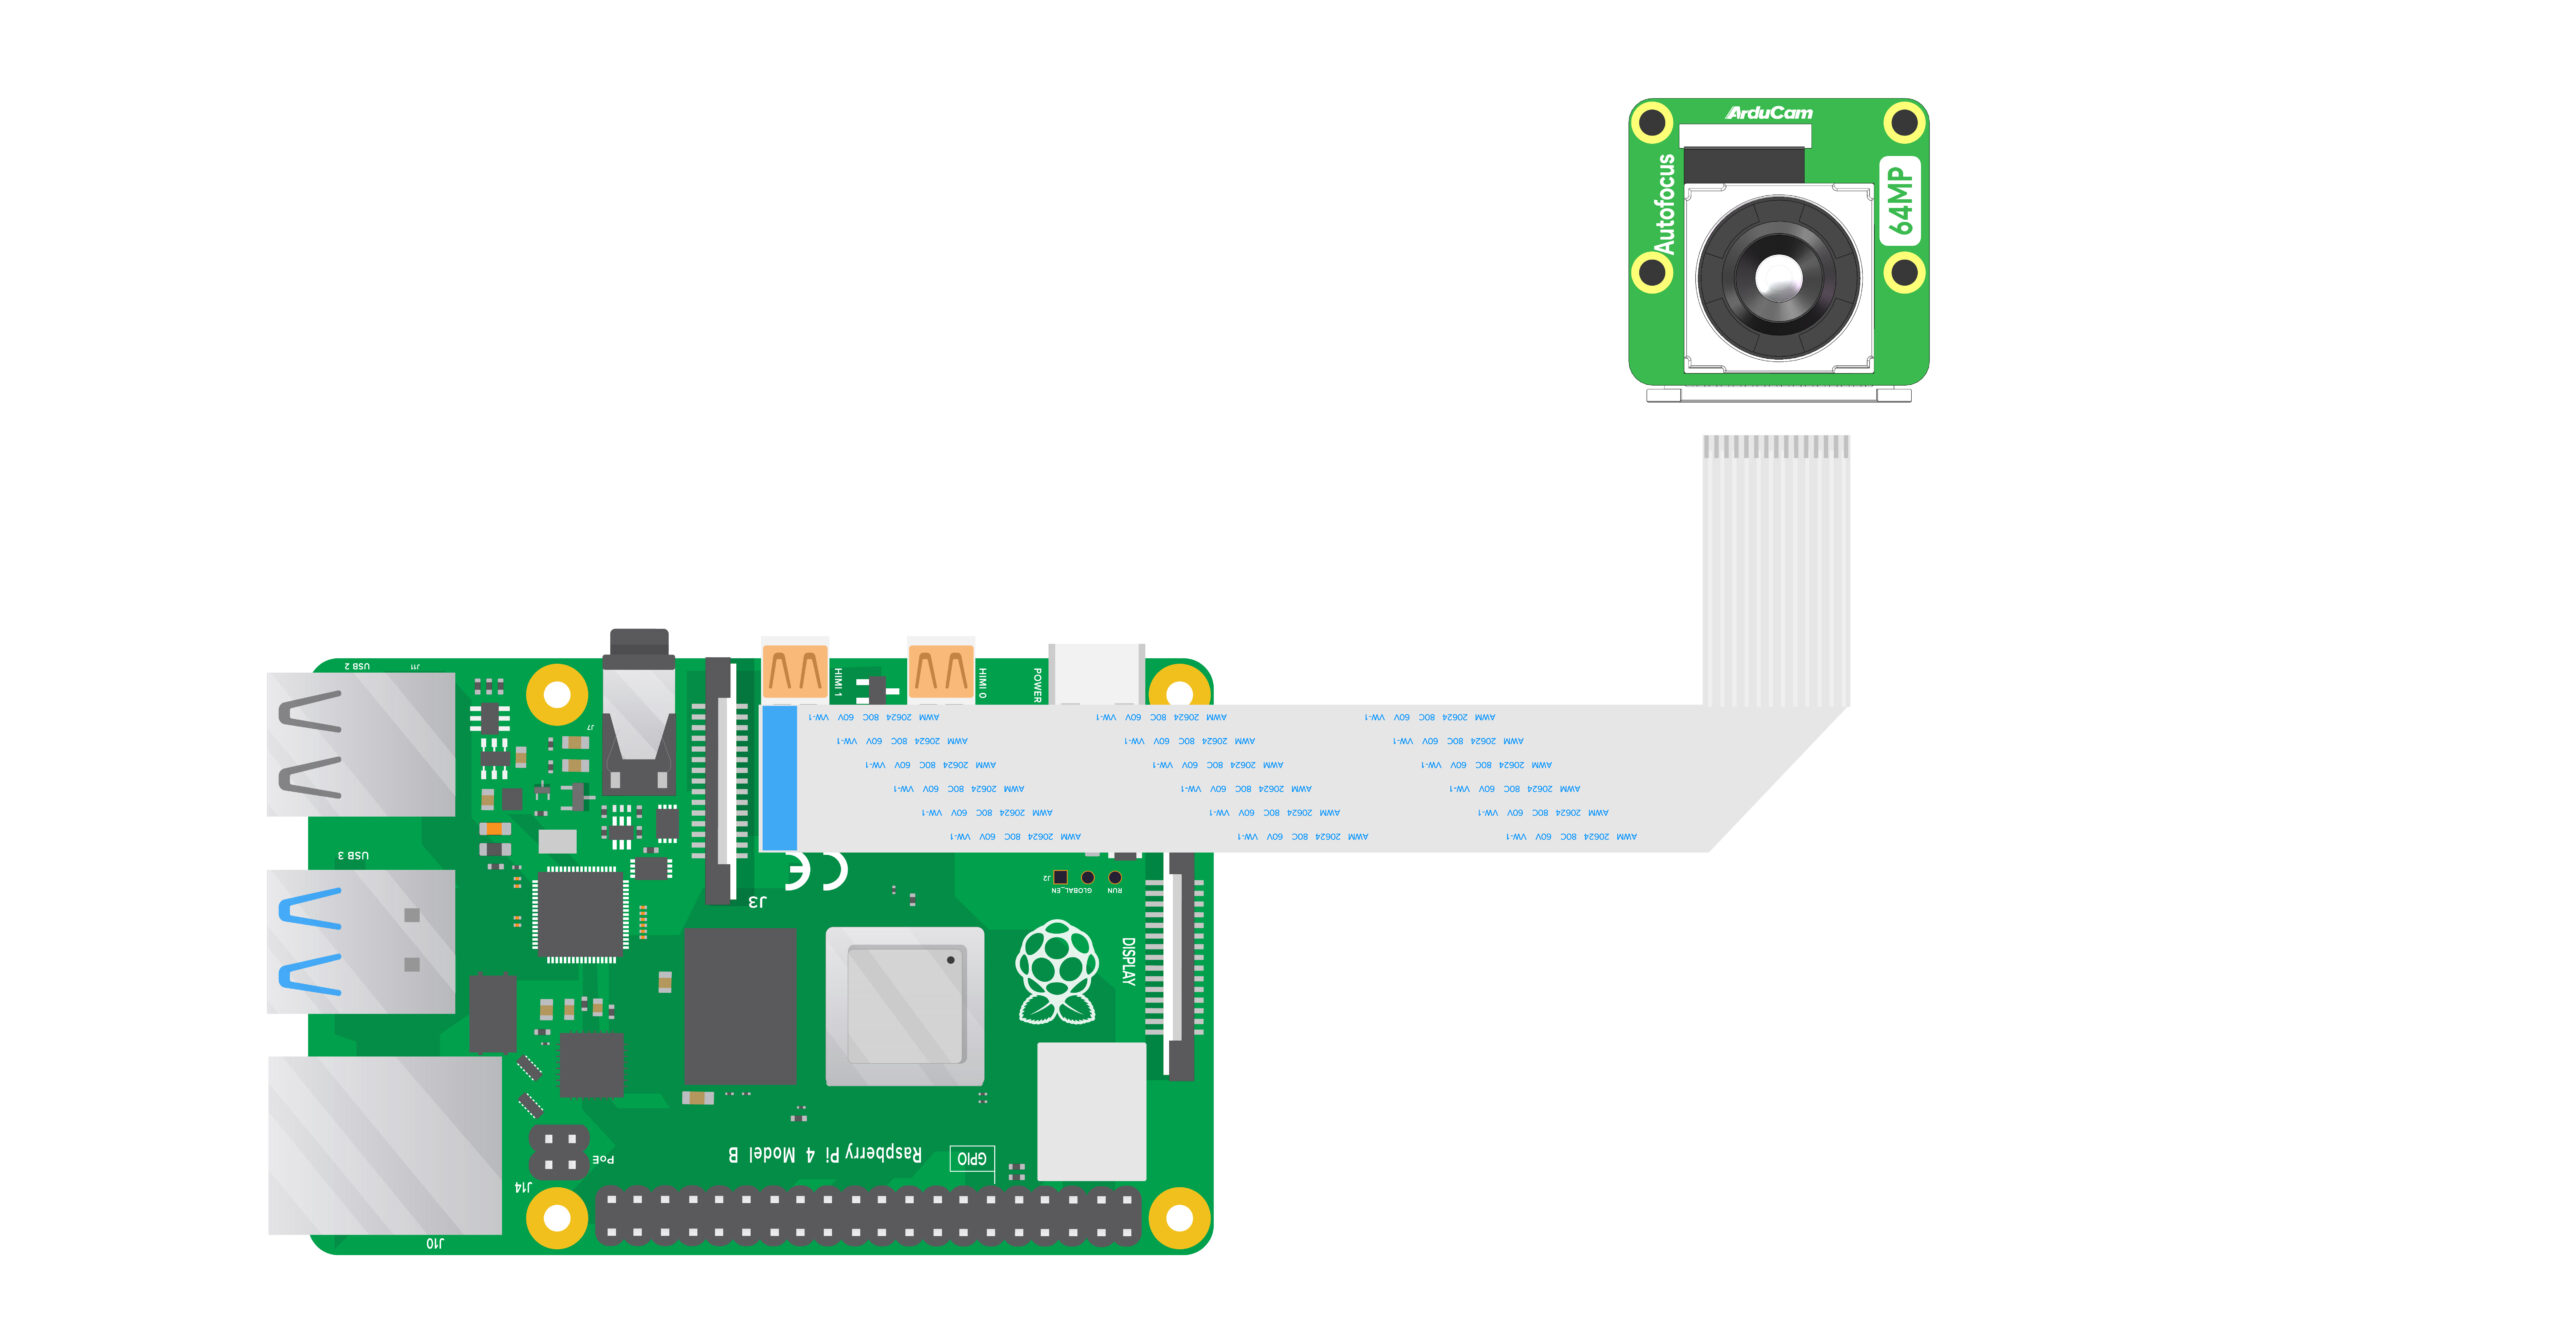
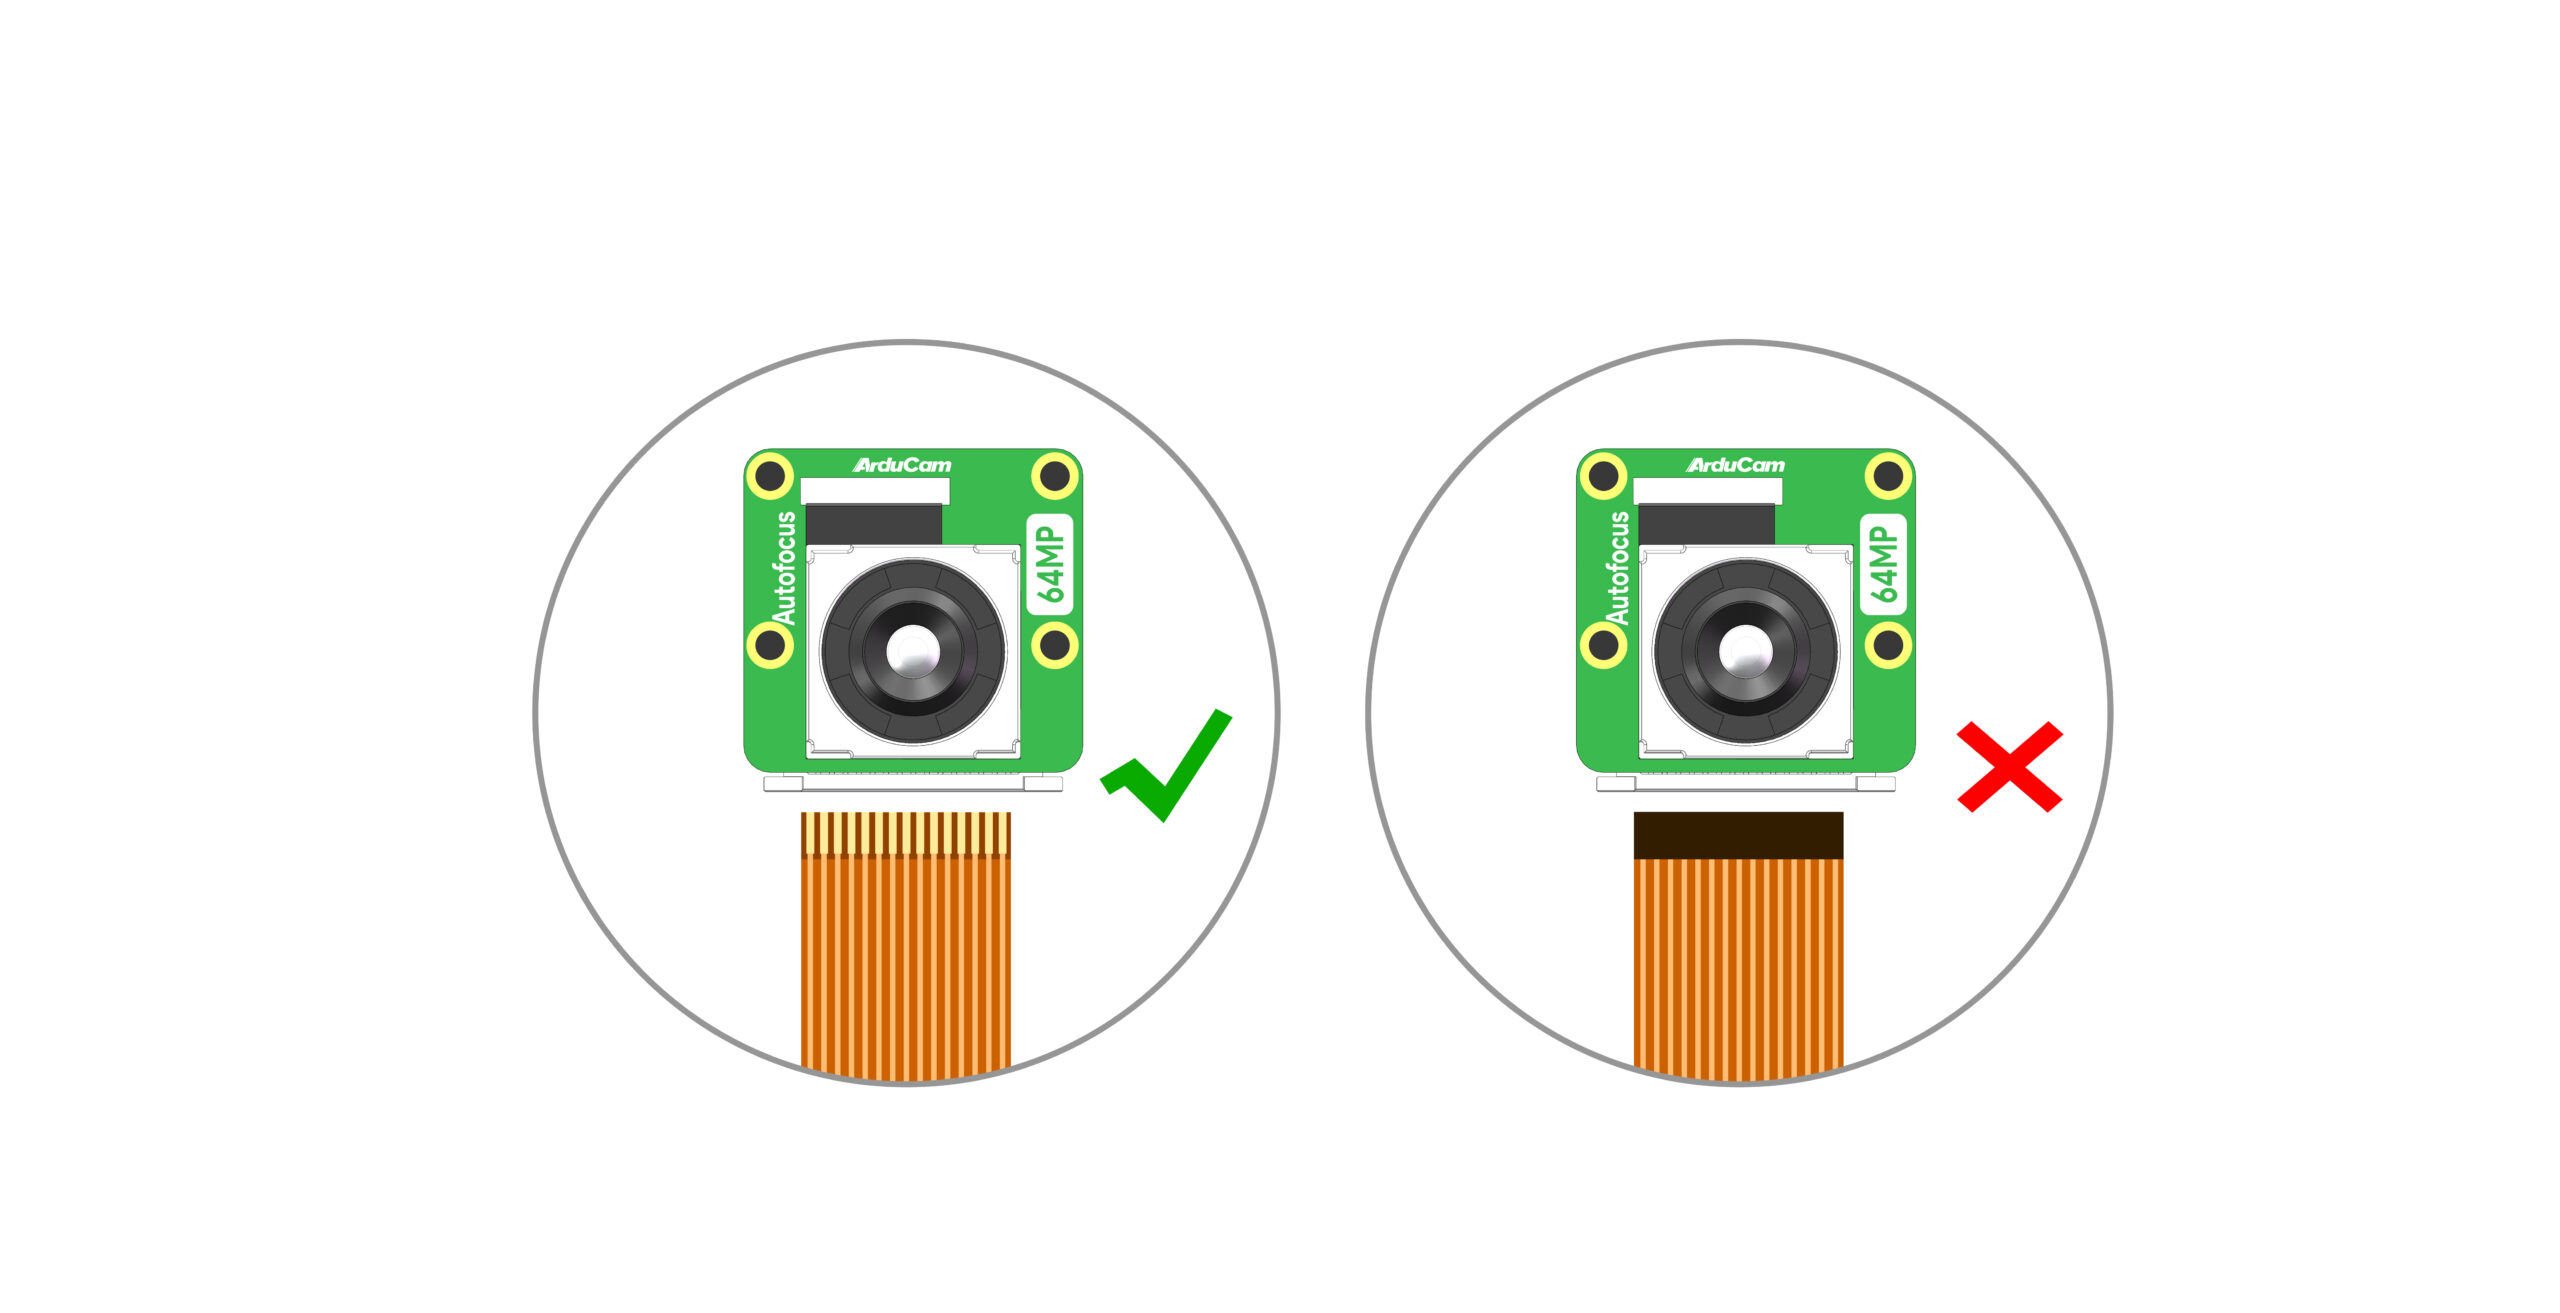
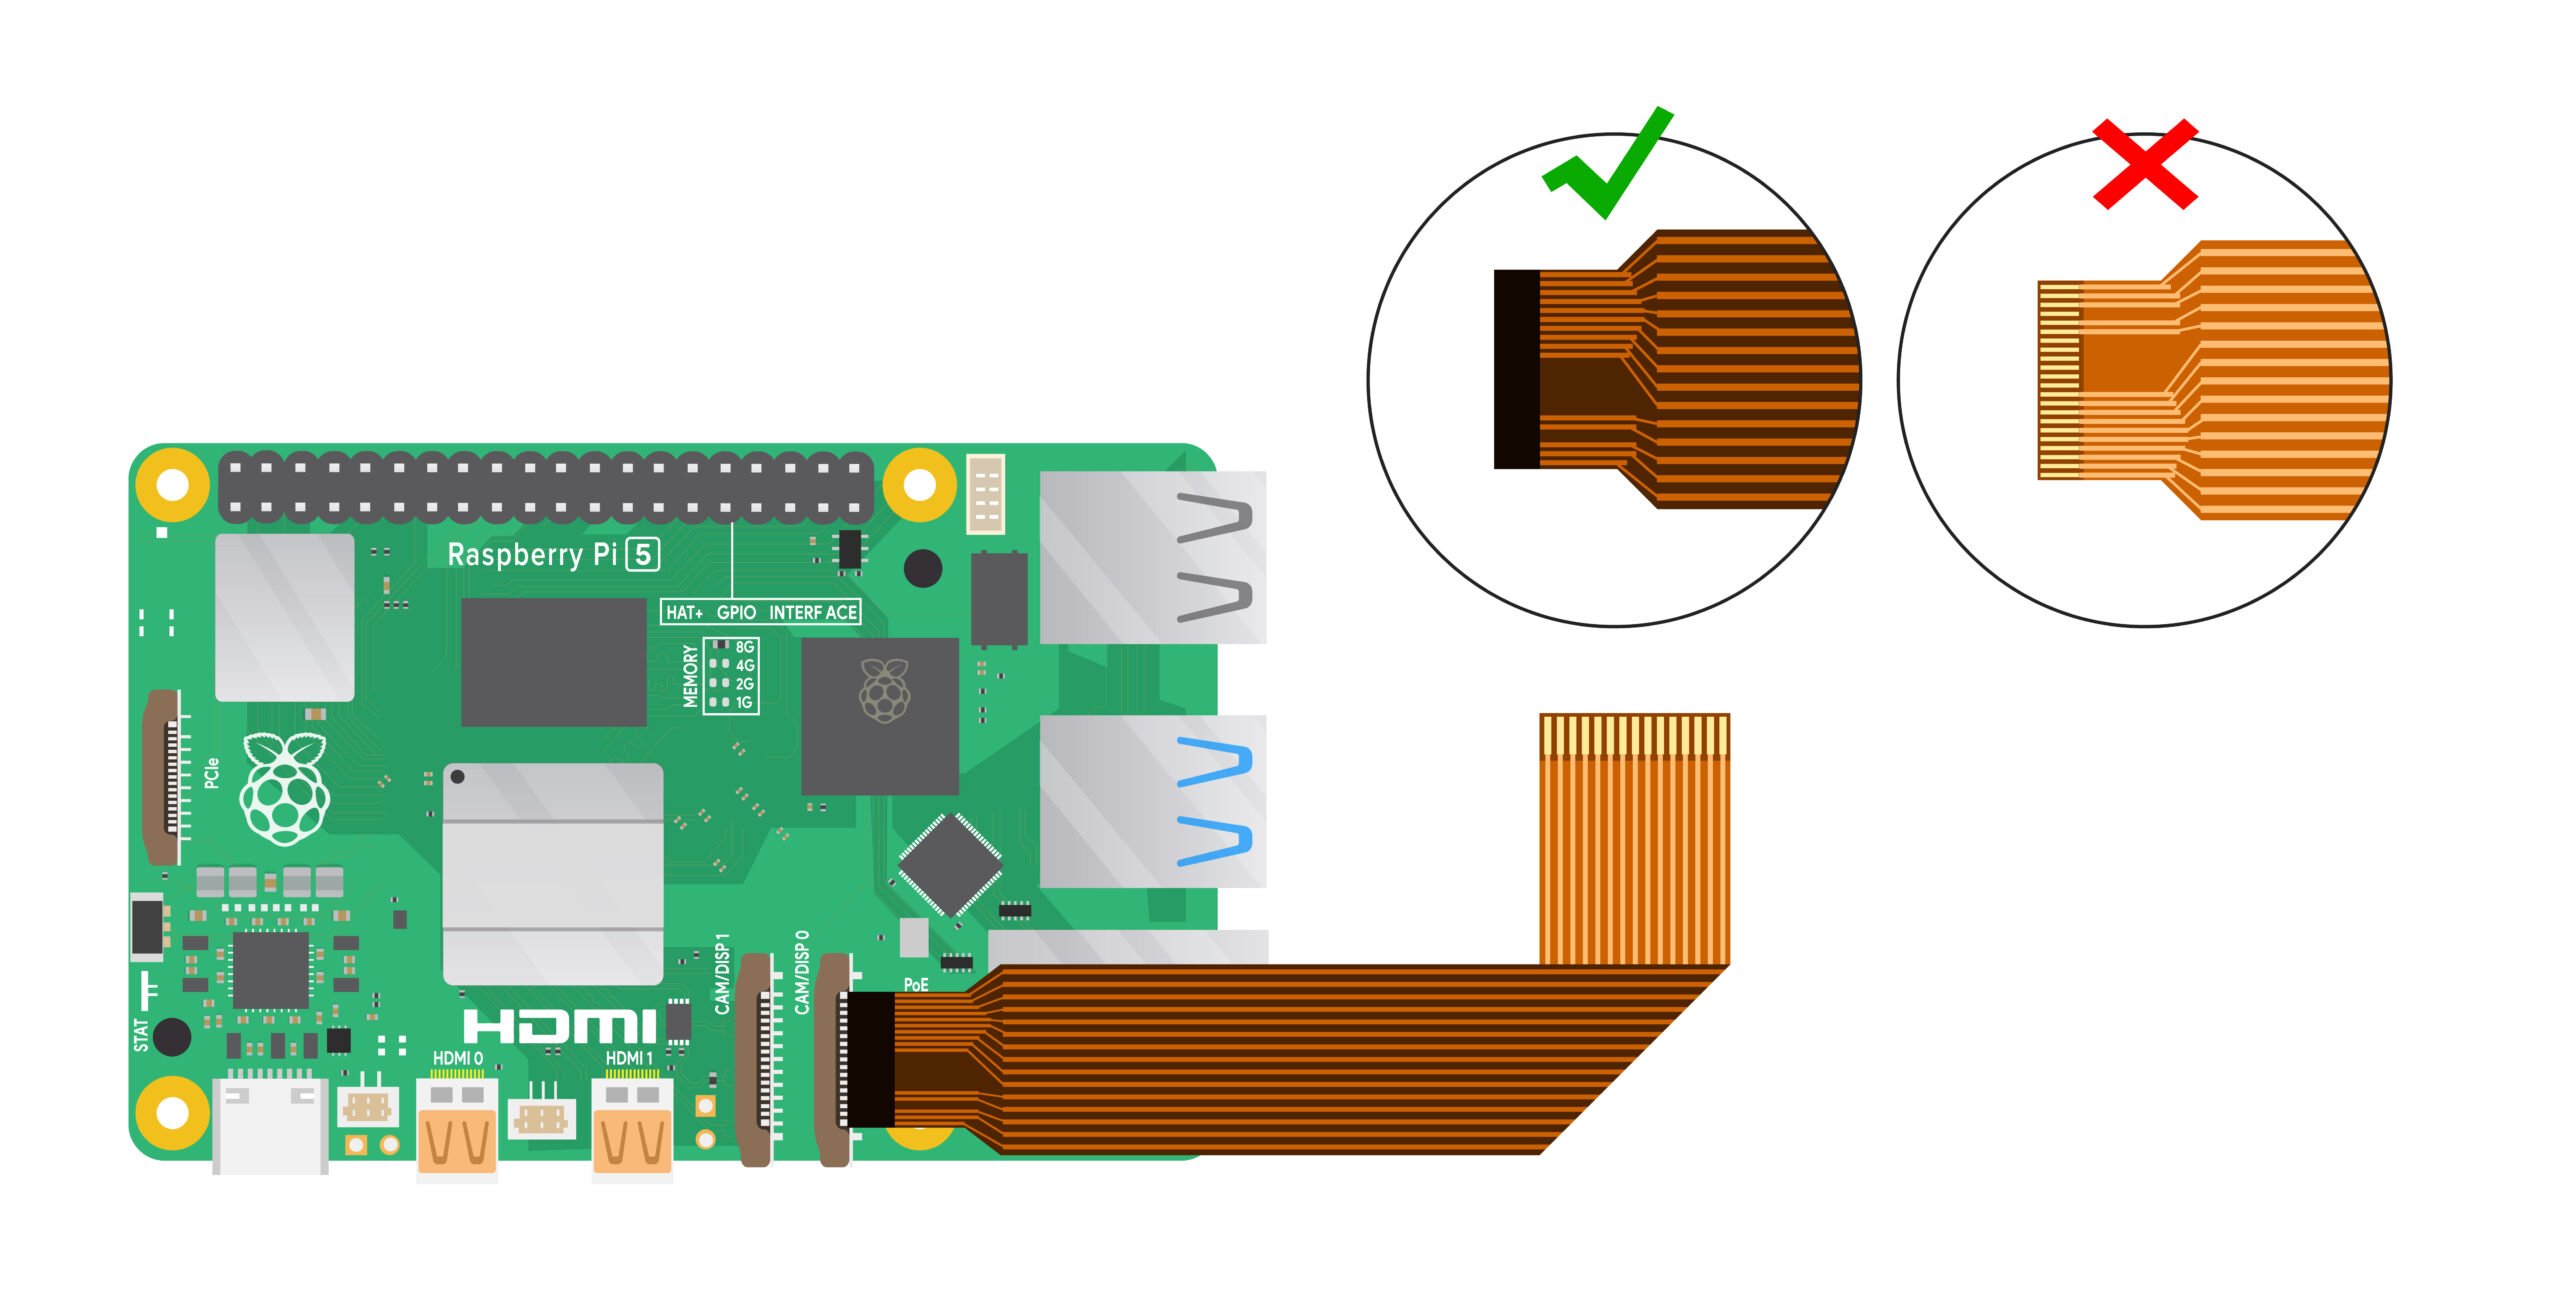
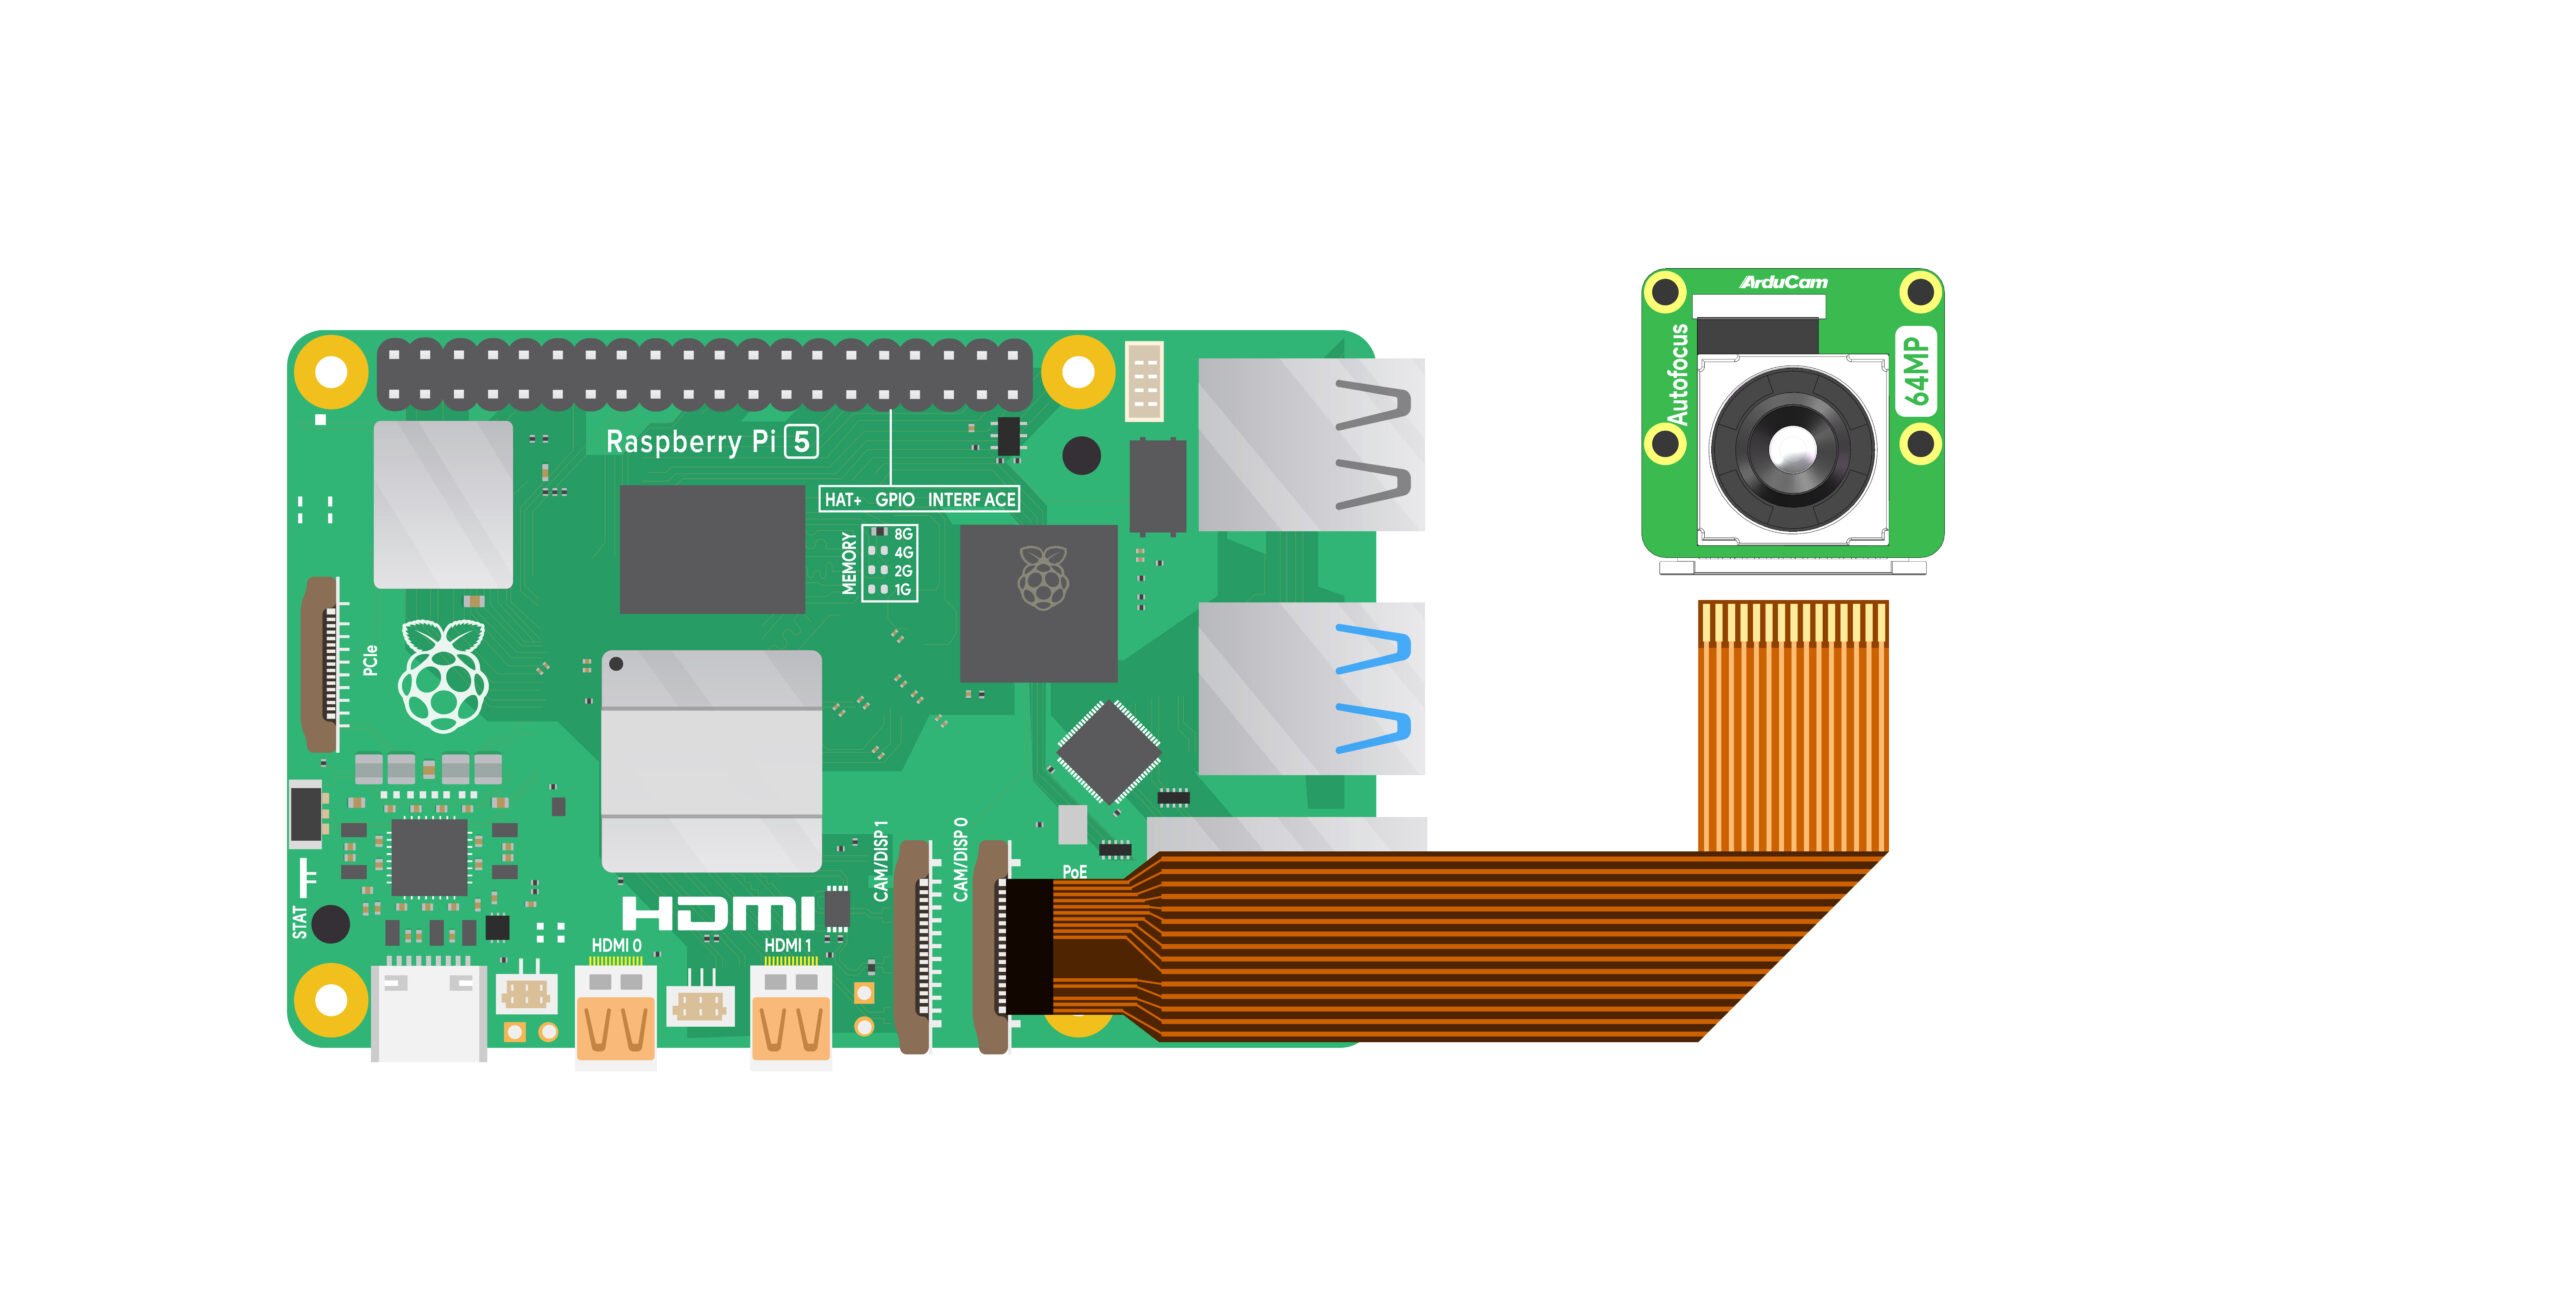
Hardware Connection
Camera Schematic
Package List
 |
 |
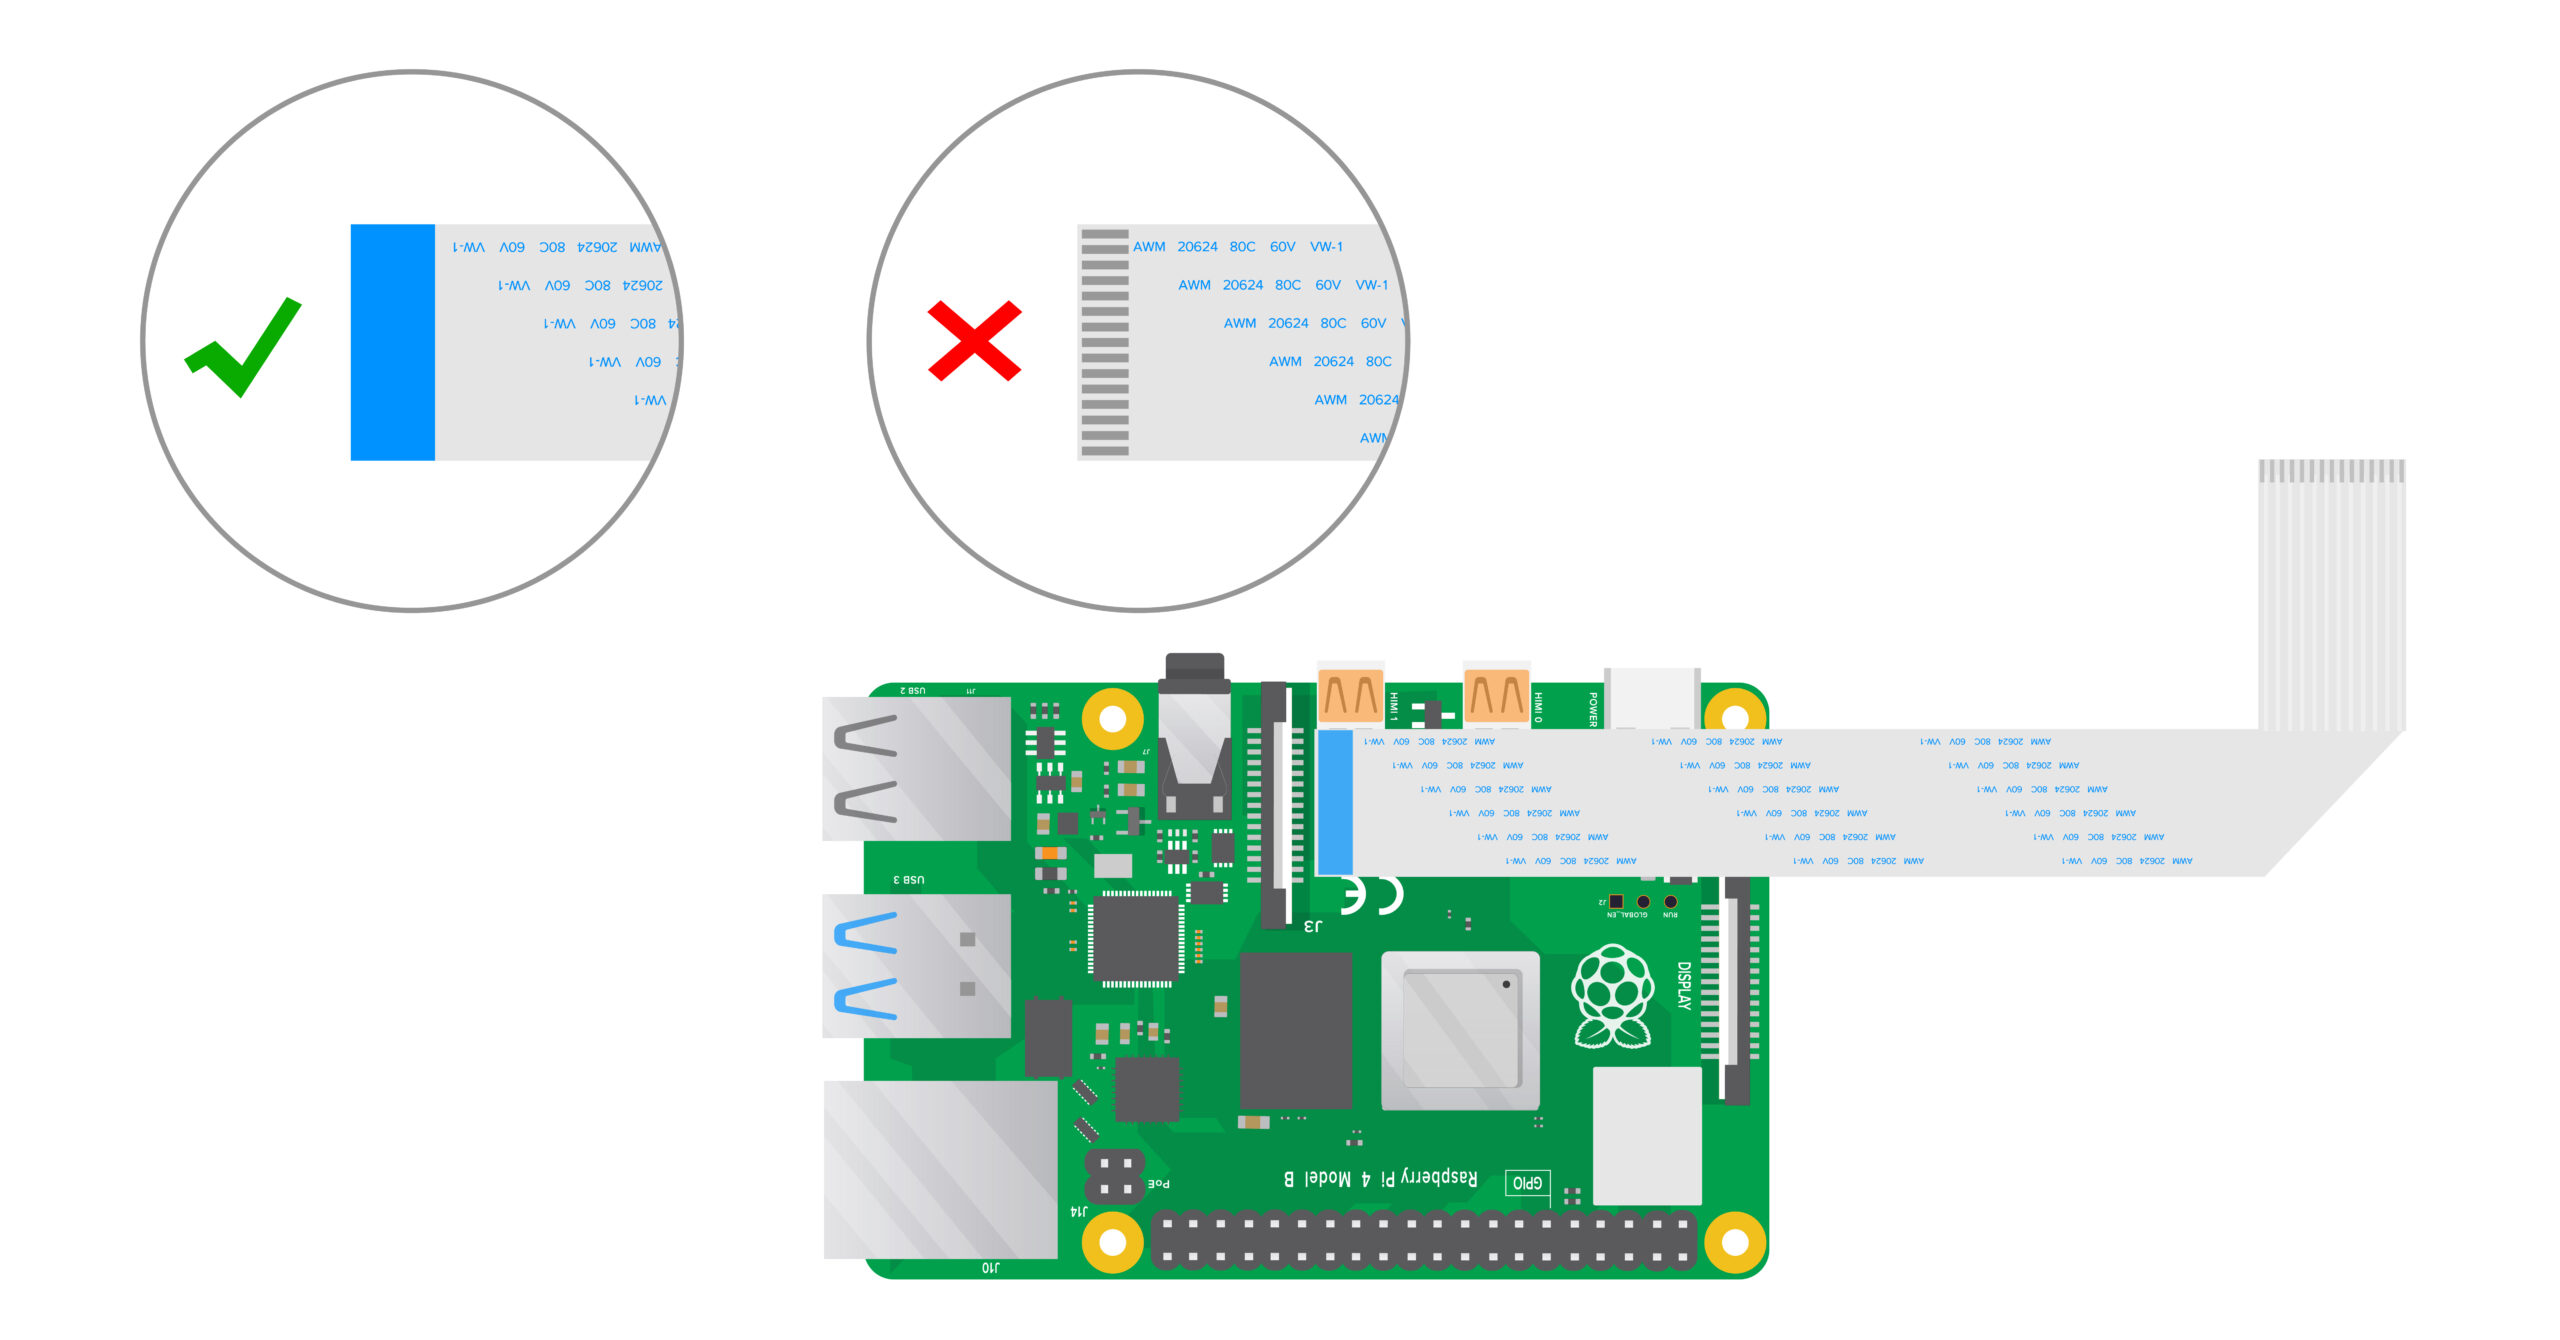
Connection on Pi 4
(15pin-15pin FFC Cable)
Connection on Pi 5
(15pin-22pin FPC Cable)
Note
The camera tripod shown in the above picture is not included in the product package. The above is only a diagram for demonstration. If you need a related tripod, please contact sales@arducam.com for it.
Software
Supported Platforms and OS
| Note for Supported Platform and OS | |||
|---|---|---|---|
| Platform | Bookworm(rpicam/libcamera) | Bullseye(libcamera) | Buster(raspistill) |
| Raspberry Pi 5 | √ | ||
| Raspberry Pi 4B / 3B+ / 3A+ / Zero / Zero 2 W | √ | ||
| Raspberry Pi CM3 / CM3+ / CM4 (extra adapter board required) |
√ | ||
Preparation
- Please keep the kernel up-to-date and restart after updating.
sudo apt-get update
sudo apt-get upgrade
- Supported Raspberry Pi OS
Raspberry Pi Bookworm OS
- Supported Raspberry Pi Kernel Version
Info
Please do not update the kernel to a non-stable version, such as via sudo rpi-update:
6.1.73and later version
You can check your kernel version by:
uname -v | grep -oP '\d+\.\d+\.\d+'

- Supported Raspberry Pi platforms(All tested)
Raspberry Pi 5/Raspberry Pi 4/Raspberry Pi 3
Enable the camera driver
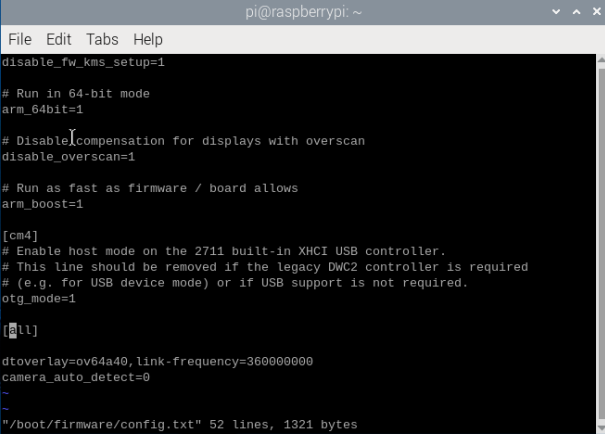
Step 1. Open and edit the config file
sudo nano /boot/firmware/config.txt
Step 2. Add dtoverlay to enable the OwlSight camera
Note
Arducam OV64A40 camera supports adjusting the image speed (link-freq parameter under config.txt).
There are currently two speeds: 360000000 and 456000000
Option 1. If you want to choose link-freq 360000000, you need to add the sentence below under [all] in the config file:
dtoverlay=ov64a40,link-frequency=360000000
camera_auto_detect=0
The
cam1port is enabled on Pi 5 by default. If you want to enable the camera on thecam0port of Pi5, please refer to the following modifications:
sudo nano /boot/firmware/config.txt
#Find the line: [all], add the following item under it:
dtoverlay=ov64a40,cam0,link-frequency=360000000
#Save and reboot.
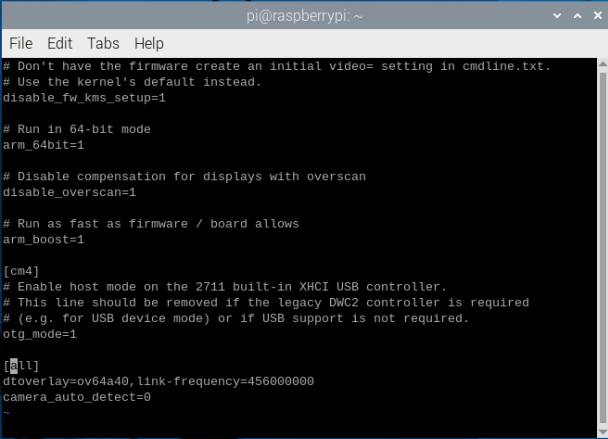
Option 2. If you want to choose link-freq 456000000, you need to add the sentence below under [all] in the config file:
dtoverlay=ov64a40,link-frequency=456000000
camera_auto_detect=0
The
cam1port is enabled on Pi 5 by default. If you want to enable the camera on thecam0port of Pi5, please refer to the following modifications:
sudo nano /boot/firmware/config.txt
#Find the line: [all], add the following item under it:
dtoverlay=ov64a40,cam0,link-frequency=456000000
#Save and reboot.
Warning
-
Please make sure you have only one
dtoverlay sentenceenabled in your config file, either 360000000 or 456000000. -
If both
dtoverlay sentencesare enabled in your config file,there will be a conflict. -
In addition, When link-frequency=456000000 is settled, the camera extension solution may have data transfer issues. Only a single camera can be used at this time. Please also ensure that the length of the flexible cable is short.
Step 3. Reboot to take effect
Please reboot your Pi when you finish the installation.
sudo reboot
Step4. Use libcamera to access Arducam 64MP Camera
Preview 5 seconds.
libcamera-still -t 5000
If you don't have a display screen, you can save an image without displaying it. And an image of test.jpg will be saved in the current directory.
libcamera-still -t 5000 -n -o test.jpg
For more instructions, please refer to: libcamera User Guide
Autofocus/Manual Focus Function
Continuous Autofocus
libcamera-still -t 0

libcamera-still -t 0 --autofocus-mode continuous
Single Autofocus
libcamera-still -t 0 --autofocus-mode auto
Manual Focus
libcamera-still -t 0 --autofocus-mode manual
# Use keyboard to control focus
# "f" trigger one-shot autofocus
# "a" add the lens position, "d" decrease the lens position, the minimum unit of step adjustment is 1
libcamera-still -t 0 --autofocus-mode manual -k
Adjust Lens Position
libcamera-still -t 0 --autofocus-mode manual --lens-position 5
Autofocus Before Capture Images
libcamera-still -t 0 --autofocus-on-capture
Set Focus Range
# Normal
libcamera-still -t 0 --autofocus-range normal

# Close Focus
libcamera-still -t 0 --autofocus-range macro
Long Exposure Guide
Exposure Time Table
- Low Speed Mode
| Resolution | Max Exposure Time(s) |
|---|---|
| 1280x720 | 204.01 |
| 1920x1080 | 304.22 |
| 2312x1736 | 336.43 |
| 3840x2160 | 492.57 |
| 4624x3472 | 608.45 |
| 8000x6000 | 1059.42 |
| 9248x6944 | 1173.95 |
- High Speed Mode
| Resolution | Max Exposure Time(s) |
|---|---|
| 1280x720 | 146.74 |
| 1920x1080 | 196.85 |
| 2312x1736 | 279.17 |
| 3840x2160 | 378.04 |
| 4624x3472 | 472.44 |
| 8000x6000 | 860.78 |
| 9248x6944 | 910.88 |
Operation Guide
- libcamera-still parameters instruction
-t: Program running time, which is usually preview time
--shutter: Fixed exposure time, the unit is us
-o: The name of the saved image
- Examples
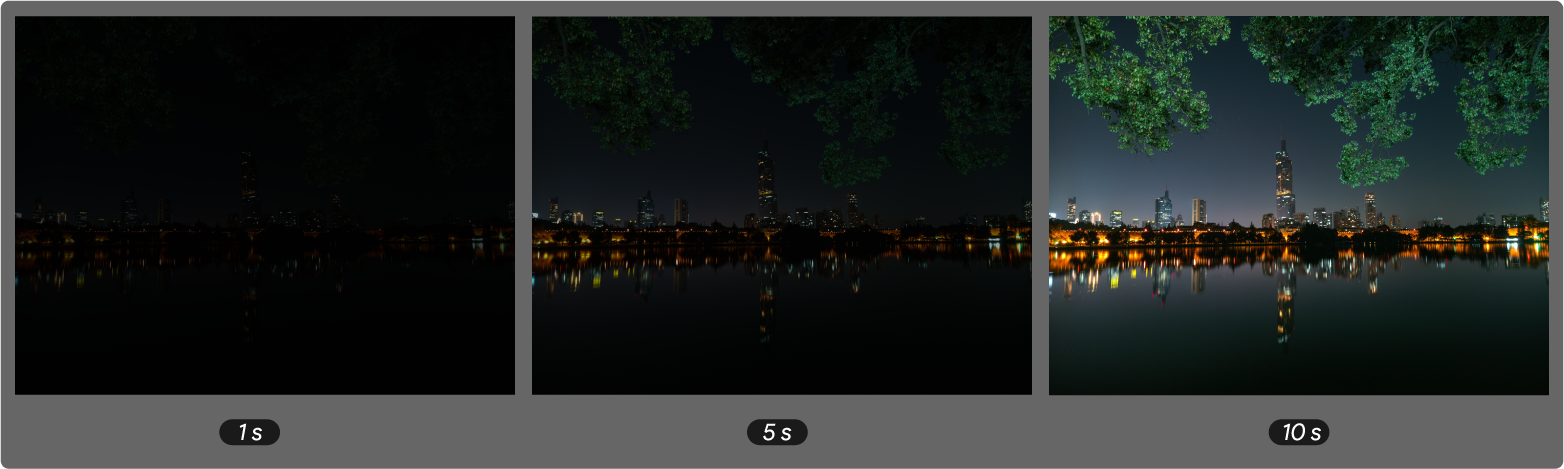
set exposure time as 1s:
libcamera-still -t 10000 --shutter 1000000 -o shutter_1s.jpg
Set exposure time as 5s:
libcamera-still -t 10000 --shutter 5000000 -o shutter_5s.jpg
Set exposure time as 10s:
libcamera-still -t 10000 --shutter 10000000 -o shutter_10s.jpg
- Contrast