How to use Edge Impulse to train machine learning models for Raspberry Pico
Introduction
Abstract
Edge Impulse is a leading development platform specializing in edge devices' machine learning. It is free for developers to use and is supported by Edge Impulse.
Edge Impulse enables developers to use embedded machine learning to create next-generation smart devices in the industrial field, enterprises, and human-oriented applications.
At present, 99% of senor data are discarded due to cost, bandwidth, or power limitations, while edge machine learning will make use of this data.
The founder of Edge Impulse believes that machine learning can bring benefits to society, and is committed to benefiting mankind by providing support for applications.
Install dependencies
To use the Edge Impulse, you first need to install dependencies:
- Node.js v12 or above.
- Open a command prompt or terminal to install and run edge-impulse-cli
npm install -g edge-impulse-cli
Data forwarding
Data repeater makes it easy to relay data from devices to Edge Impulse via serial. The device writes the sensor value through the serial connection, then the data repeater collects the data, signs the data, and sends the data to the extraction service.
The data repeater can be used to quickly collect data from various development boards instead of transplanting a complete remote management protocol and serial protocol, but it only supports data collection at a relatively low frequency.
Connect the device
Enter at the command line:
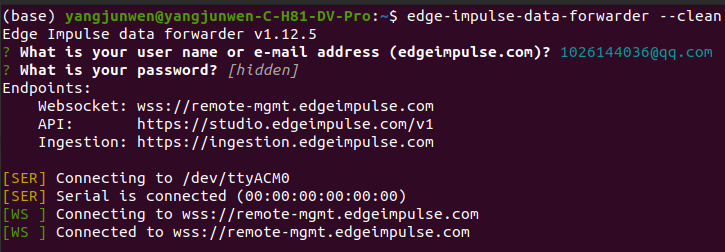
edge-impulse-data-forwarder
This is an example of the output of the repeater:
Edge Impulse data forwarder v1.5.0
? What is your user name or e-mail address (edgeimpulse.com)? jan@edgeimpulse.com
? What is your password? [hidden]
Endpoints:
    Websocket: wss://remote-mgmt.edgeimpulse.com
    API:       https://studio.edgeimpulse.com
    Ingestion: https://ingestion.edgeimpulse.com

[SER] Connecting to /dev/tty.usbmodem401203
[SER] Serial is connected
[WS ] Connecting to wss://remote-mgmt.edgeimpulse.com
[WS ] Connected to wss://remote-mgmt.edgeimpulse.com
? To which project do you want to add this device? accelerometer-demo-1
? 3 sensor axes detected. What do you want to call them? Separate the names with ',': accX, accY, accZ
? What name do you want to give this device? Jan's DISCO-L475VG
[WS ] Authenticated
The repeater will ask you which server you want to connect to, prompt you to log in, and then configure the device.
Register and create project
If you want to use the Edge Impulse platform, you must first register an Edge Impulse account.
After registration, enter the platform to create a project.
Reconnect the device
Tip
Note: The program output can only be data, and separated by ",".
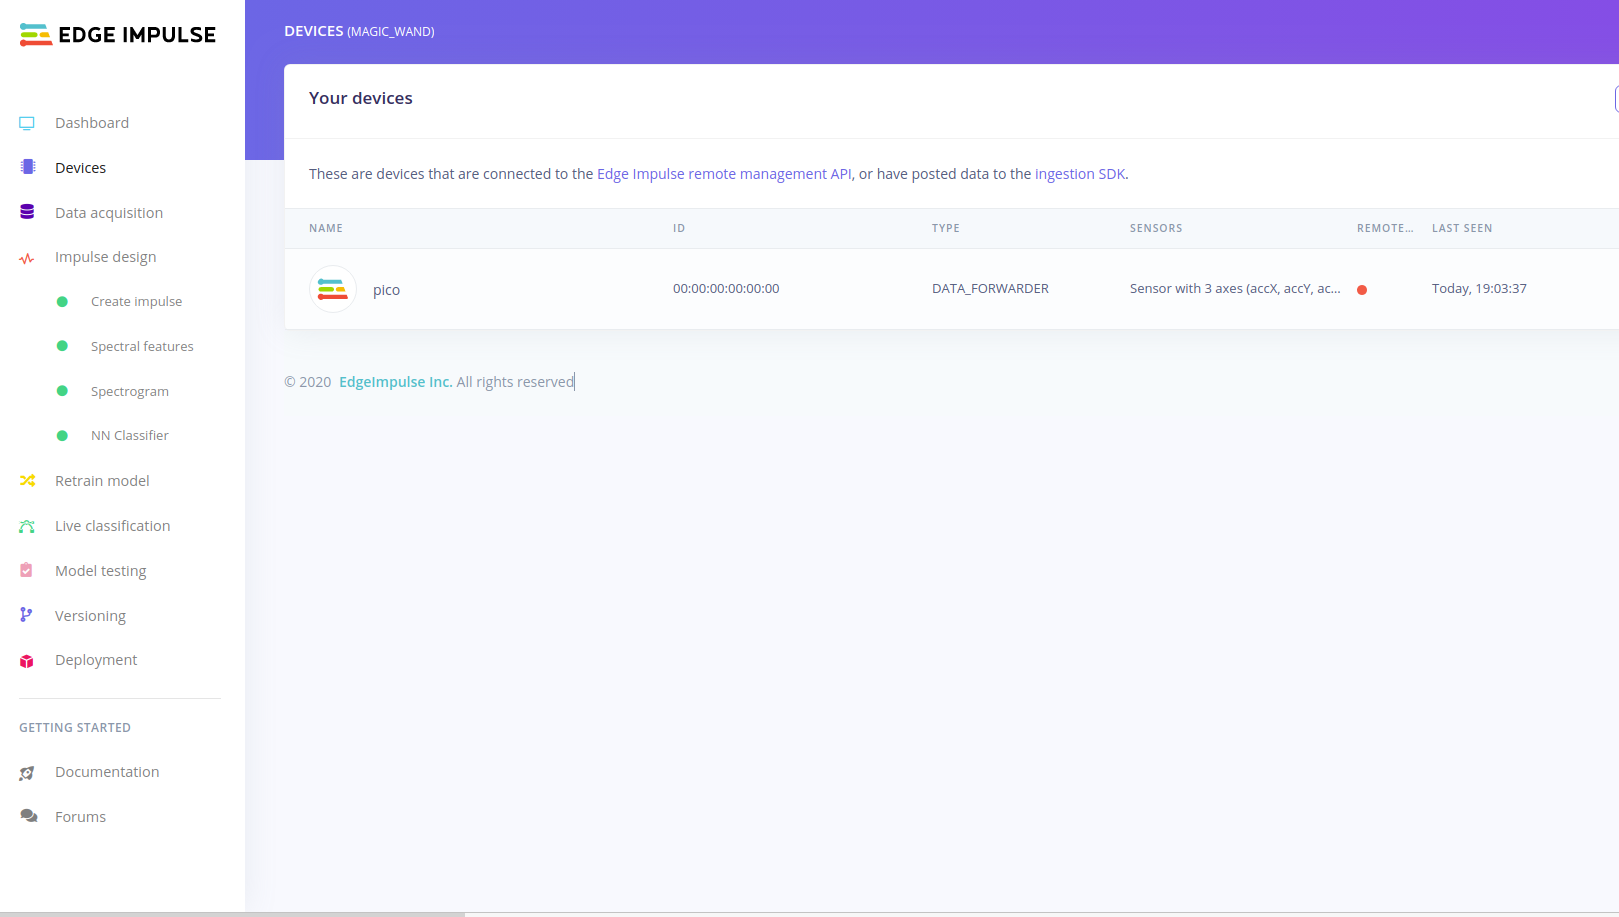
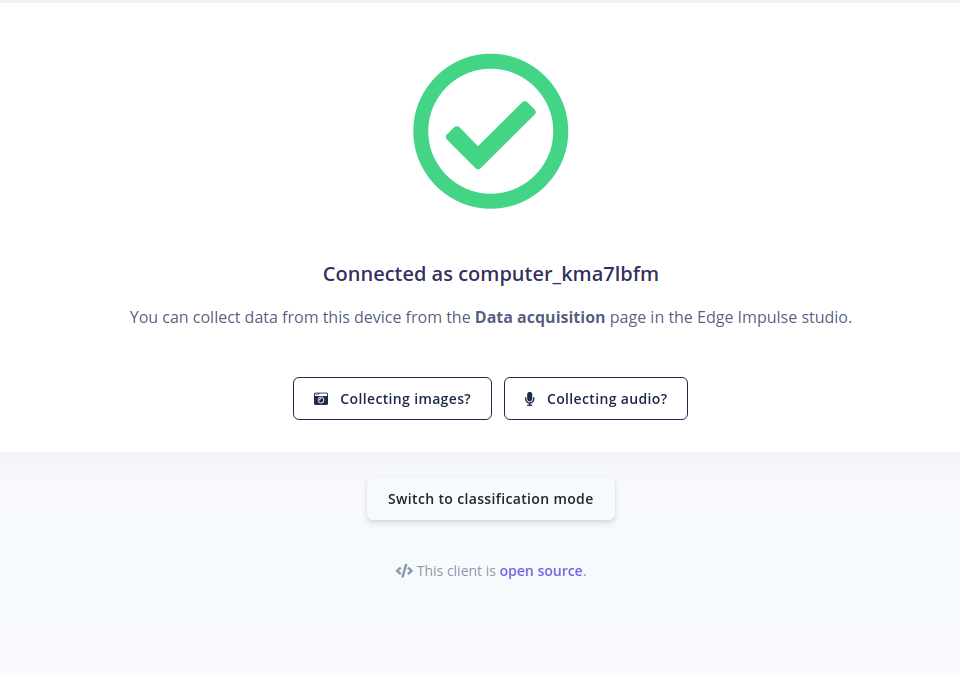
So far we have connected the device to the Edge Impulse platform.Click "Devices" on the left side of the page to view the device list.
Clear configuration
After connecting once, the program will record this configuration. To change items, you can use the clear command:
edge-impulse-data-forwarder --clean
Add training and test sets
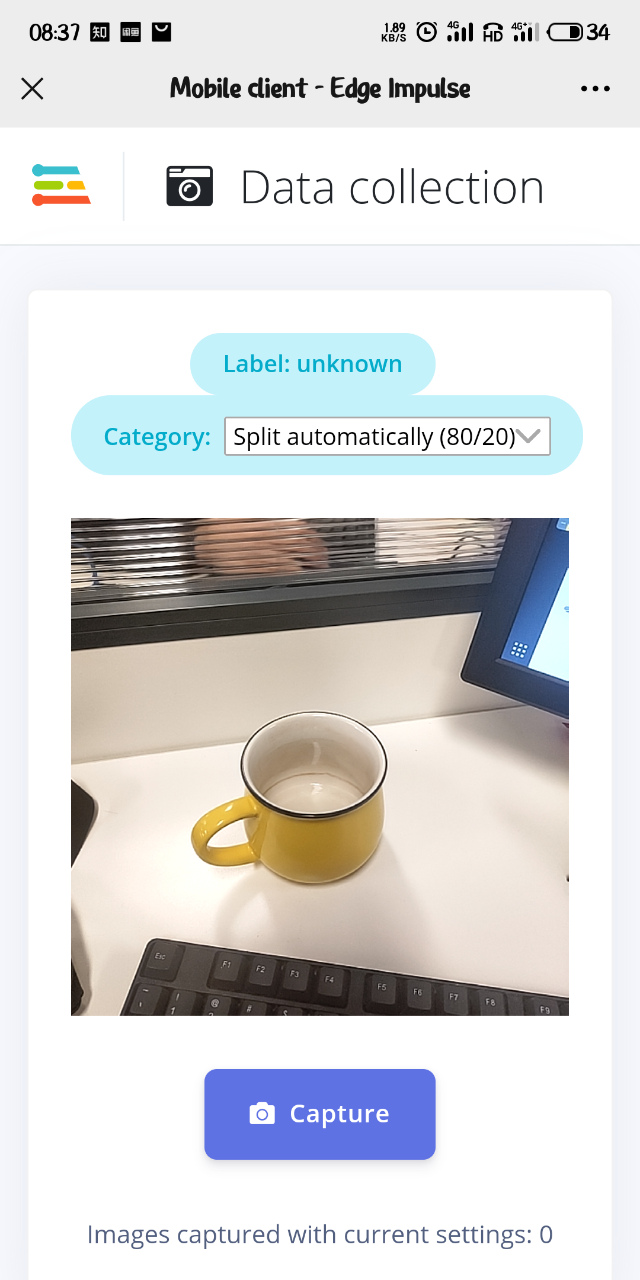
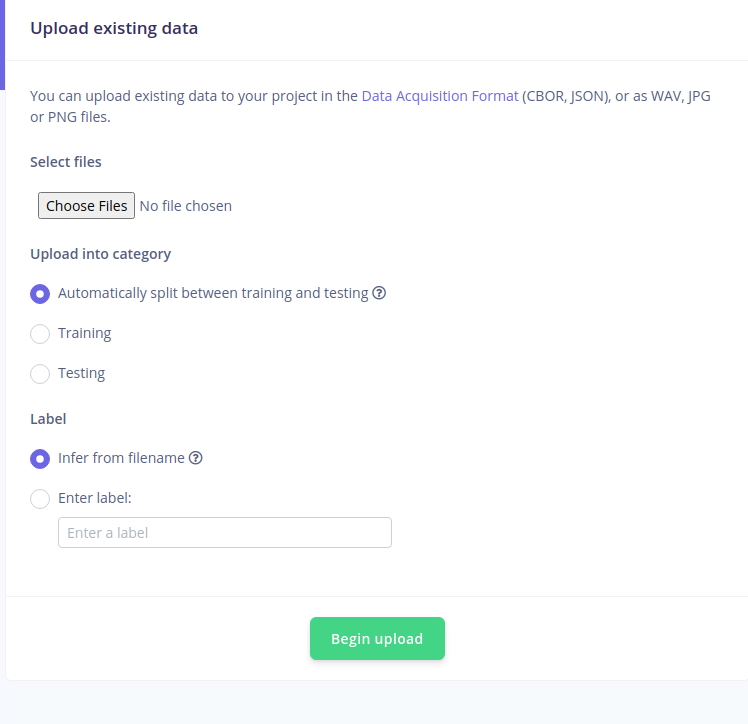
You can choose a variety of ways to add data.

- Use your mobile phone to capture motion, audio, or images, and even run a model which has been trained locally.
- Use your computer to capture audio or images from a webcam or microphone or external audio device.
- Capture data from devices or development boards
- Upload existing datasets in WAV, JPG, PNG, CBOR or JSON format.
Neural reasoning process design
![img]/picture/spi-camera/Pico/Arducam-Pico4ML-TinyML/train-machine-learning-models/9.png)
Select an appropriate processing module and learning module, and the platform will generate a default configuration based on the acquired data.
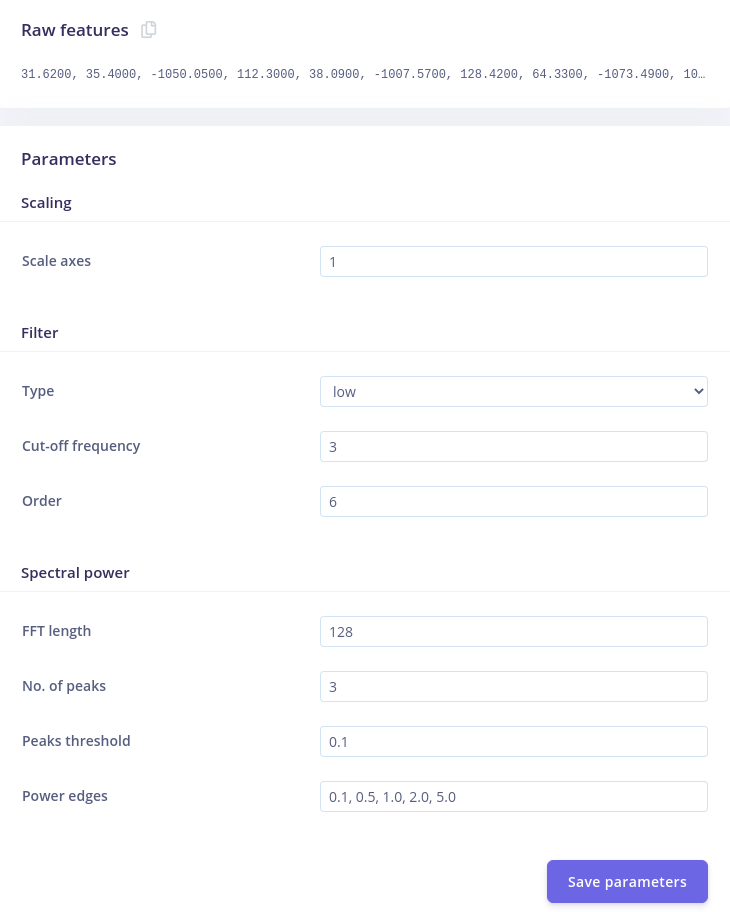
After selecting the module, you can enter to configure detailed parameters. Don't forget to save it after setting the parameters.
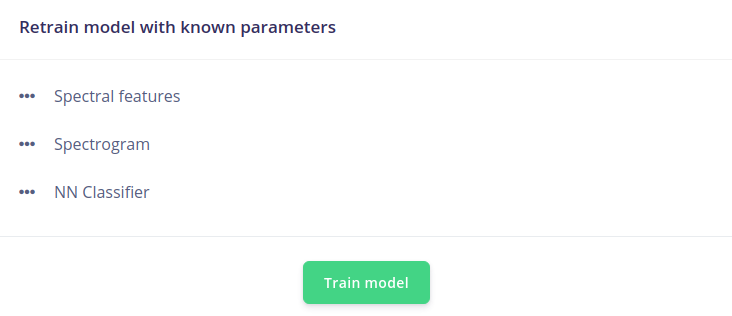
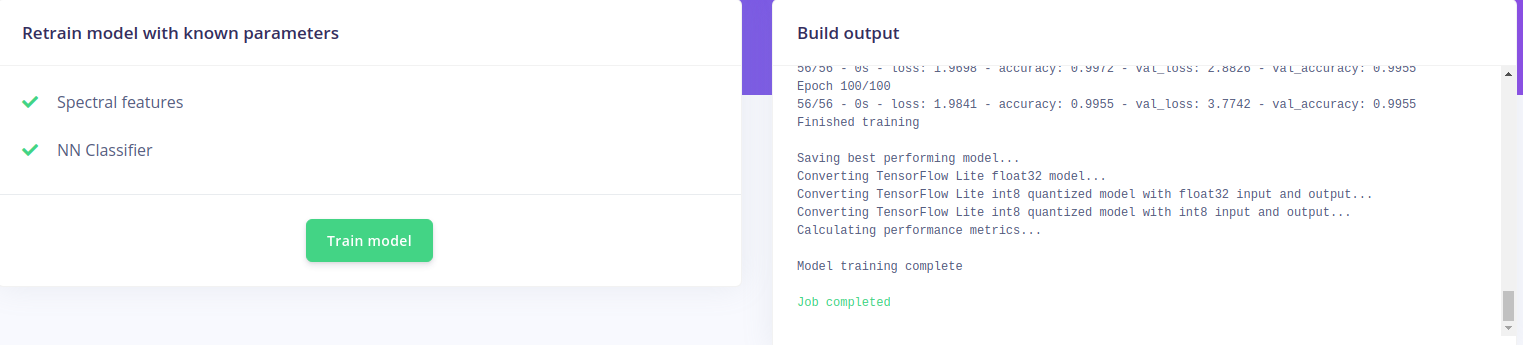
Train the model
Train the model with known parameters
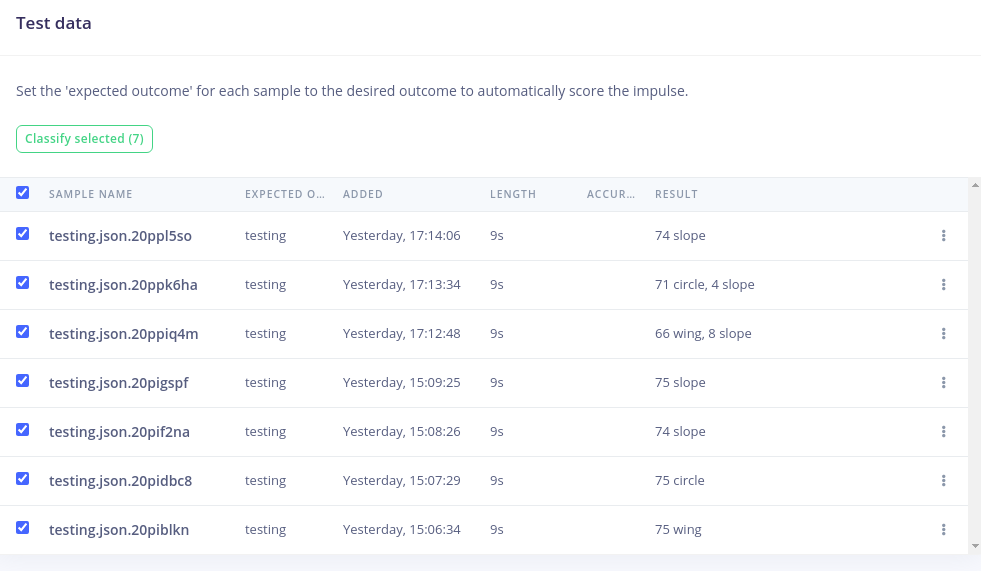
Test the model
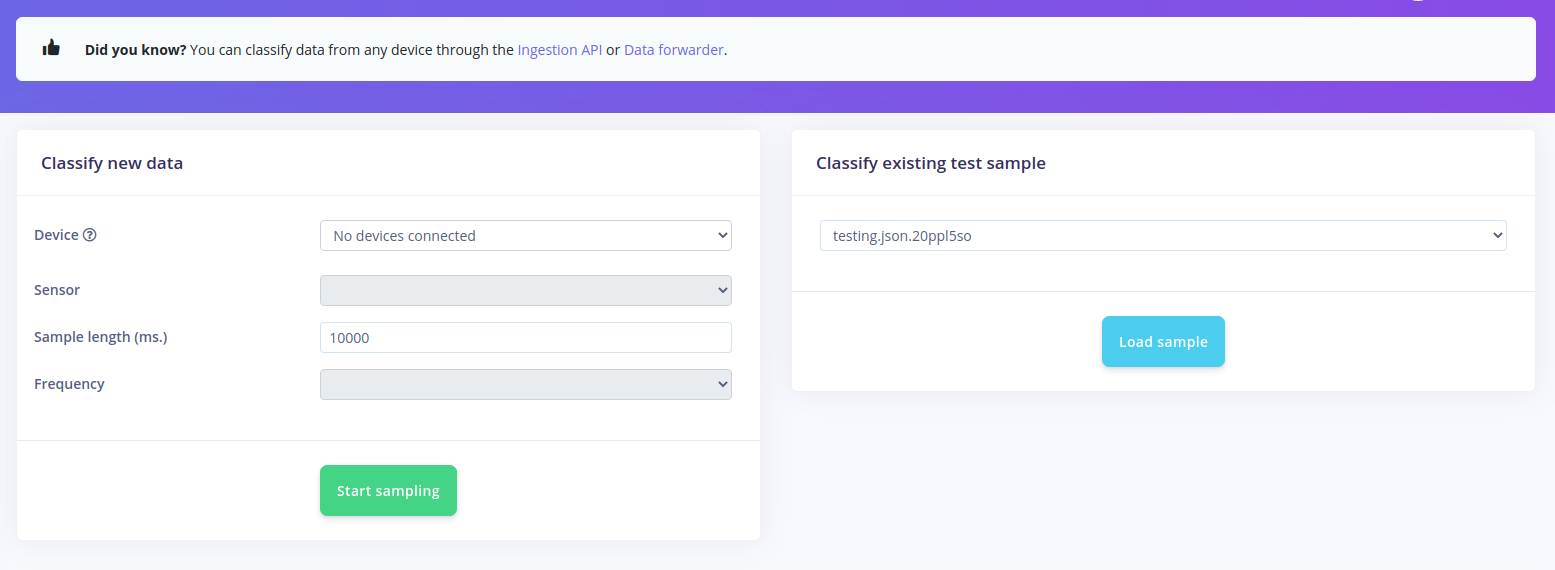
Here you can choose to use equipment to obtain test data, or use existing test data.
Deploy the model
You can deploy the pulse to any device. This allows the model to run without connecting to the Internet, run at the minimum energy consumption, and minimize latency.
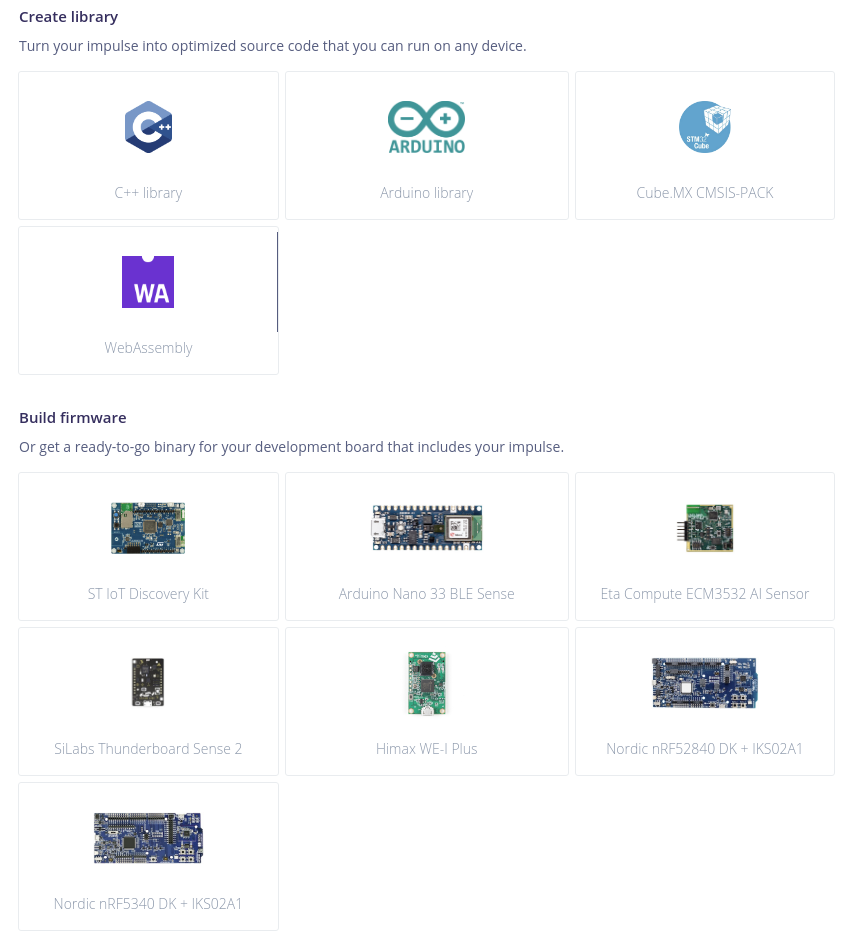
- Get the source code Transform your neural inference model into optimized source code that can be run on any device.
- Build the firmware Prepare a ready-to-use binary file for your development board, which includes your neural network model.
Use pico to connect Edge Impulse
Next, we will demonstrate how to connect a pico to the Edge Impulse and collect data on the Ubuntu system. Use pico to draw "Wing", "Slope" and "Circle".
Connect the device
- Log in
- Select an item

- Set up data alias

So far we have connected our pico to Edge Impulse.
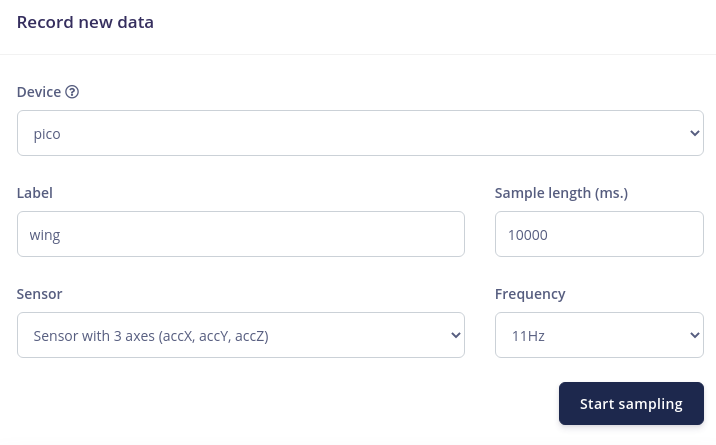
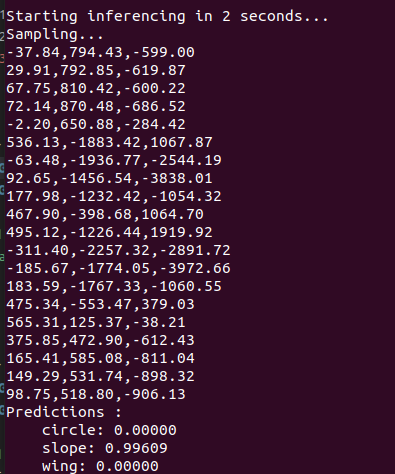
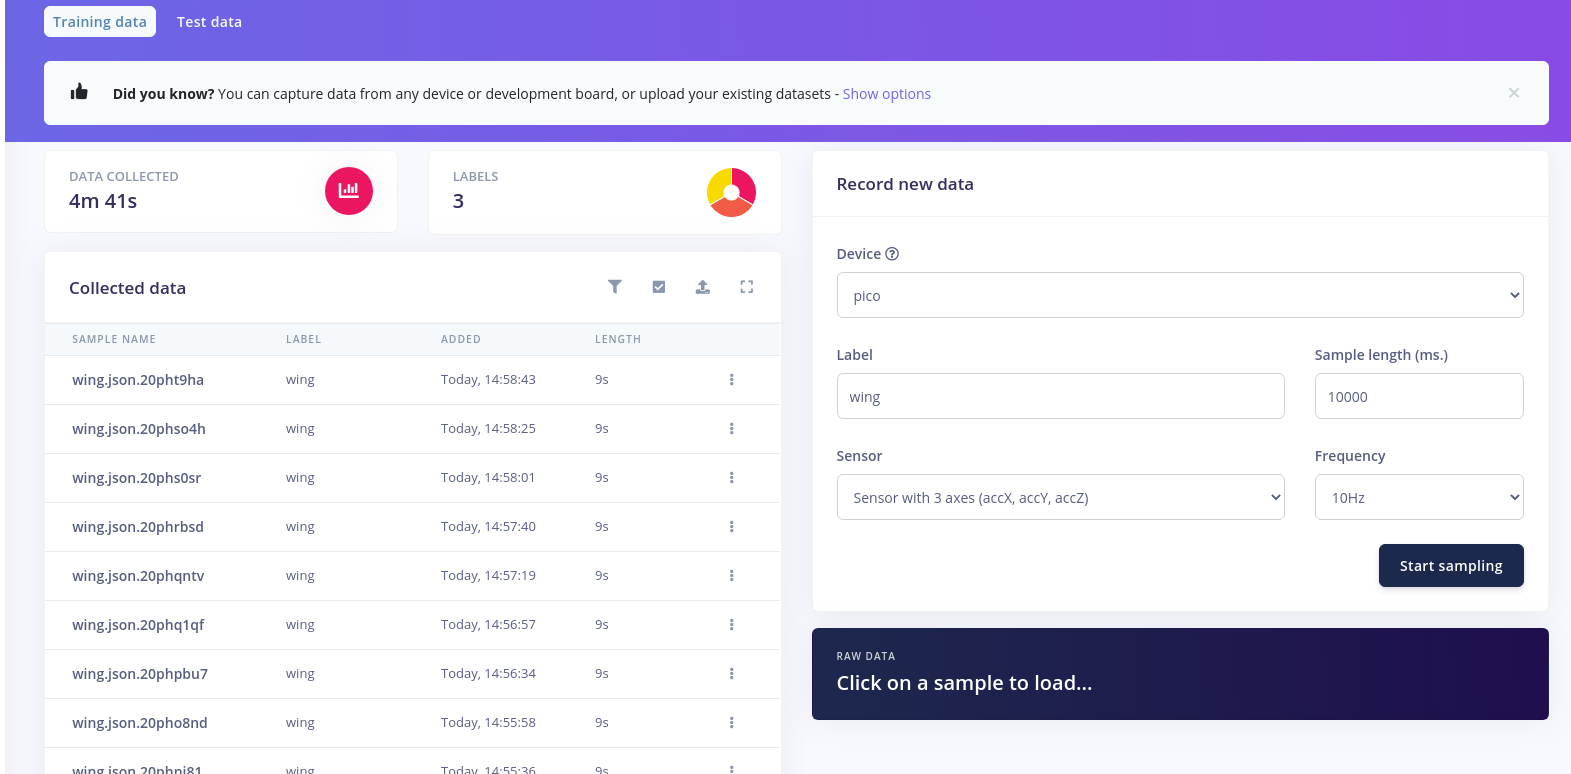
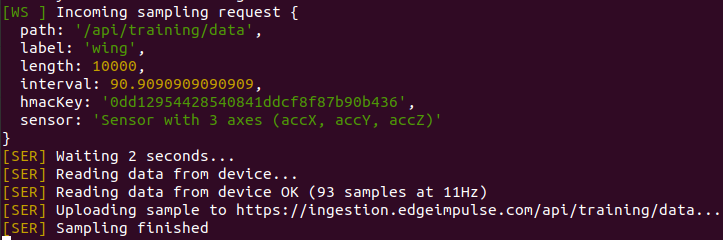
Collect data
Set the classification label, then click Start sampling
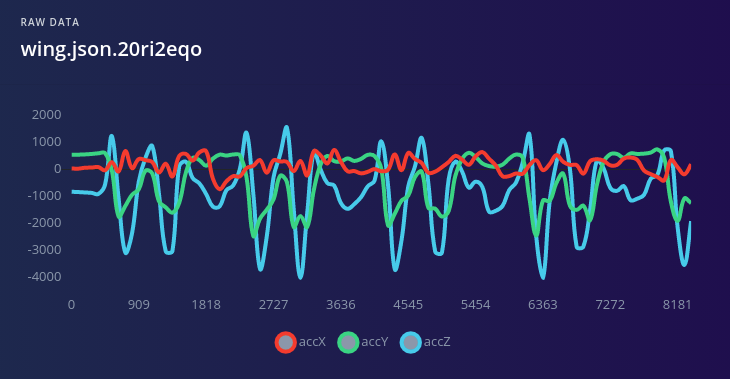
After the acquisition is completed, you can see the waveform of the data. We collected three types of data separately.
Process design

- Processing module
We choose spectral analysis, which is very suitable for analyzing repetitive motions, such as data from accelerometers. Extract the frequency and power characteristics of the signal over a period of time.
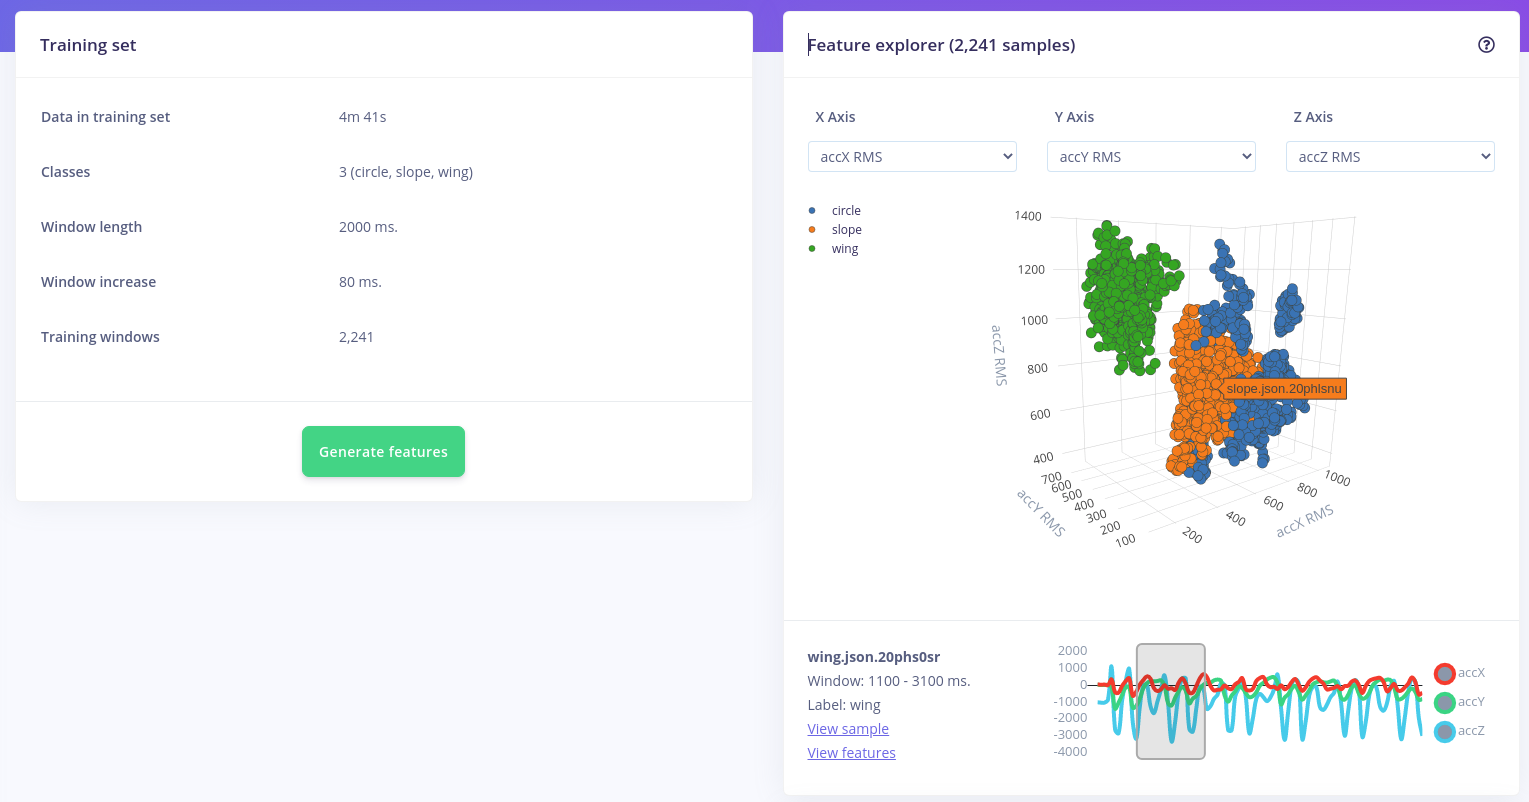
- Learning module
We select neural networks, learn patterns from data, and apply them to new data. It is very suitable for classifying sports or recognizing audio.

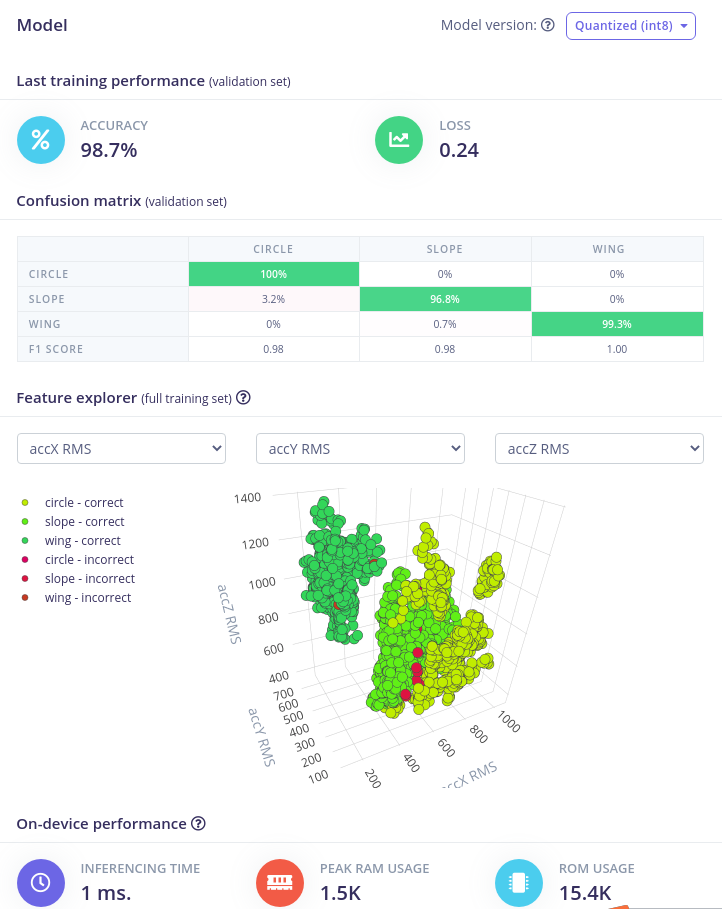
Test Model
Deploy model
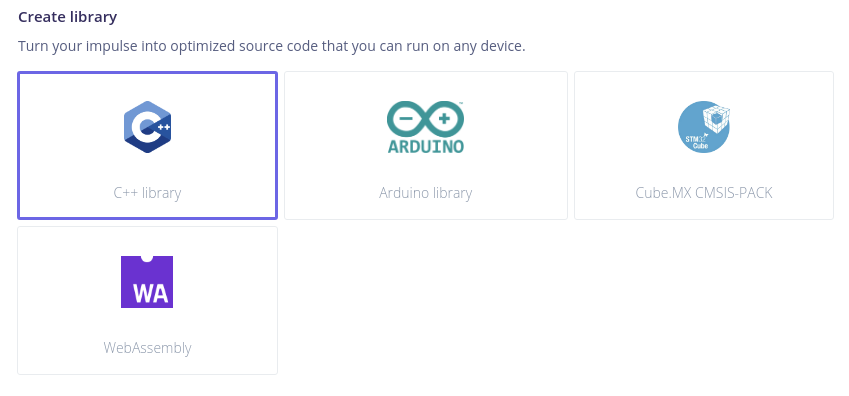
Download the C++ source code
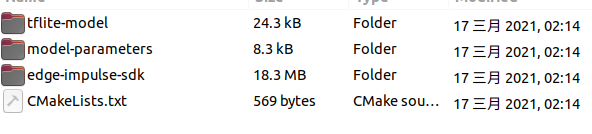
Add the contents of the compressed package to our project.
Ultimate image