Pivistation 5 Series
Introduction
Welcome to Arducam Pivistation 5, a smart ready-to-deploy all-in-one camera solution.
At Arducam, we understand that your vision projects demand simplicity and ease of use. That’s why we’ve developed Arducam Pivistation 5, tailored to accelerate your innovation journey with Raspberry Pi 5.
By seamlessly integrating Raspberry Pi 5 with a variety of high-performance image sensors, Pivistation 5 offers you a versatile collection of ready-to-use cameras designed for your specific applications. No more guesswork or tedious setup processes – simply choose a suitable camera from our collection, and you’re ready to go.
Whether you’re a beginner or an experienced developer, our goal is to provide you with a lightsome way to ensure a quick and easy innovation without compromising performance.
Quick Start Guide
Notes Before Starting:
- The built-in SD card of this product already contains all the required environments.
Equipment you may need:
Host: laptop or desktop with Ethernet interface.
Optional: Monitor, HDMI cable, mouse, keyboard, USB Hub
Help Center
There are two plans you can choose to access Arducam Pivistation 5. Connect Pivistation 5 to the host or Connect Pivistation 5 to the router:
Option 1. Connect the host with Ethernet Cable
Hardware Connection
- Step1.
Connect the power supply and Ethernet cable to Pivistation 5:
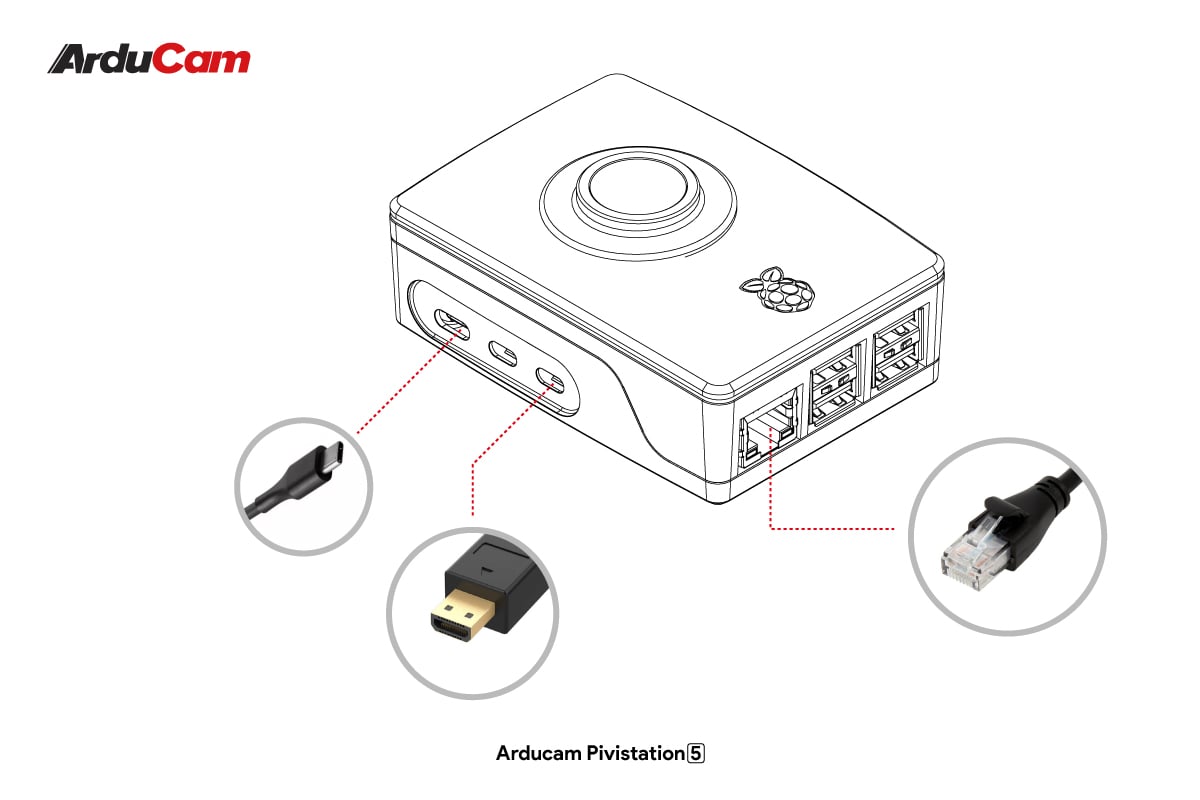
- Step2.
Connect the Ethernet cable to Host:

Software Operation
The Pivistation 5 Ethernet interface owns a fixed IP address by default. (10.254.10.1)
- Step1.
Find the Device IP address:
After connecting the host and Pivistation 5 using a network cable, open the host network settings:
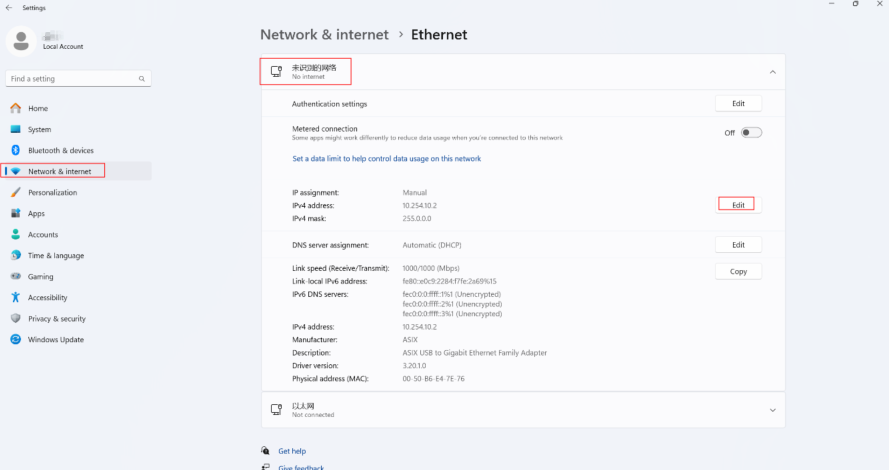
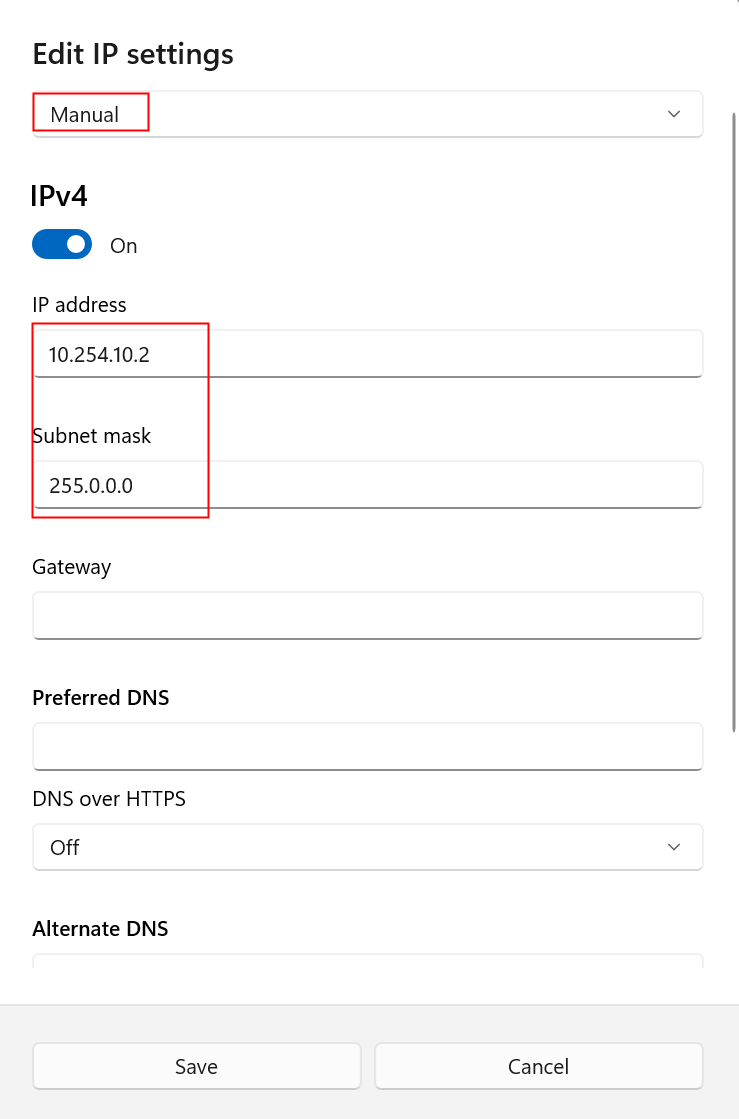
- Step2.
Set the host ipv4 to the following format:
- Step3.
Open a web page on the host and input http://10.254.10.1:8081 to enter the main network service interface.
Homepage
Network service page:
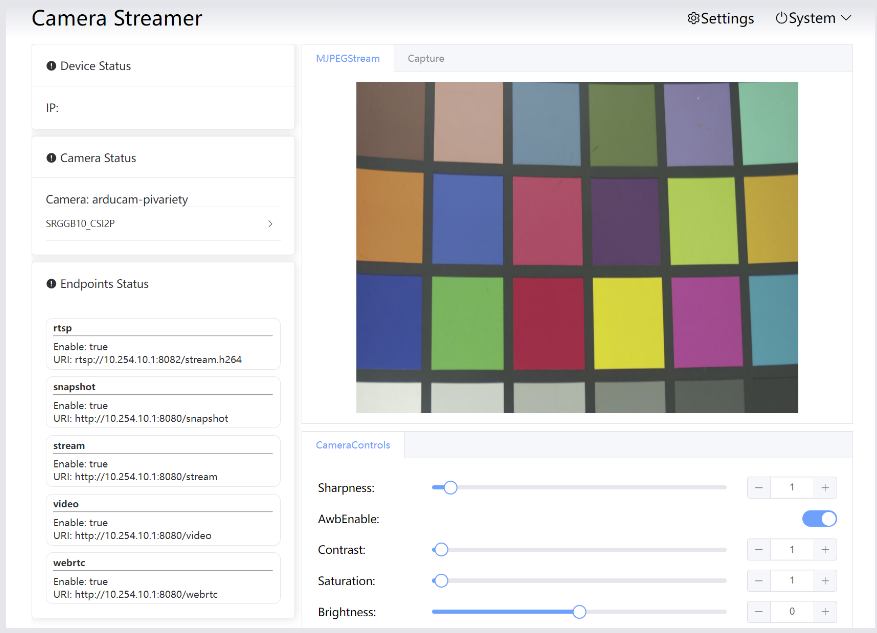
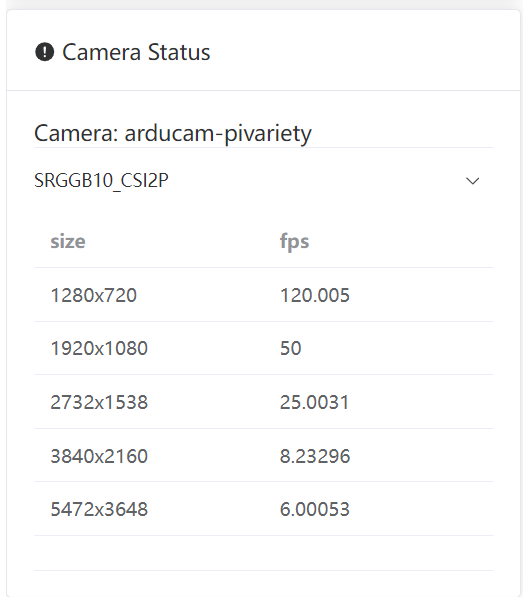
Display the camera status, including format, resolution, frame rate,etc.:
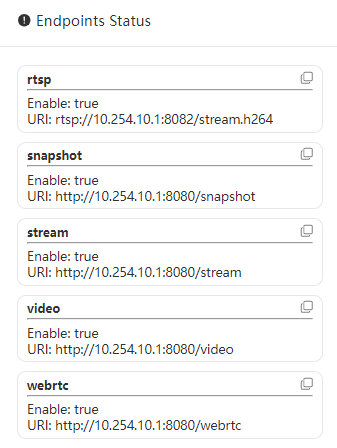
Displays the endpoint status, which only exists when using the camera-streamer service and can be accessed directly through the displayed link:
Tip
The modes contains push streaming modes of various protocols.
Among them, rstp needs streaming software, such as vlc. The rest can be used in web pages.
Settings
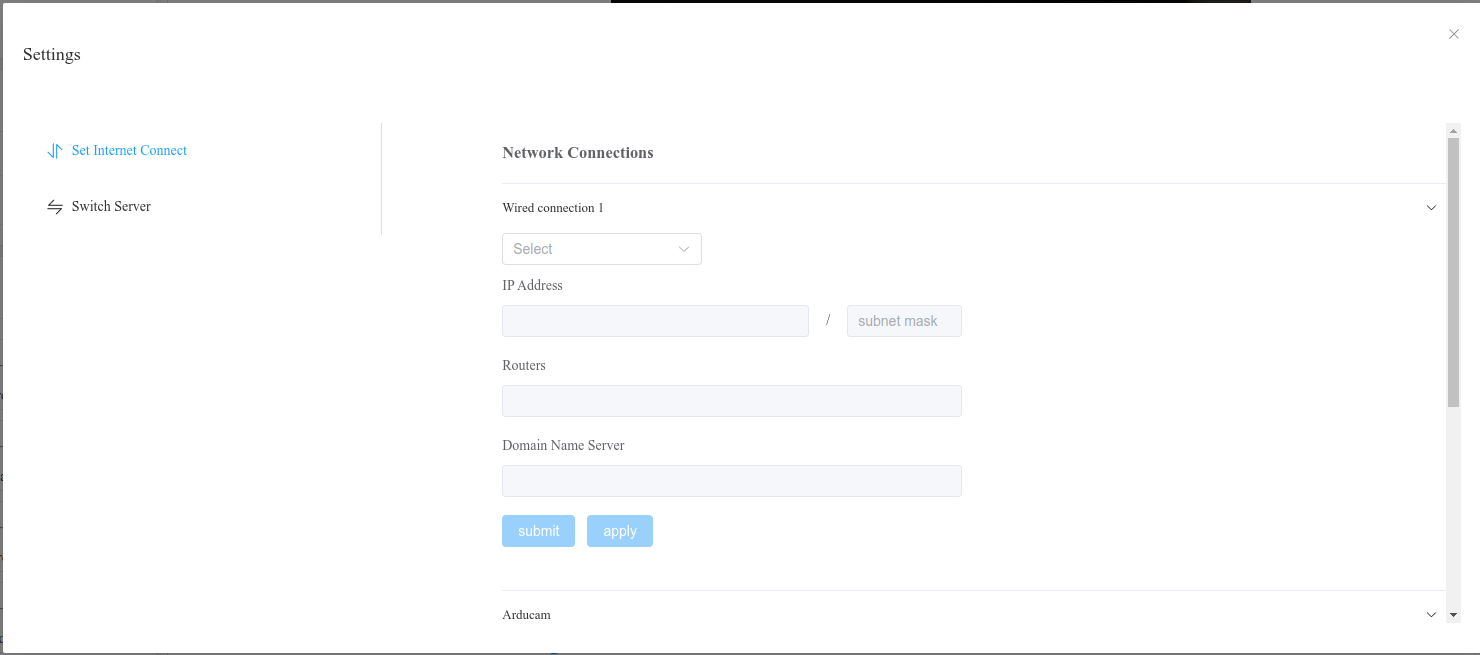
Network Setting:
List all network ports. You can switch between static IP and dynamic IP for a single network port.
For example: switch the current IP address to a static or dynamic address:
Toggle and switch service plugins:
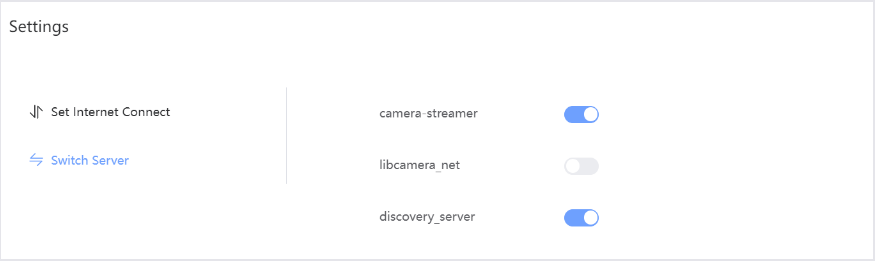
1. libcamera-net
Based on the http push service implemented by libcamera, you can choose different post-processing methods and push the processed images to the front-end page for preview.
2. discovery_server
Used to discover other devices and control all devices to take photos.
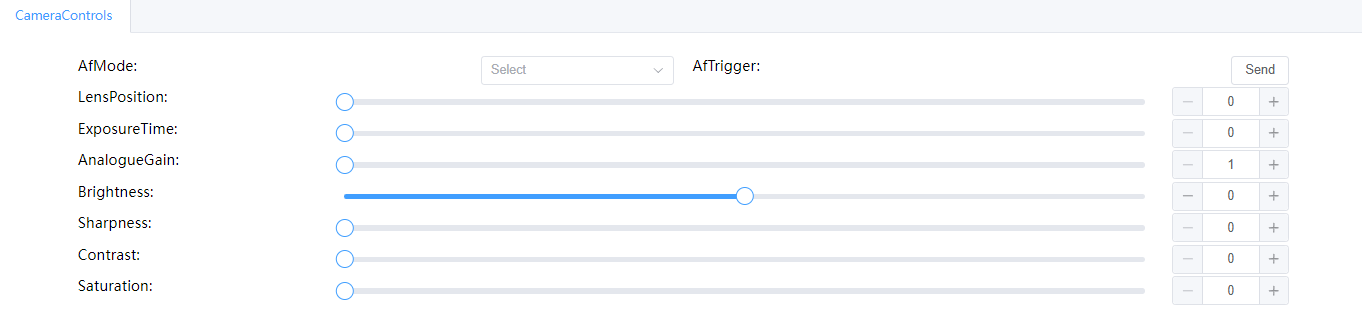
Note
AfMode control function is not supported currently. The remaining functions can be controlled by sliding the slider.
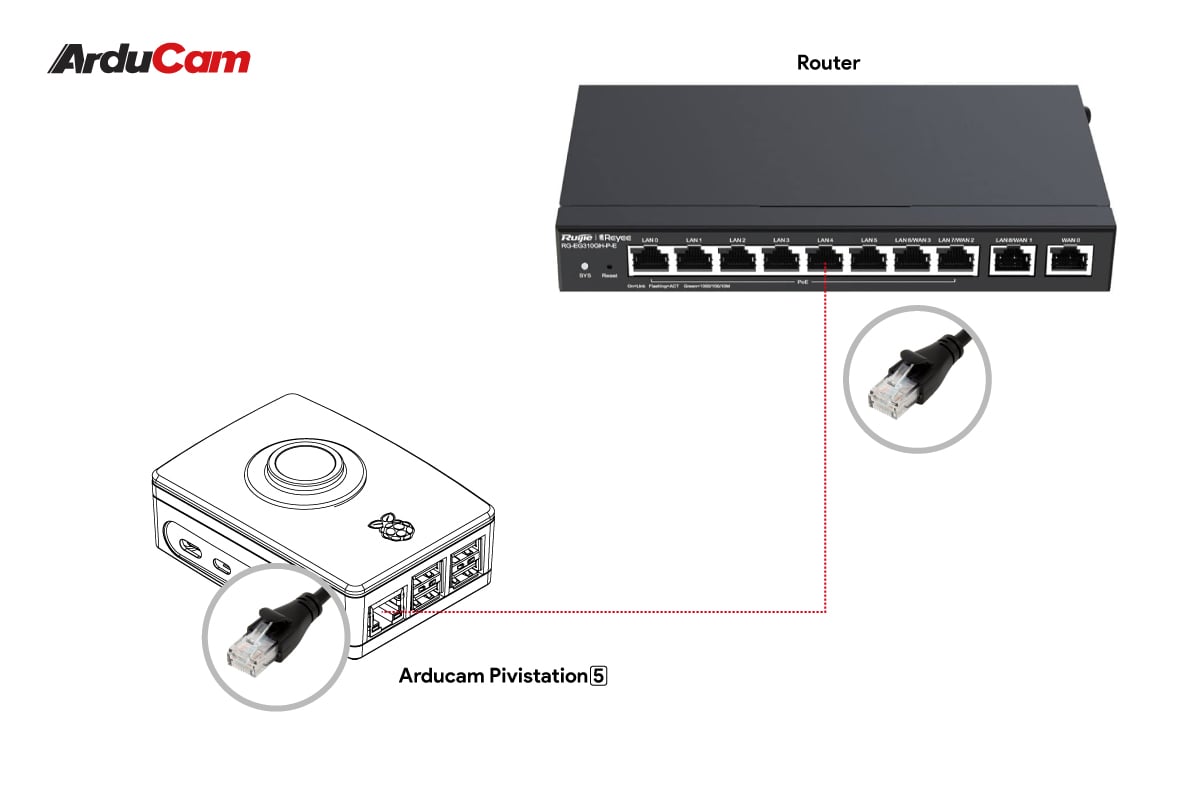
Option 2. Connect the router with Ethernet cable
Hardware Connection
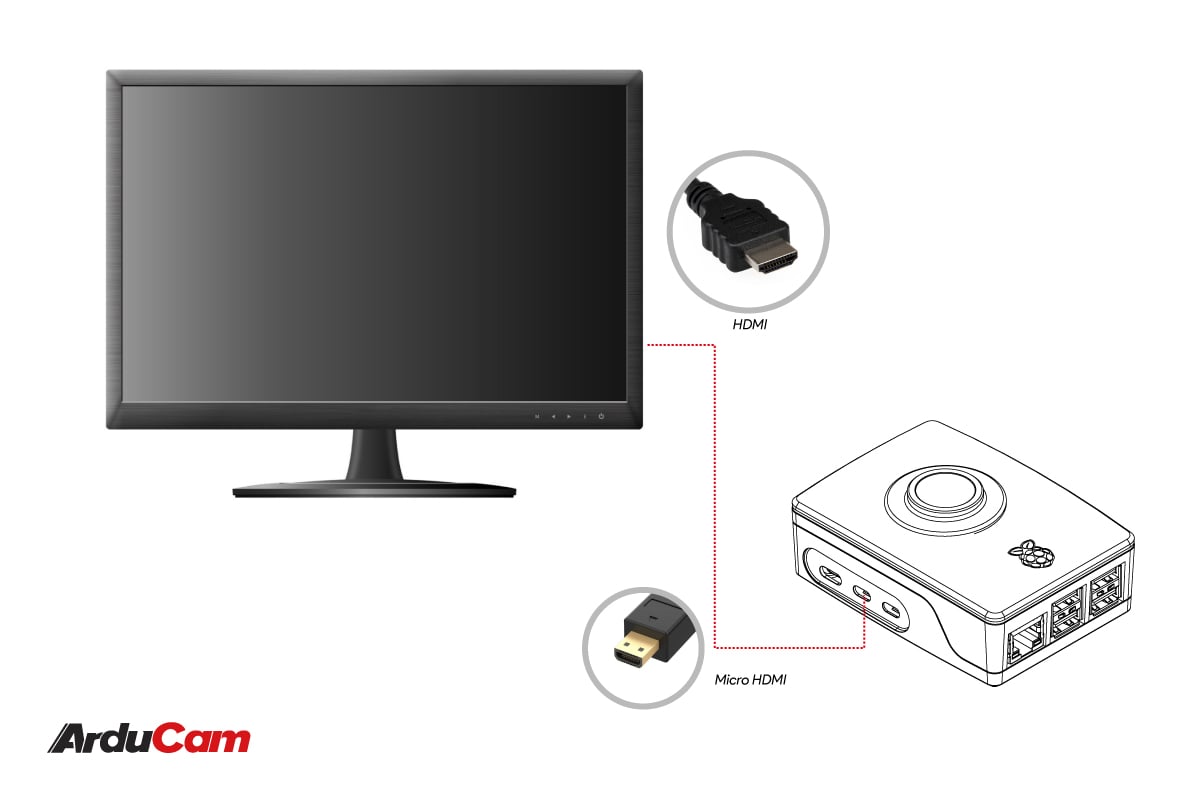
Connect Arducam Pivistation 5 to the router using an Ethernet cable. And connect the monitor to Pivistation using an HDMI cable.
You can choose a keyboard as a peripheral.
- Step1.
Connect the power supply and Ethernet cable to Pivistation 5:
- Step2.
Connect the Ethernet cable to router
- Step3.
Connect the monitor with HDMI Cable
- Step4.
Connect peripherals (keyboard or mouse). You can also connect more peripherals through the USB hub.
Software Operation
- Step1.
Find the Device IP address:
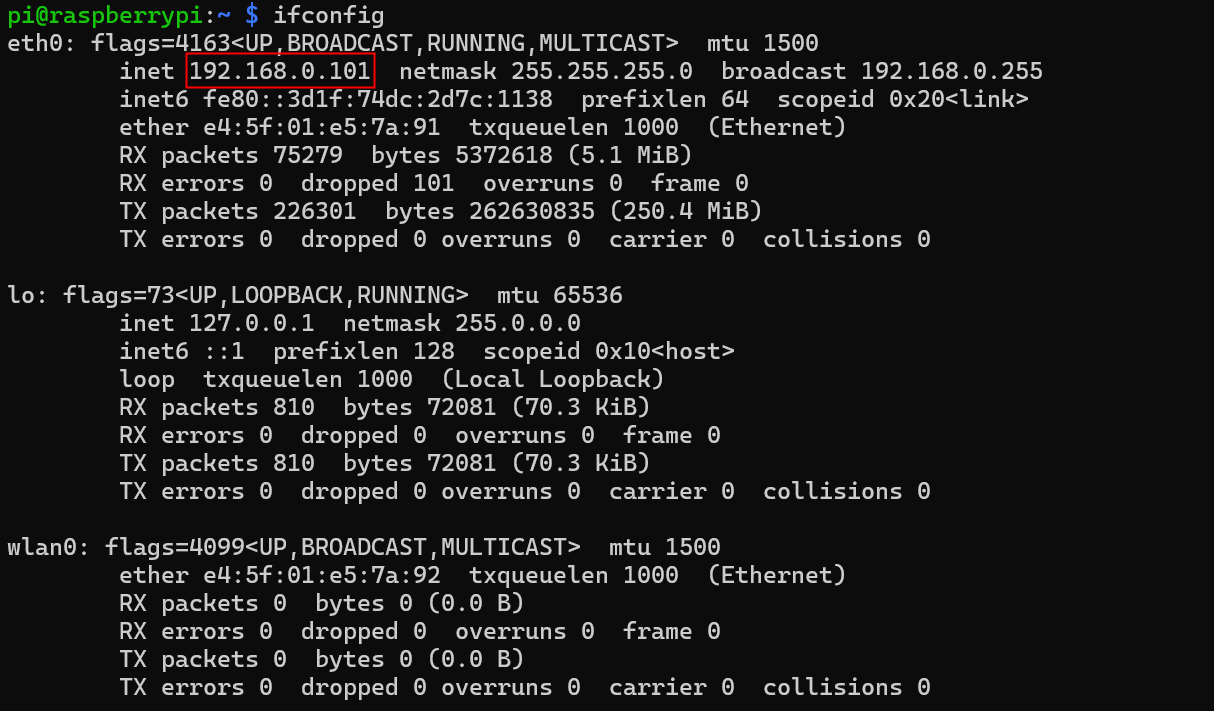
After the connection is completed, you can log in to the system and use the command to view the IP.
Enter the terminal, and then use the following command to view:
ifconfig
Example:
- Step2.
Enter http://<ip address>:8081 on the host web page to enter the network service interface:
Homepage
Network service page:
Display the camera status, including format, resolution, frame rate,etc.:
Displays the endpoint status, which only exists when using the camera-streamer service and can be accessed directly through the displayed link:
Tip
The modes contains push streaming modes of various protocols.
Among them, rstp needs streaming software, such as vlc. The rest can be used in web pages.
Settings
Network Setting:
List all network ports. You can switch between static IP and dynamic IP for a single network port.
For example: switch the current IP address to a static or dynamic address:
Toggle and switch service plugins:
1. libcamera-net
Based on the http push service implemented by libcamera, you can choose different post-processing methods and push the processed images to the front-end page for preview.
2. discovery_server
Used to discover other devices and control all devices to take photos.
Note
AfMode control function is not supported currently. The remaining functions can be controlled by sliding the slider.
Run the Test Program
Preparation
Note
You will need an HDMI cable to connect a monitor to display the demos.
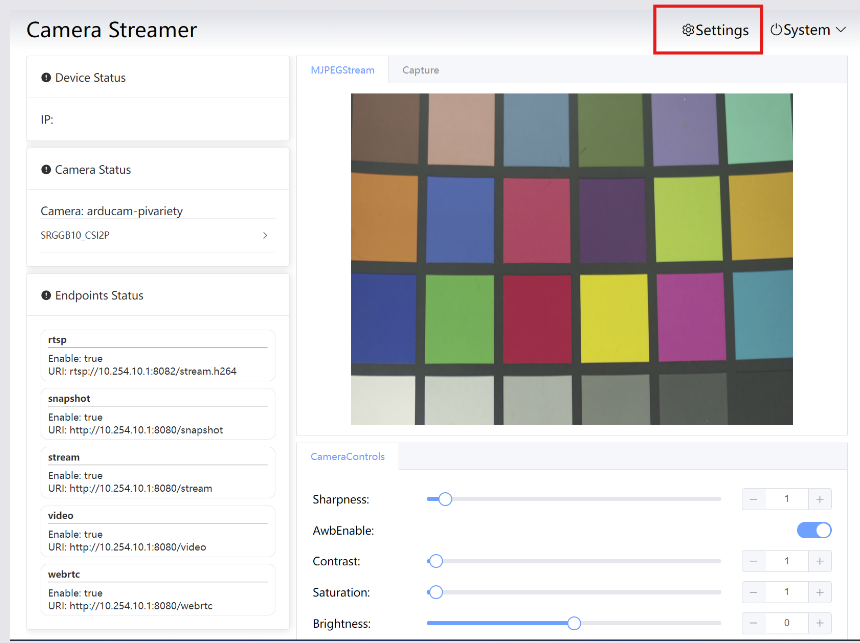
Turn off the Push Streaming service (it is enabled by default).
In Settings, turn off all the areas selected by the red box below. If you need network streaming later, please come back here to restart it.

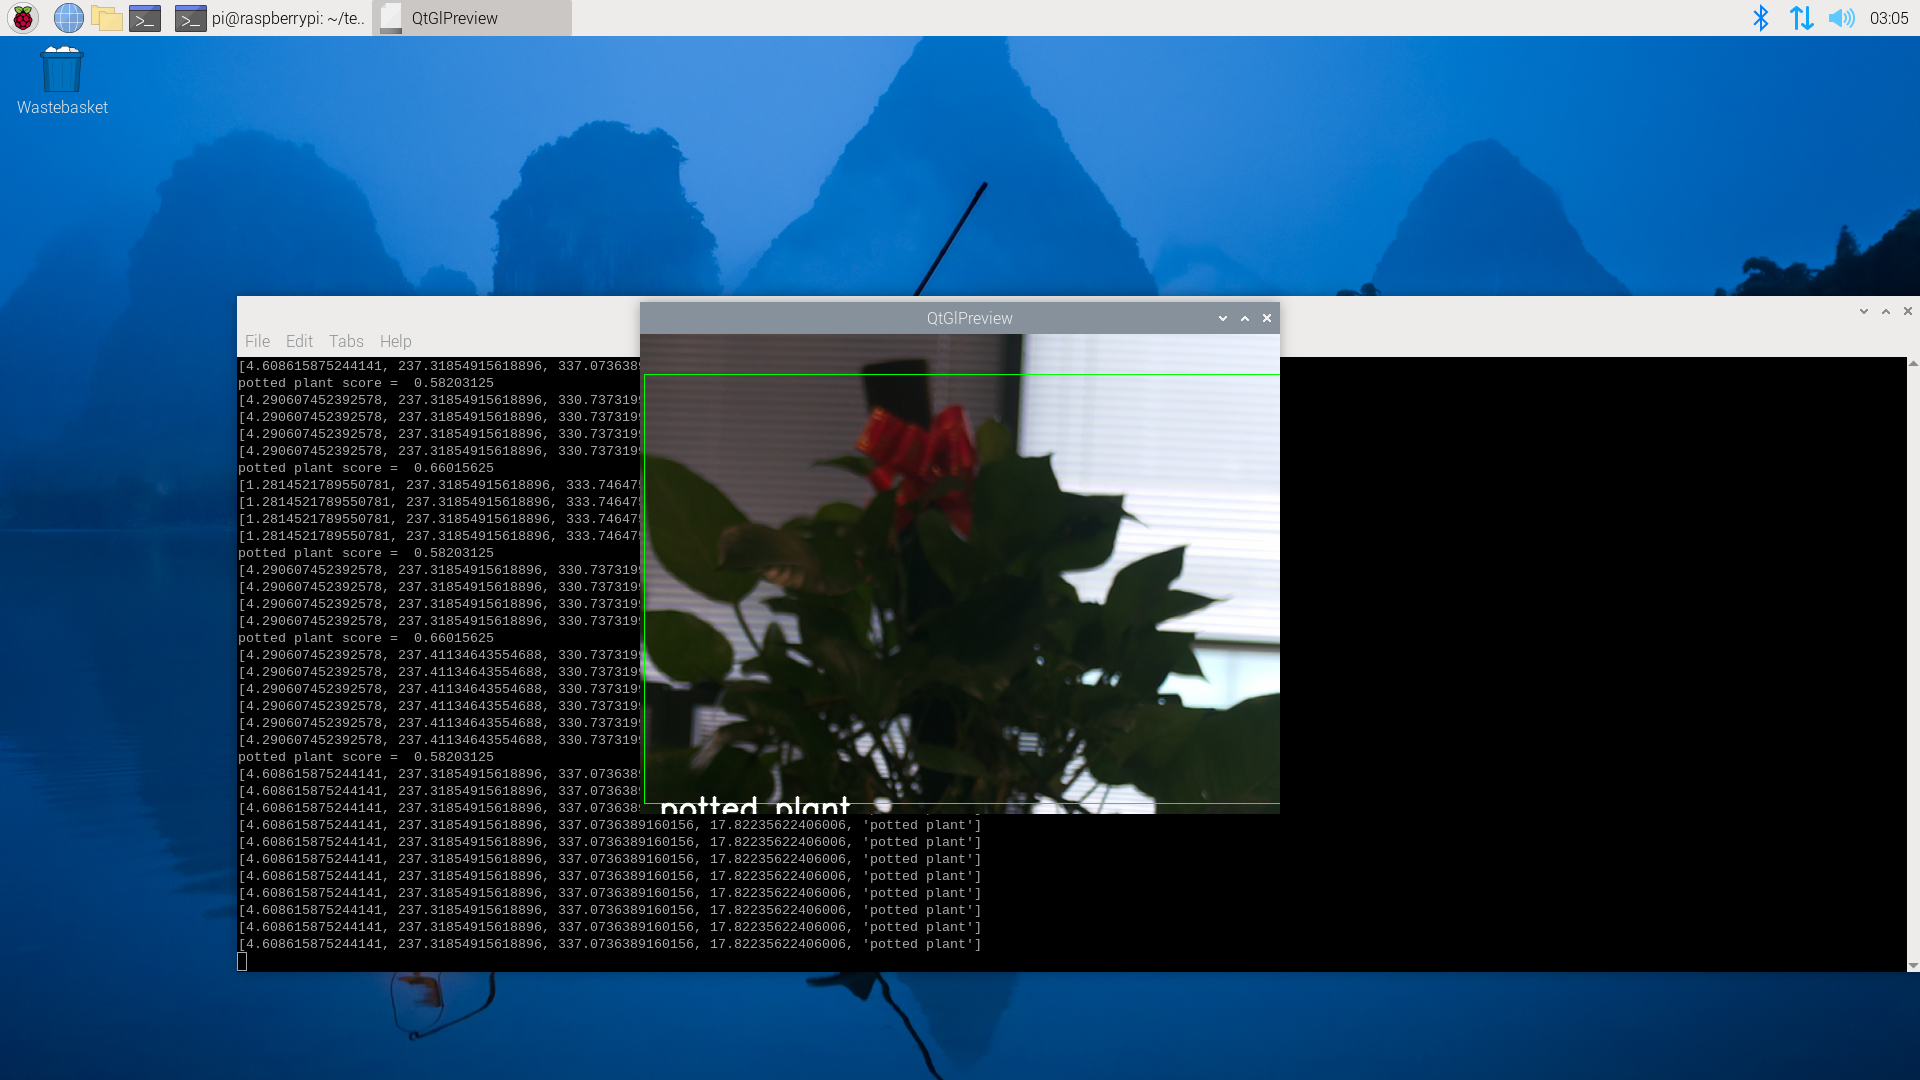
Pytorch Demo

cd ~/pytorch_test

./pytorch_test.sh
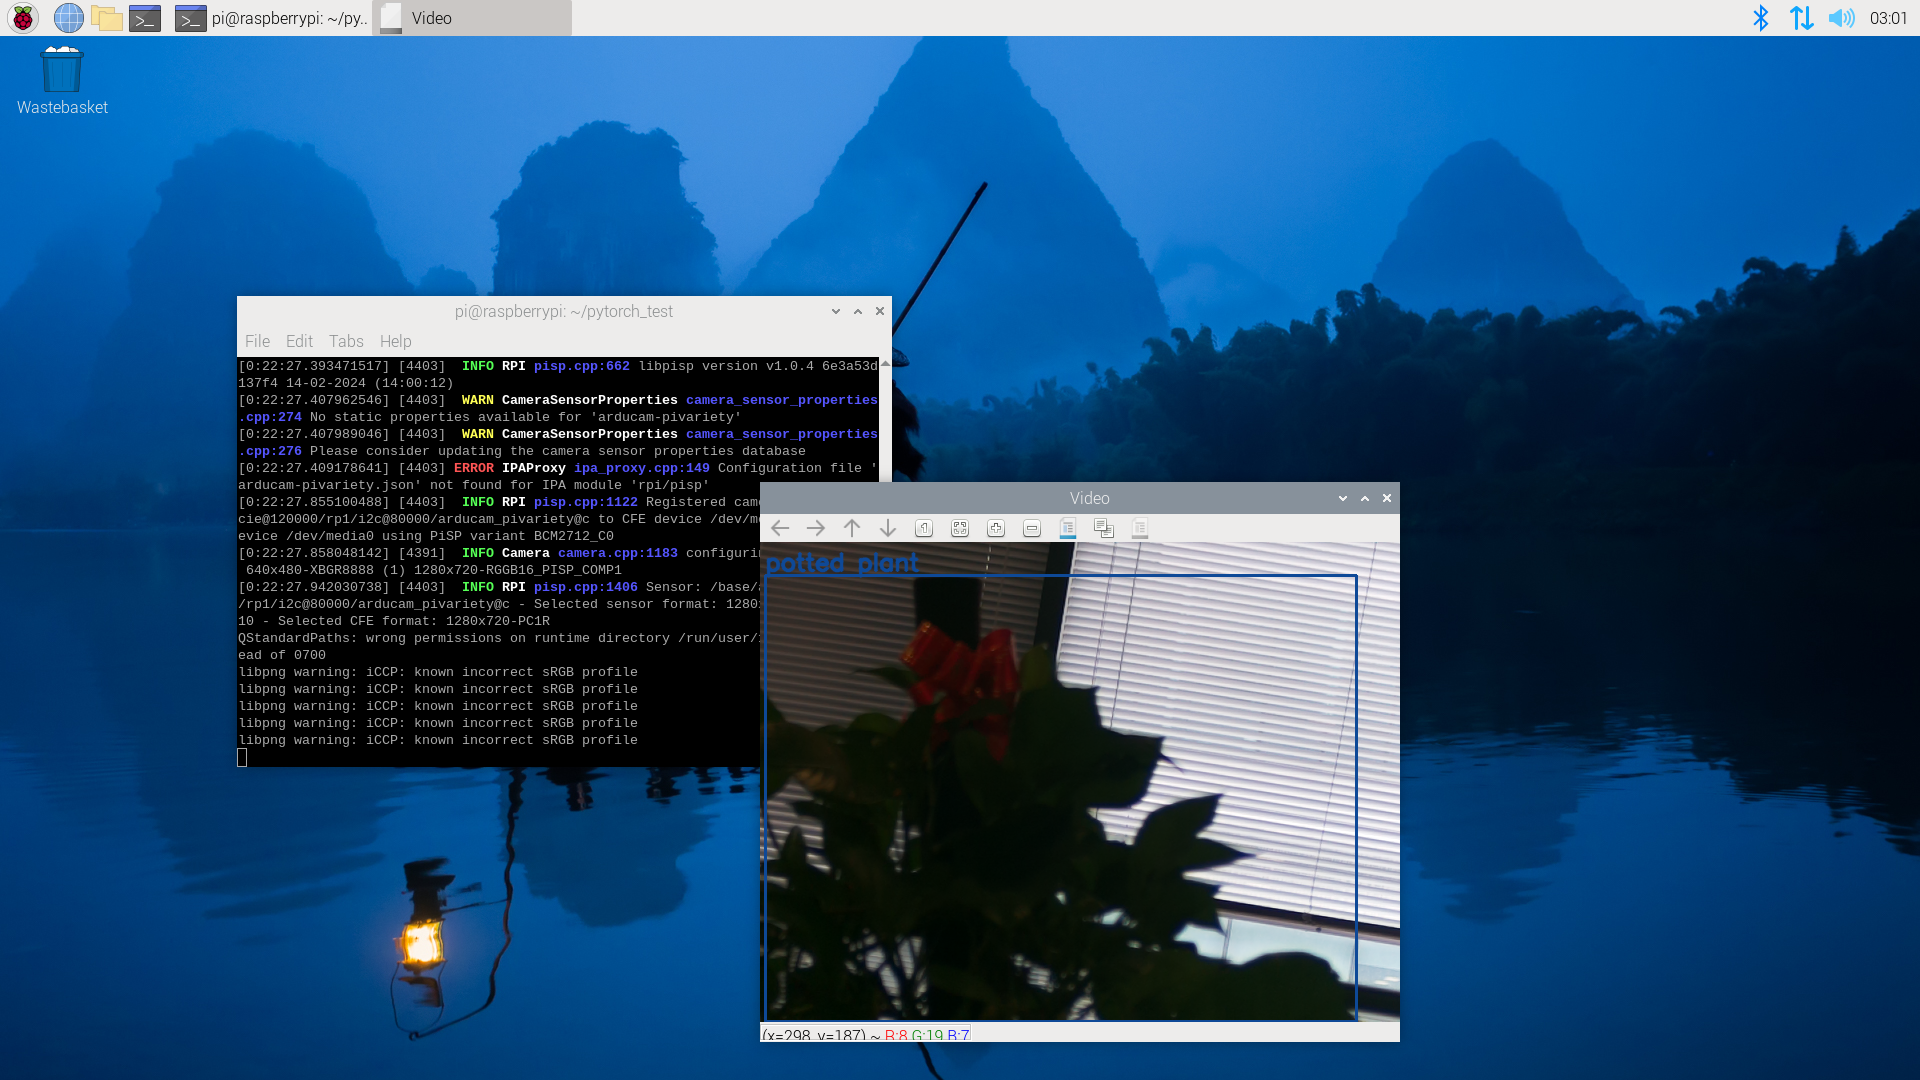
Video Demo
Tensorflow Demo

cd ~/tensorflow_test

./tensorflow_test.sh
Video Demo
Data Matrix QR code recognition Demo

cd ~/detection_qr_test

./detection_qr_test.sh
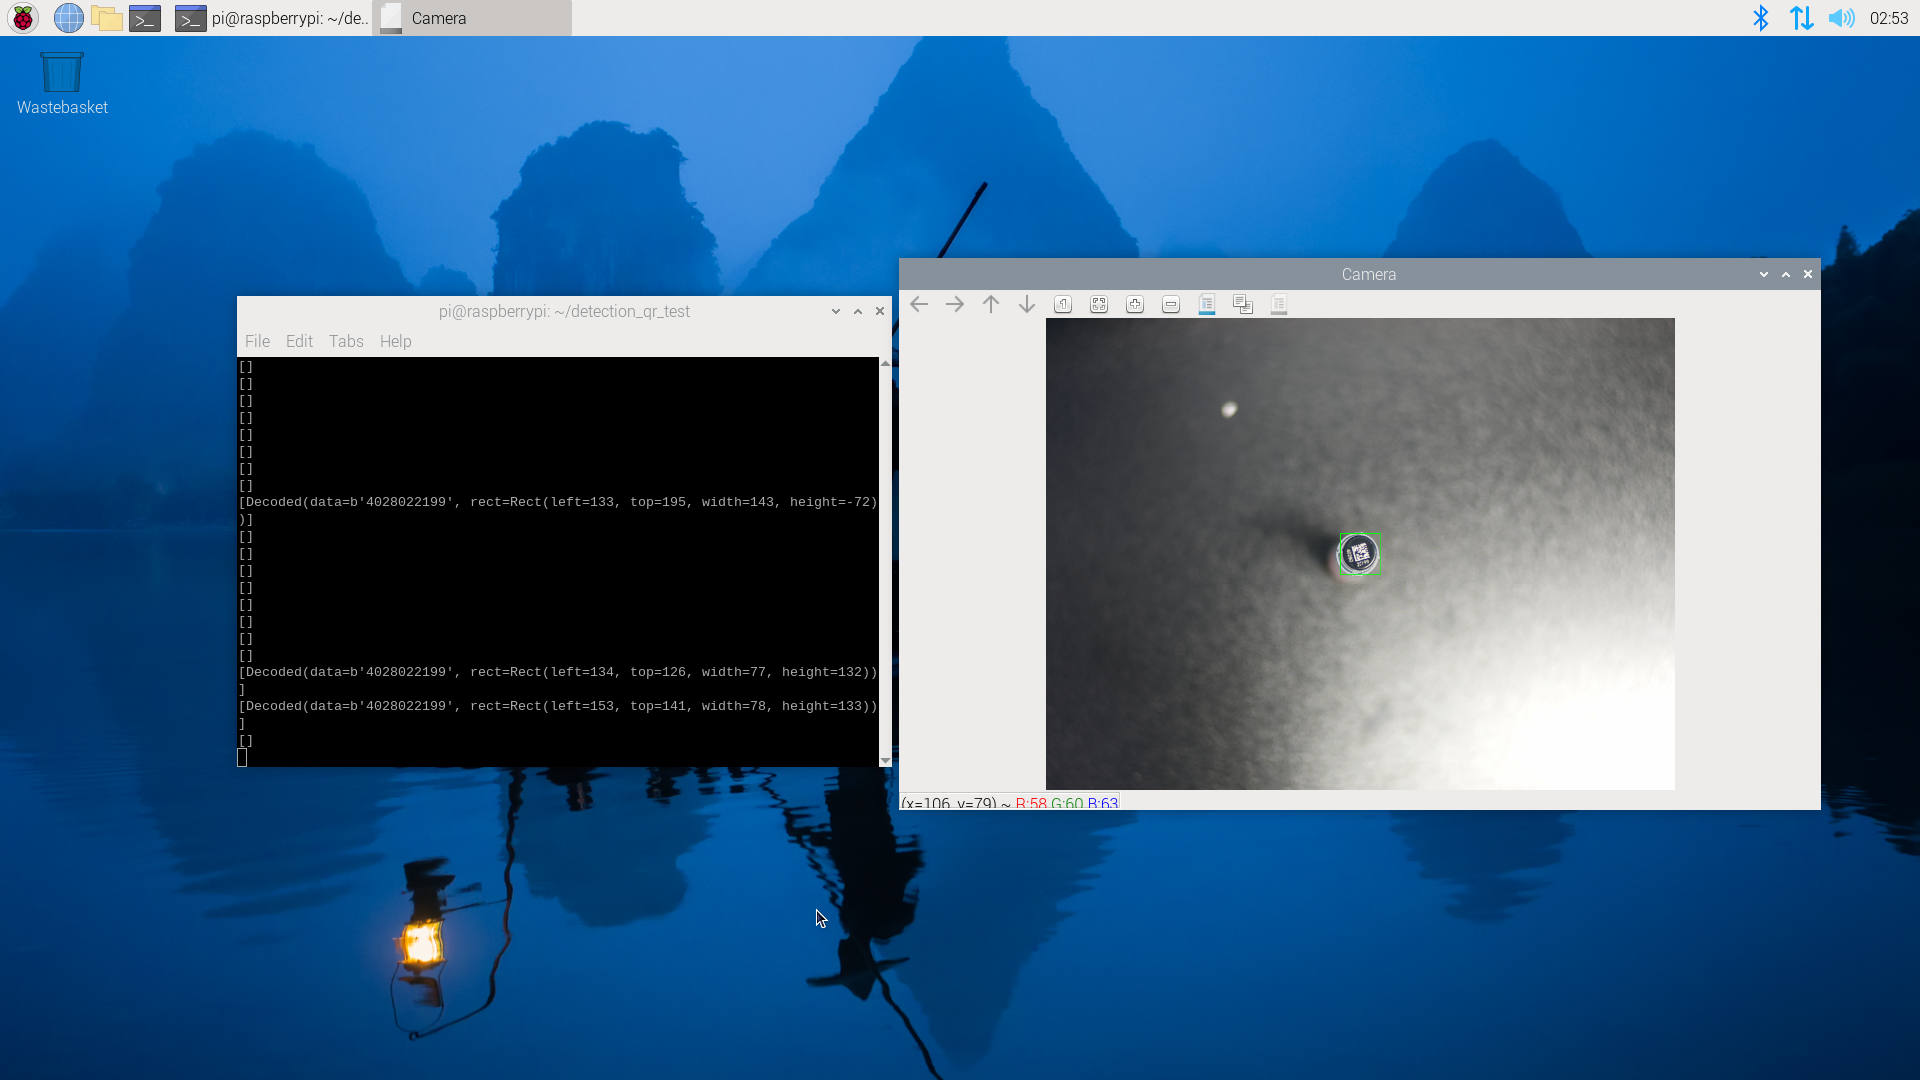
Video Demo