Solution On OctoPrint
1. SD Card image:
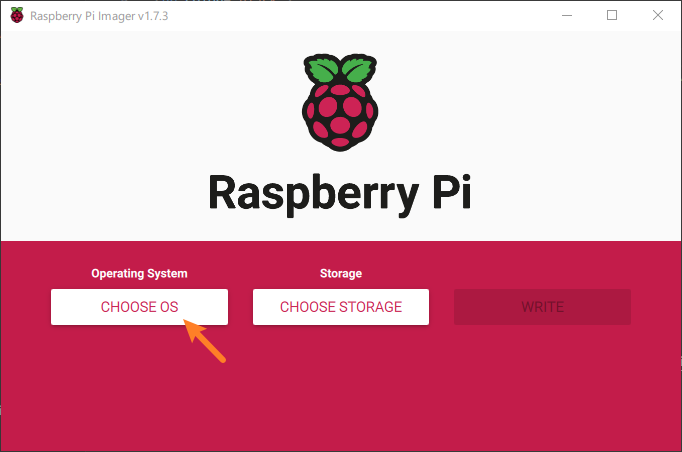
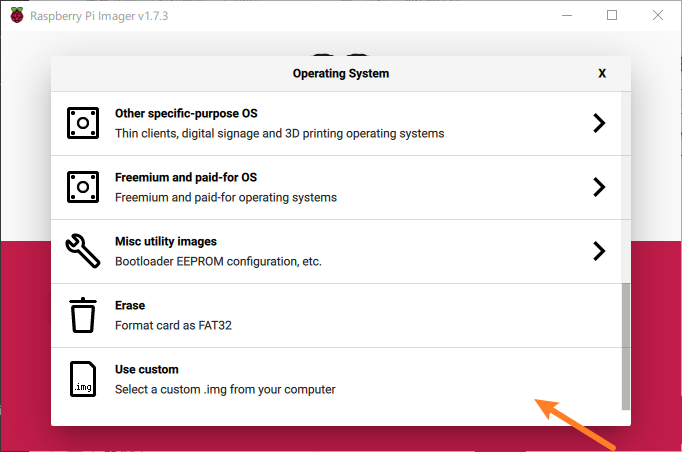
2. Flash image onto your SD Card:


OS and Kernel version:

3. Install dependencies
3.1. Enable the Focus Driver and Install libcamera
| Resolution | Sensor | Key SKU | Quick Start Guide |
|---|---|---|---|
| 5MP | OV5647 | B0176 | Software - Enable the focus driver for OV5647 |
| 8MP | IMX219 | B0182 | Software - Enable the focus driver for IMX219 |
| 12MP | IMX477 | B0272 | Software - Enable the focus driver for IMX477 |
| 16MP | IMX519 | B0371 | Software - Enable the device tree for IMX519 |
| 21MP | IMX230 | B0324 | Software - Enable the device tree for Arducam Pivariety |
| 64MP | 64MP Hawkeye | B0399 | Software - Enable the device tree for 64MP Hawkeye |
Install libcamera:
Step 1. Download the bash scripts
wget -O install_pivariety_pkgs.sh https://github.com/ArduCAM/Arducam-Pivariety-V4L2-Driver/releases/download/install_script/install_pivariety_pkgs.sh
chmod +x install_pivariety_pkgs.sh
Step 2. Install libcamera
./install_pivariety_pkgs.sh -p libcamera_dev
Step 3. Install libcamera-apps
./install_pivariety_pkgs.sh -p libcamera_apps
3.2. Test
Check video device:

libcamera-still -t 5000 -o test.jpg -n
4. Download libcamera plugin source code
Clone mjpg-streamer source code and execute the following commands, compile and install the libcamera plugin.
git clone https://github.com/ArduCAM/mjpg-streamer.git mjpg-streamer-libcamera
cd mjpg-streamer-libcamera/mjpg-streamer-experimental
git checkout bullseye
make
sudo install -m 755 _build/mjpg_streamer /opt/mjpg-streamer
sudo find _build -name "*.so" -type f -exec install -m 644 {} /opt/mjpg-streamer \;
sudo cp -a -r ./www /opt/mjpg-streamer
sudo chmod 755 /opt/mjpg-streamer/www
sudo chmod -R 644 /opt/mjpg-streamer/www
5. Configure the octopi.txt file
Edit /boot/octopi.txt, and make the following changes
sudo nano /boot/octopi.txt
5.1. Configure which camera to use
Scroll to the bottom and add the entry below:
camera="libcamera"

5.2. Set parameters for libcamera plugin.
General setting
If you want to set the option value as default, please add the entry below in the octopi.txt:
camera_libcamera_options=""
For Example: If you want to set framerate at 60fps and enable continuous autofocus functionality, you can add the entry below in the octopi.txt:
camera_libcamera_options="-afmode continuous -fps 60"

Tuning file for OV5647/IMX219/IMX477
Specially, you will need to add tuning file for Arducam OV5647/IMX219/IMX477 motorized focus cameras:
- OV5647 Motorized Focus Camera
camera_libcamera_options="-afmode continuous -fps 60 /usr/share/libcamera/ipa/rpi/vc4/ov5647_af.json"
- IMX219 Motorized Focus Camera
camera_libcamera_options="-afmode continuous -fps 60 /usr/share/libcamera/ipa/rpi/vc4/imx219_af.json"
- IMX477 Motorized Focus Camera
camera_libcamera_options="-afmode continuous -fps 60 /usr/share/libcamera/ipa/rpi/vc4/imx477_af.json"

About Focus Mode
For some cameras that support both autofocus and manual focus, if you need to access the camera's autofocus/manual focus function, you need to set the focus mode in the option settings at first. Reference the following content:
- Single Time Autofocus
camera_libcamera_options="-afmode auto -fps 60"
- Continuous Autofocus
camera_libcamera_options="-afmode continuous -fps 60"
- Manual Focus
camera_libcamera_options="-afmode manual -fps 60"
Parameter Details
Parameter details can be viewed using the following command.
cd /home/pi/mjpg-streamer-libcamera/mjpg-streamer-experimental
./mjpg_streamer -i "input_libcamera.so -h"

5.3. Configuration of camera HTTP output
Uncomment these two sentences in the octopi.txt
camera_http_webroot="./www-octopi"
camera_http_options="-n"
6. Replace webcamd file
webcamd is in the /root/bin directory. You need to change the name of the original file to achieve the purpose of backup. Then copy our modified webcamd to the /root/bin directory. Please follow the steps below:
cd ~
sudo mv /root/bin/webcamd /root/bin/webcamd.bak
sudo wget -O webcamd https://github.com/ArduCAM/mjpg-streamer/releases/download/v1.0.3/webcamd
sudo mv webcamd /root/bin/
sudo chmod 755 /root/bin/webcamd
7. Reboot your Pi
sudo reboot
8. View in browser
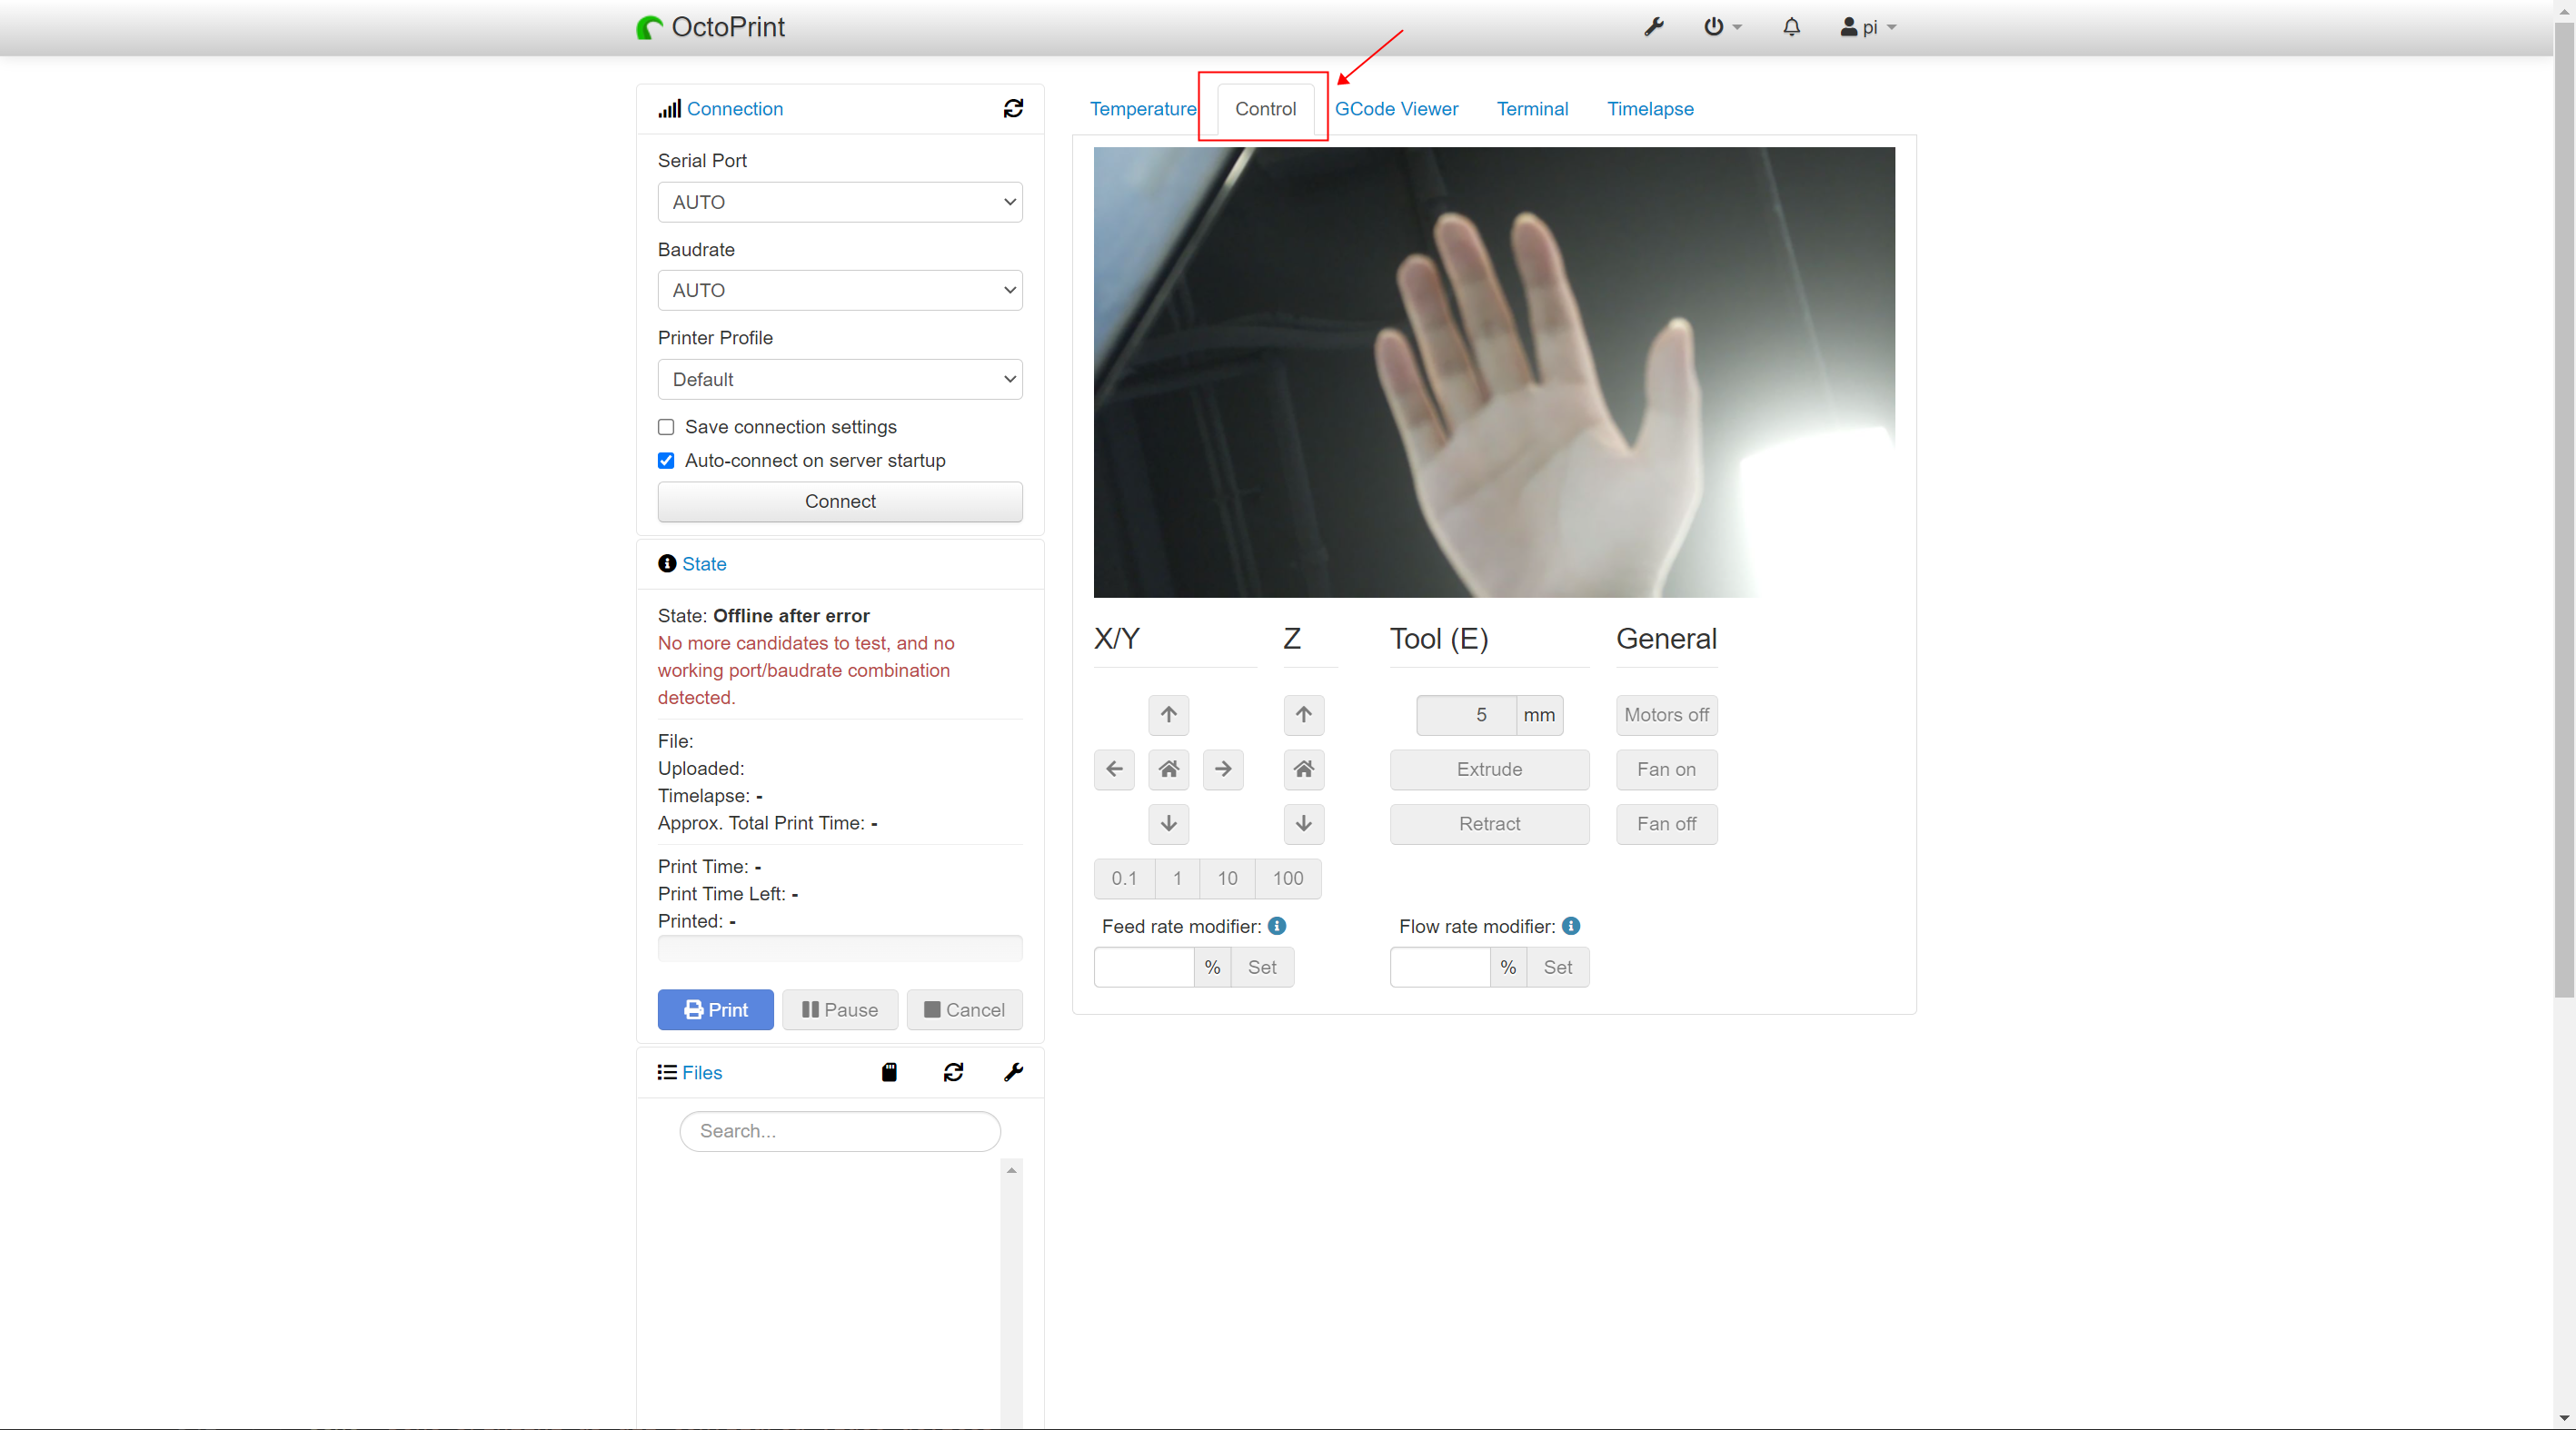
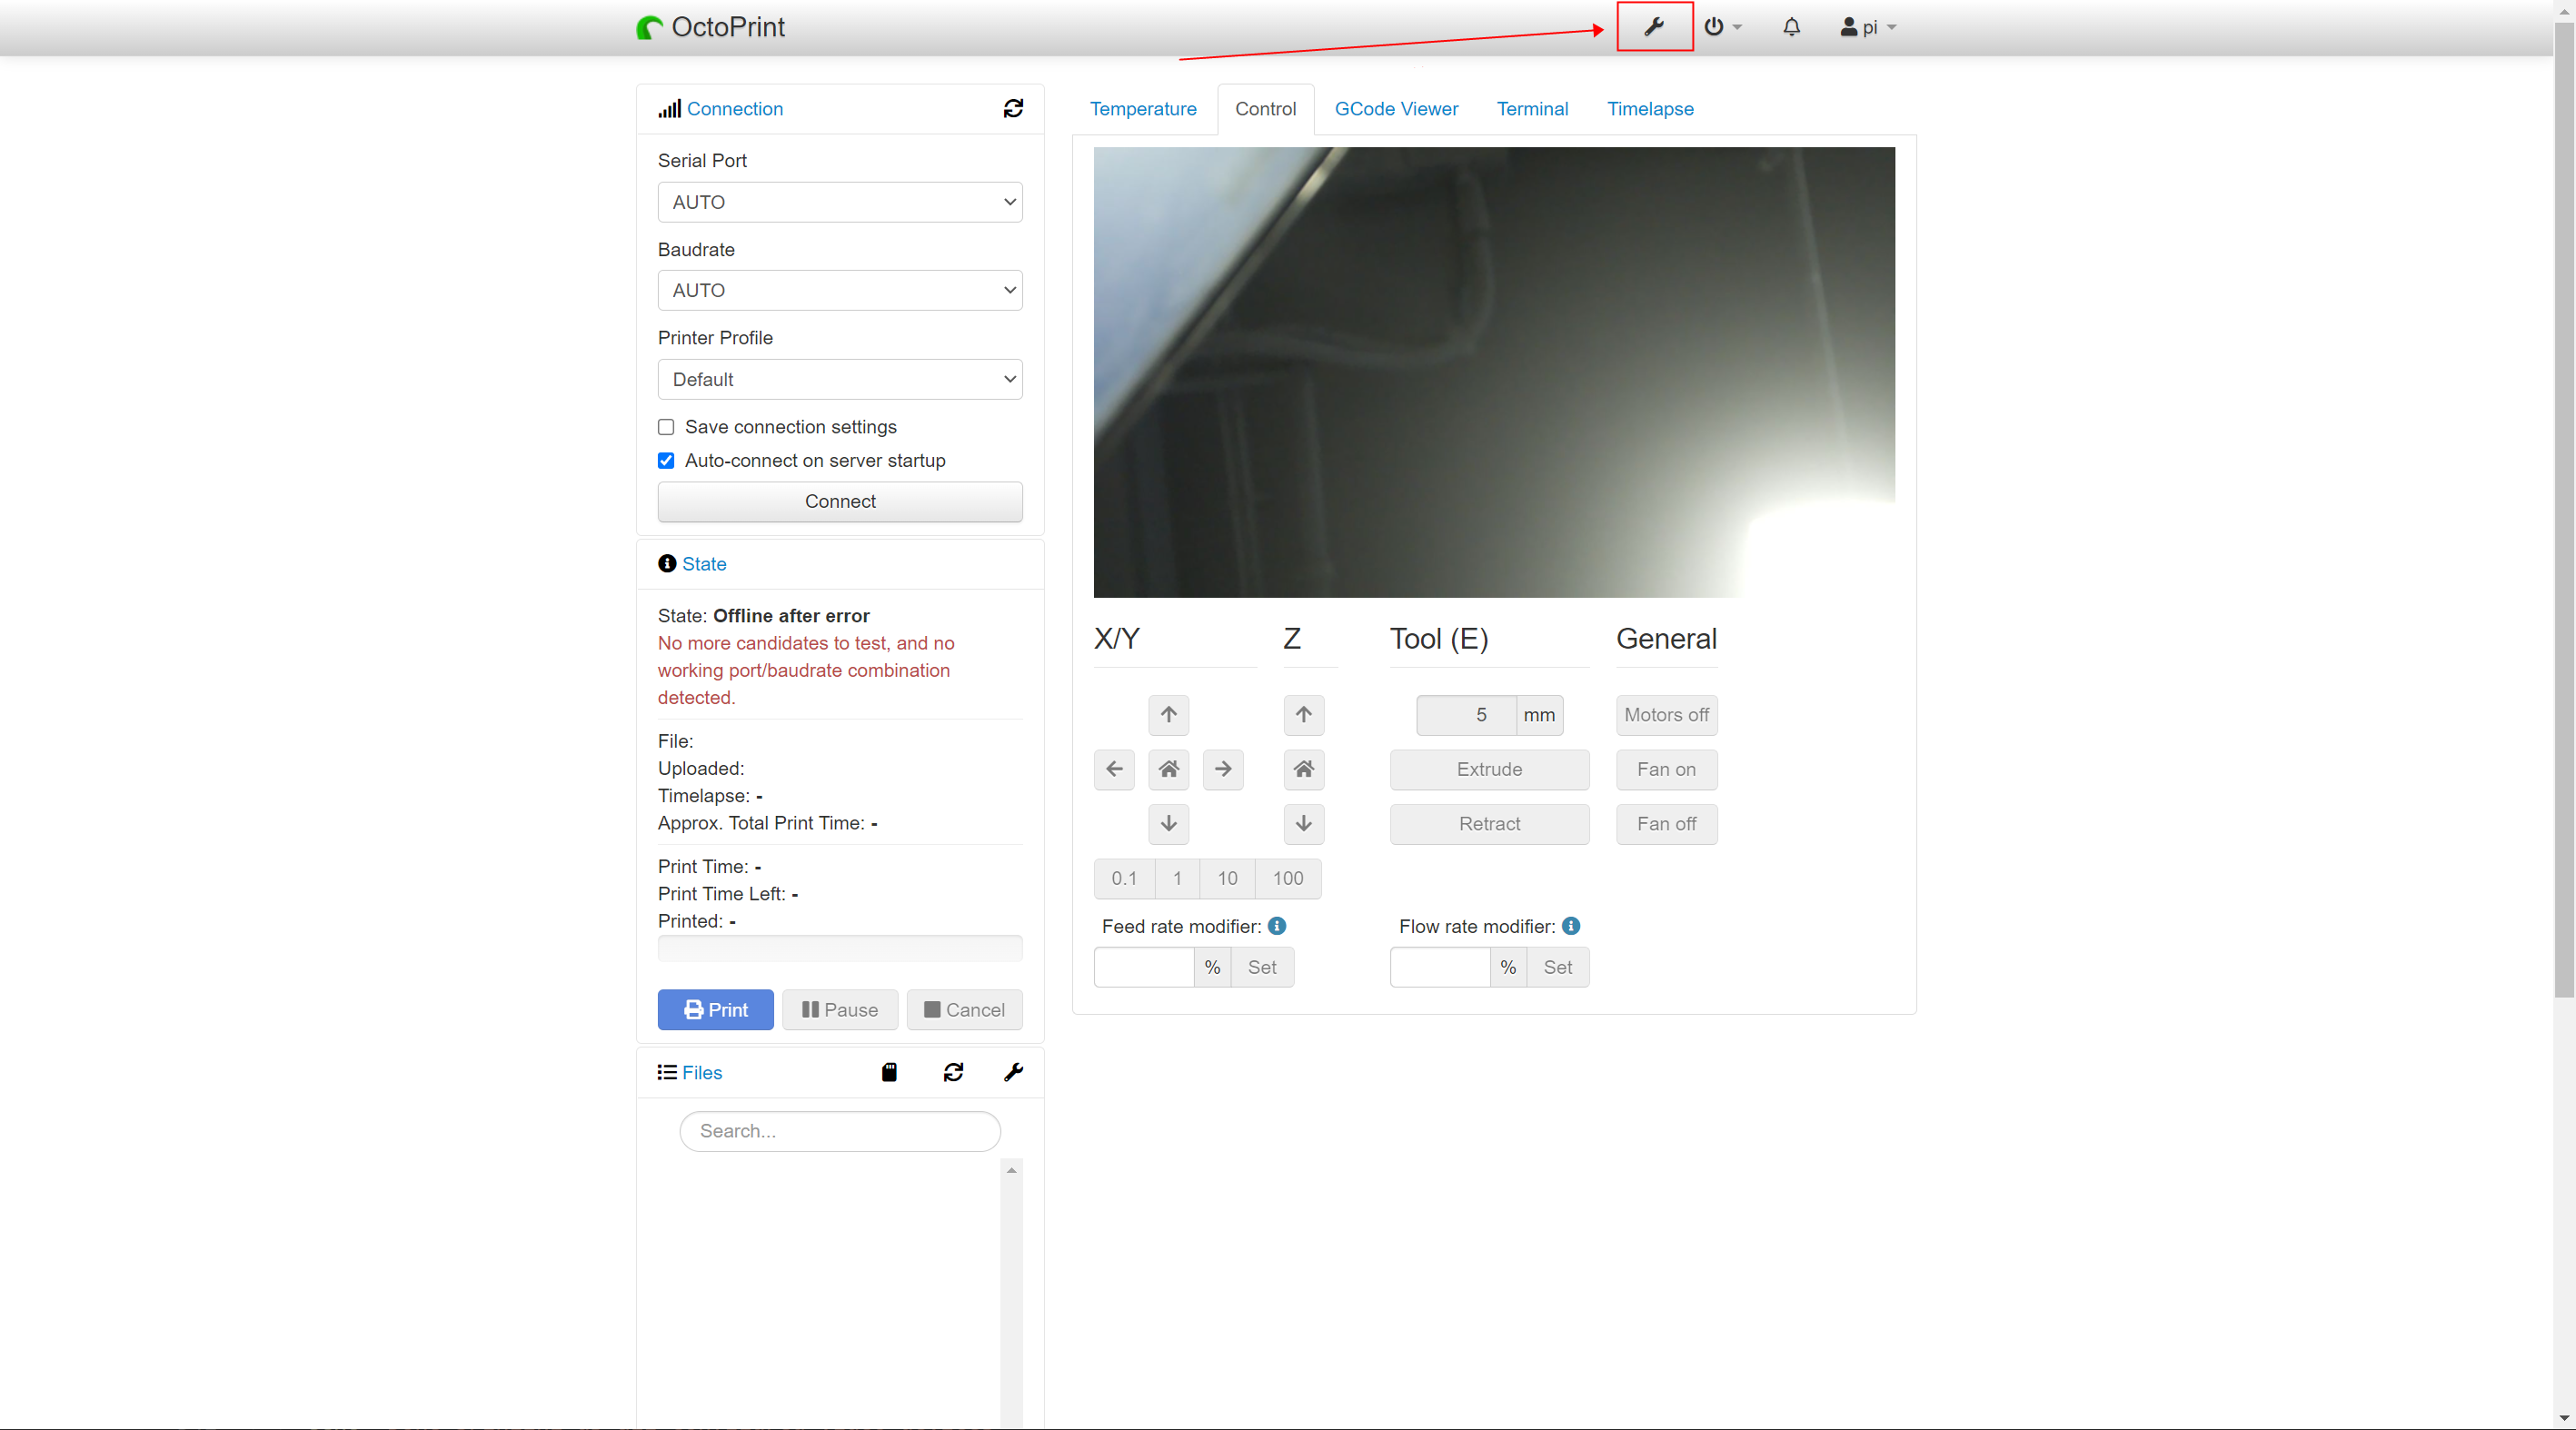
8.1. Display
Enter the device’s IP address(ipv4 address) in the browser address bar.
Click on the label pointed by the red arrow in the image below to view the image captured by the camera.
8.2. Control
Install control plugin
Click the button pointed by the arrow in the image below.
Follow the instructions to complete the plugin download.
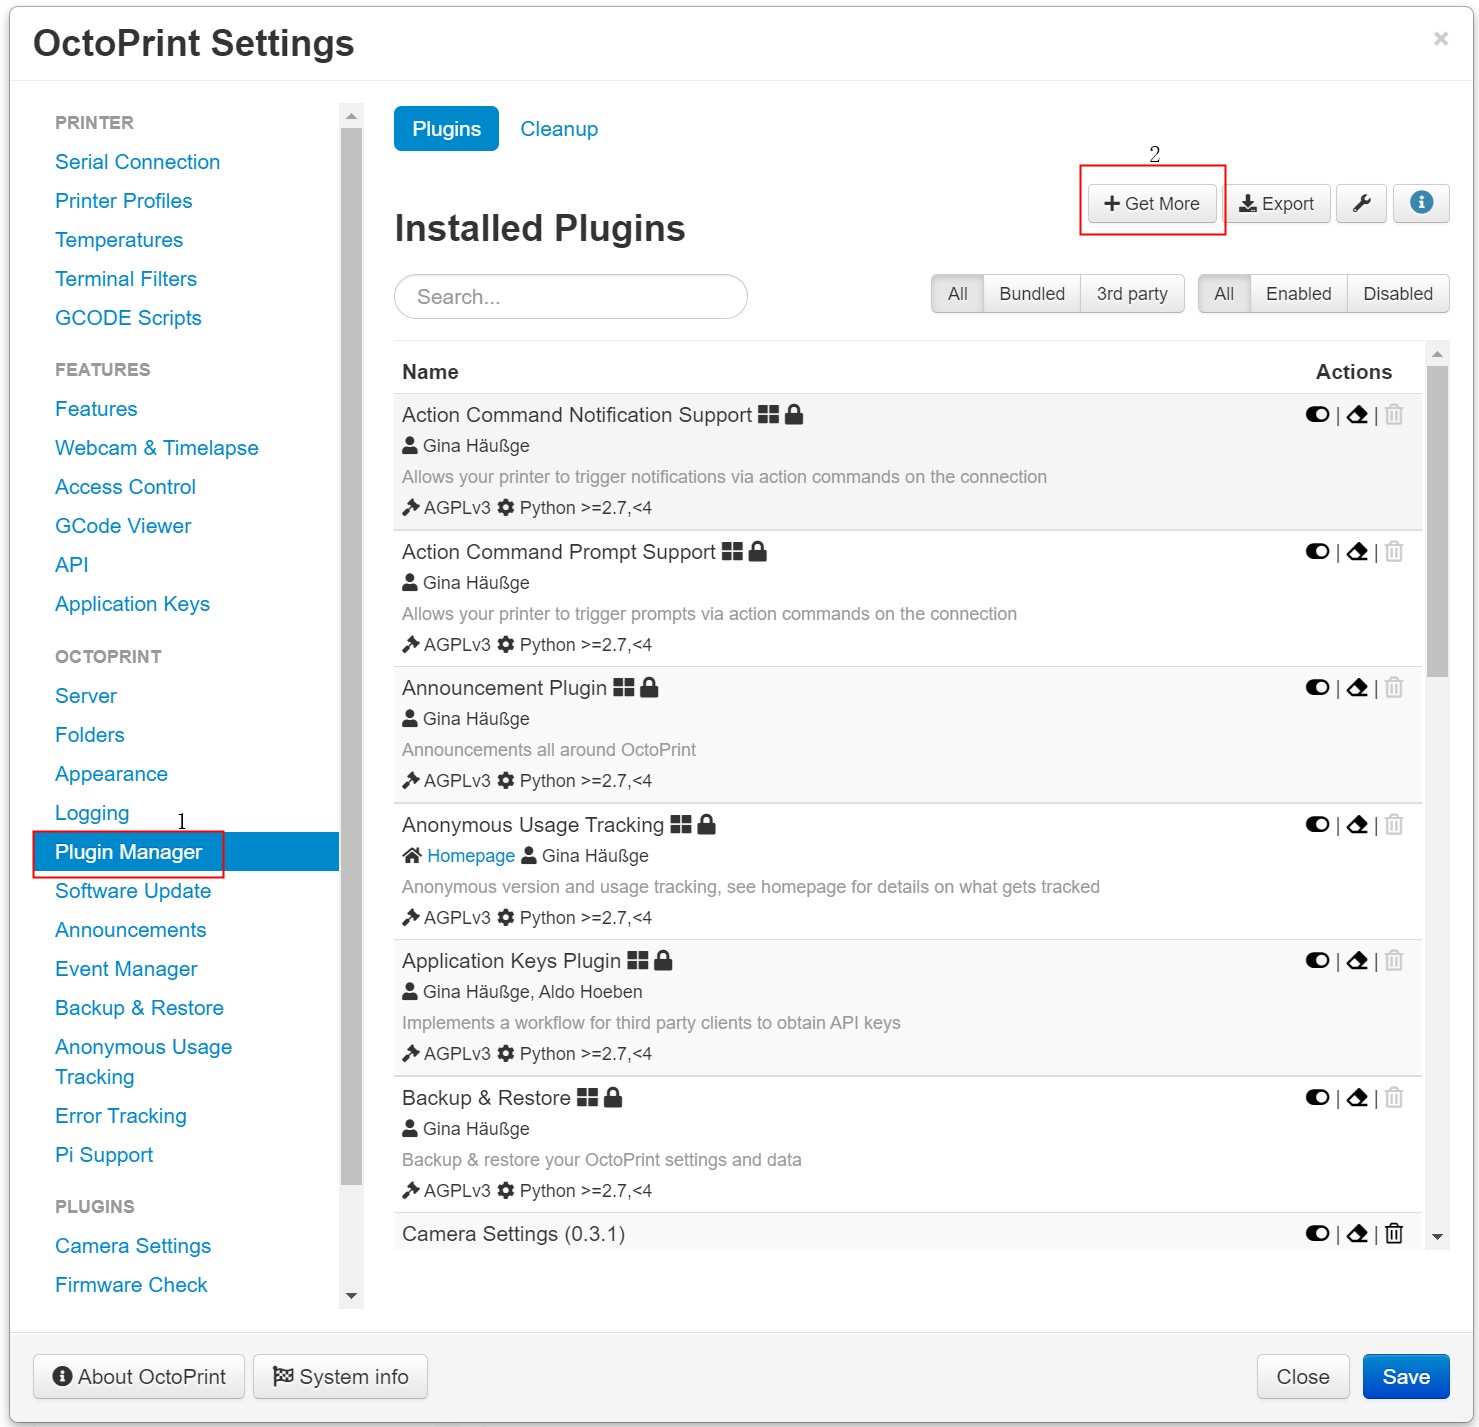
Copy the link to the location outlined in the diagram.
https://github.com/The-EG/OctoPrint-CameraSettings/archive/main.zip

Finally, follow the prompts on the page to restart the service.
sudo reboot
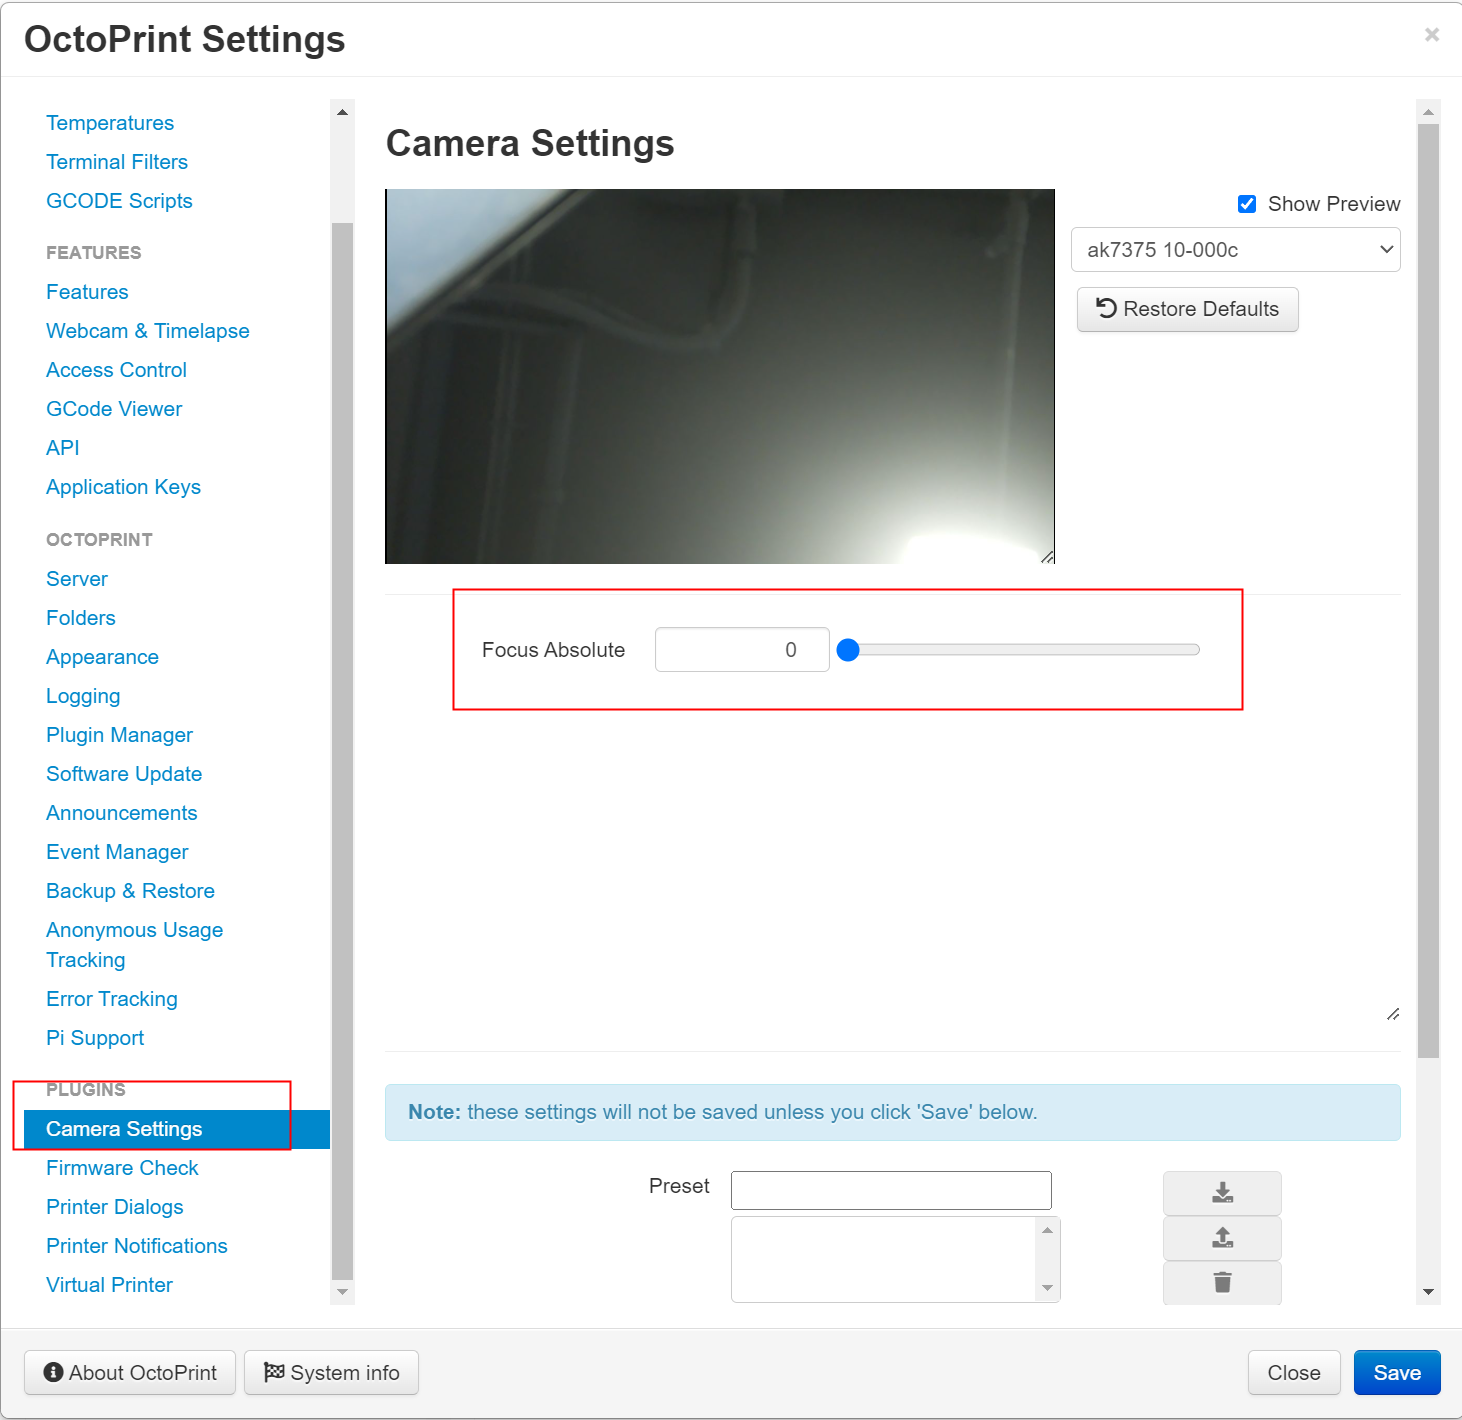
8.3. Manual Focus
If you want to realize the manual focus function of the autofocus camera, you need to select the appropriate mode during the setting parameter for libcamera plugin in step 5.2, and then perform subsequent configuration.
For example, if you need the manual focus function of OV5647 motorized focus Camera, please open the octopi.txt and add:
camera_libcamera_options="-afmode manual -fps 60 /usr/share/libcamera/ipa/rpi/vc4/ov5647_af.json"