Arducam HM01B0 QVGA Camera Module for Raspberry Pi Pico
Introduction
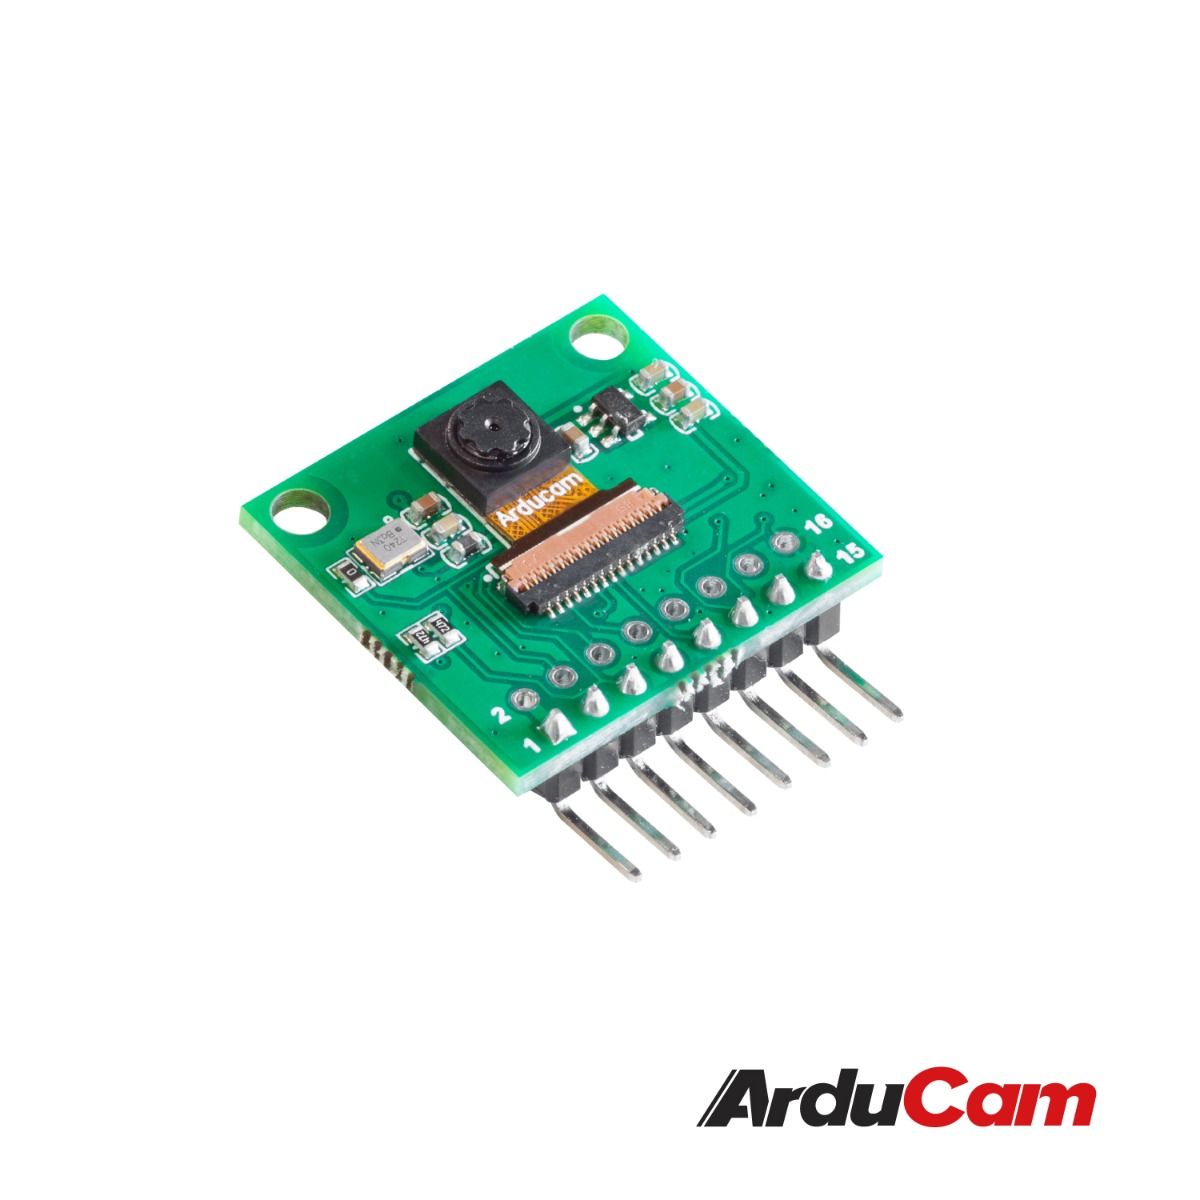
Arducam HM01B0 is a camera module featuring ultra-low power consumption, up to QVGA resolution, 1-bit video data interface and line sync. This, along with other specs makes it a perfect camera for building machine vision projects and Always on Service applications with energy-efficient MCUs. It’s designed specifically for Raspberry Pi Pico and other third-party RP2040 dev boards. It’s also a built-in camera of Arducam Pico4ML.
Schematic Diagram
B0315(HM01B0) Schematic Diagram
Sensor Datasheet
Features
- Ultra-Low Power Image Sensor designed for Always-on vision devices and applications
- High sensitivity 3.6μ BrightSenseTM pixel technology
- 324 x 324 active pixel resolution with support for QVGA window, vertical flip, and horizontal mirror readout
- <1.1mW QQVGA resolution at 30FPS, < 2mW QVGA resolution at 30FPS
- Programmable black level calibration target, frame size, frame rate, exposure, analog gain (up to 8x), and digital gain (up to 4x)
- Automatic exposure and gain control loop with support for 50 / 60Hz flicker avoidance
- Flexible 1-bit, 4-bit, and 8-bit video data interface with video frame and line sync
- Motion Detection circuit with programmable ROI and detection threshold with digital output to serve as an interrupt
- On-chip self oscillator
- I2C 2-wire serial interface for register access
- CSP and Bare Die sensor package option
- High CRA for low profile module design
Quick Setup
1. Hardware signal definition and wiring diagram

| HM01B0 | VCC | SCL | SDA | VSYNC | HREF | PCLK | DO | GND |
|---|---|---|---|---|---|---|---|---|
| PICO | 3V3 | GP5 | GP4 | GP16 | GP15 | GP14 | GP6 | GND |
2. How to develop HM01B0 on Arduino IDE
NOTE: Arduino Software installation and use reference:
https://www.arduino.cc/en/Guide
- Step 1
Open up the Arduino IDE and go to File->Preferences.
Enter the following URL in the "Additional Boards Manager URLs" field in the dialog that pops up.
https://www.arducam.com/downloads/Pico/package_pico4ML_index.json
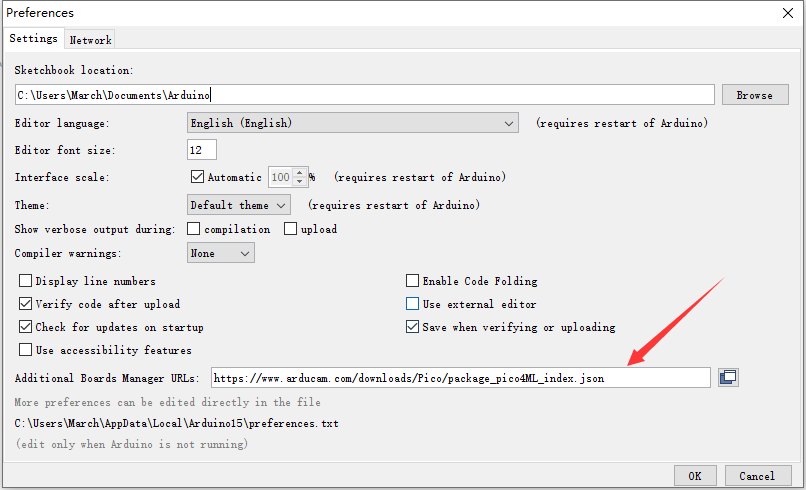
Click OK and you will close the dialog.
- Step 2
Go to Tools->Boards->Board Manager in the IDE.
Type "pico" in the search box and select "Add".
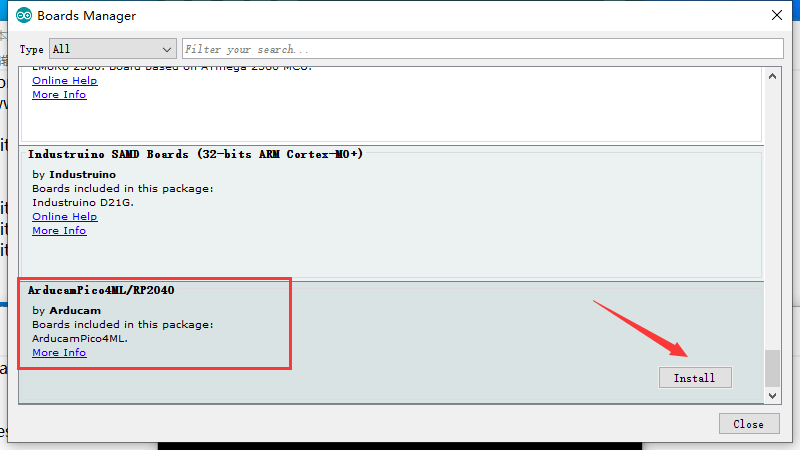
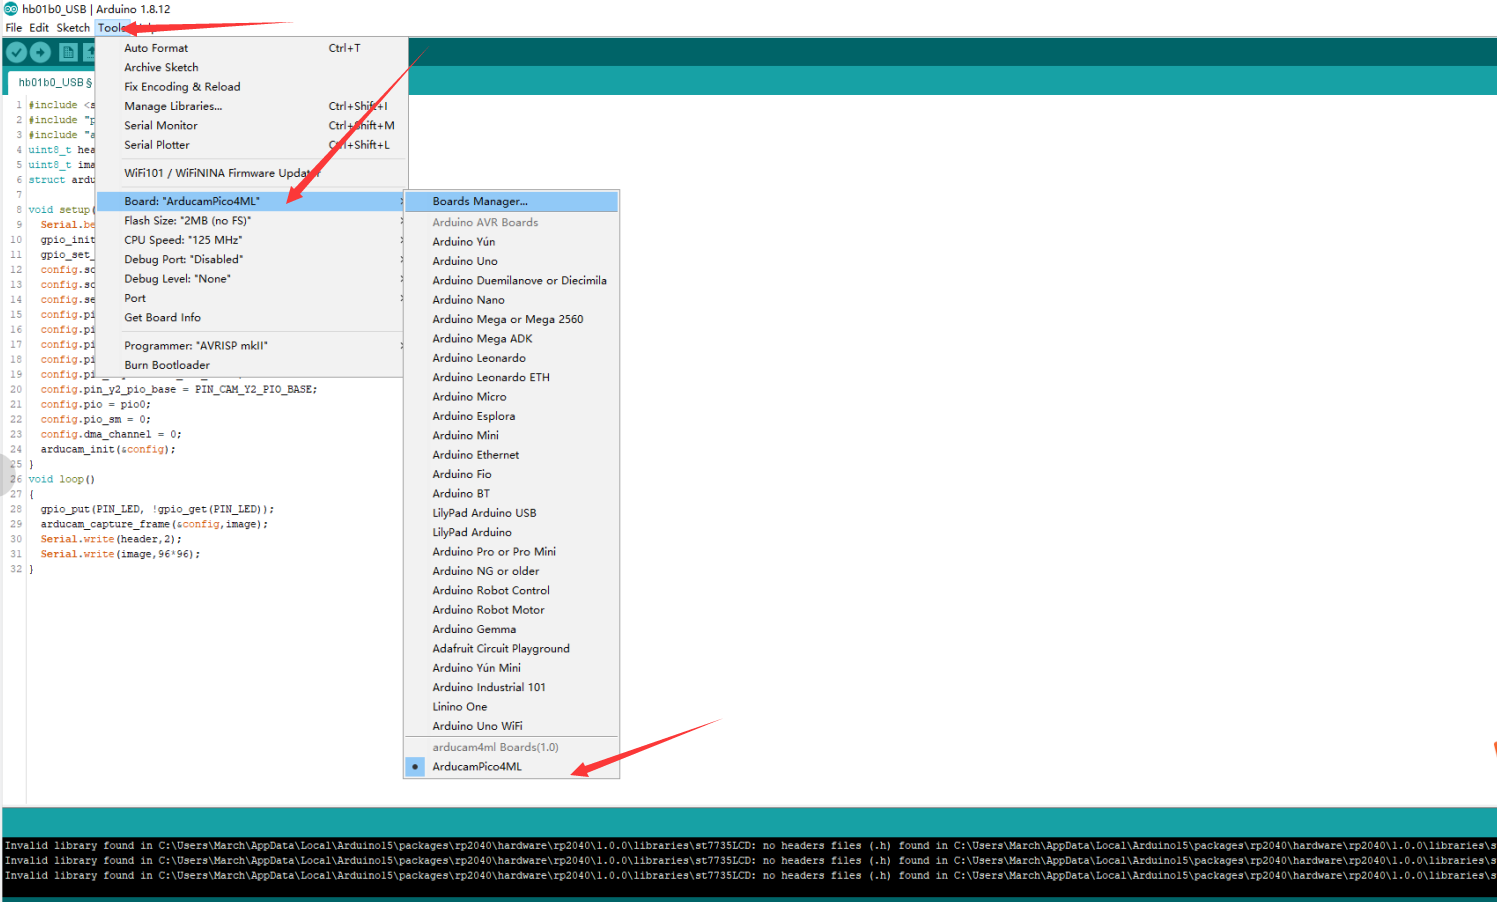
Select your development board.
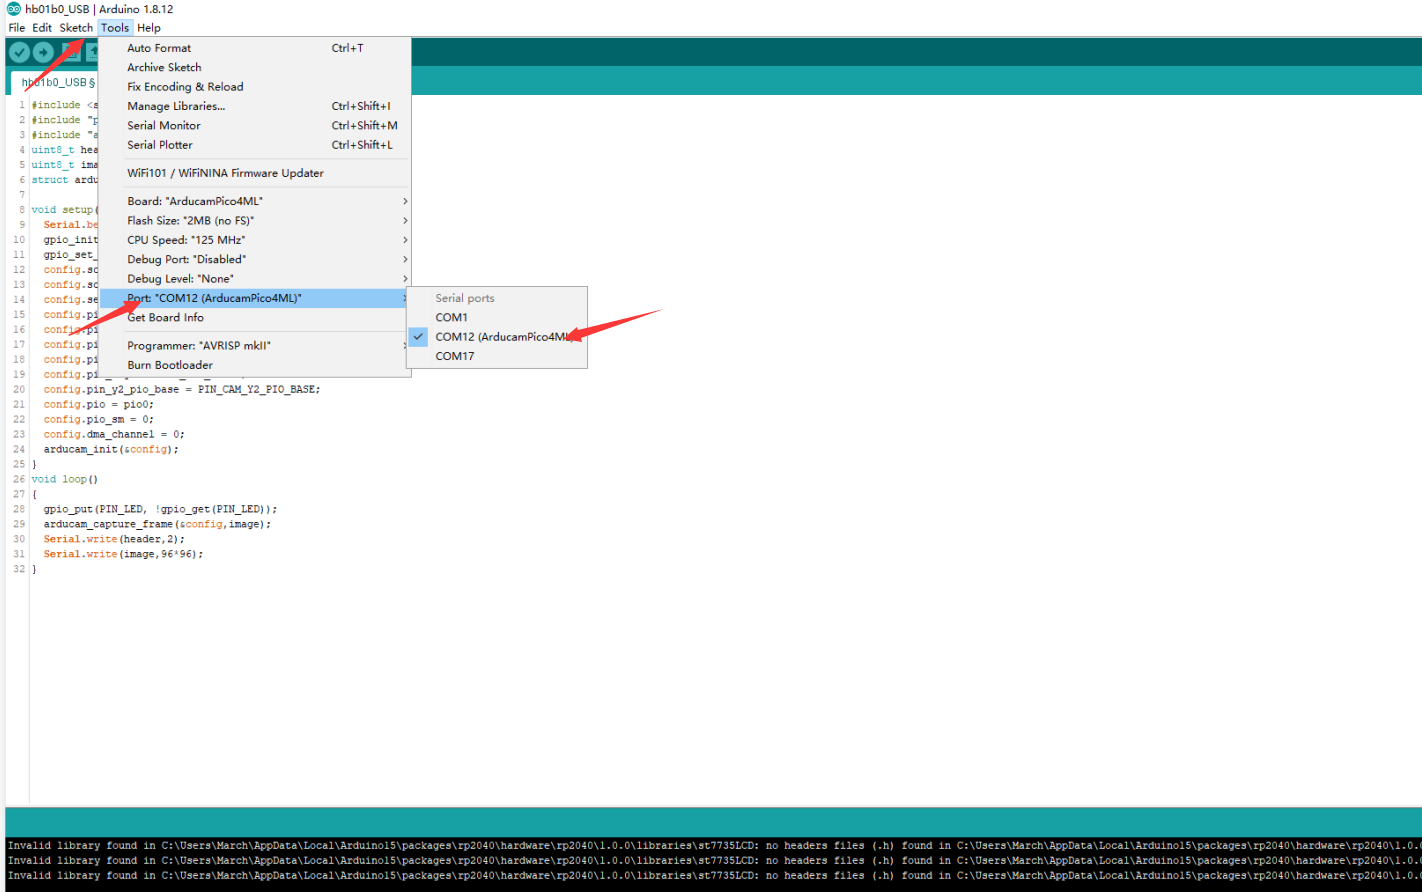
Make sure you are connected to the development board, look at the port number and select it.
NOTE: The port number will be different due to Arduino recognition.
- Step 3
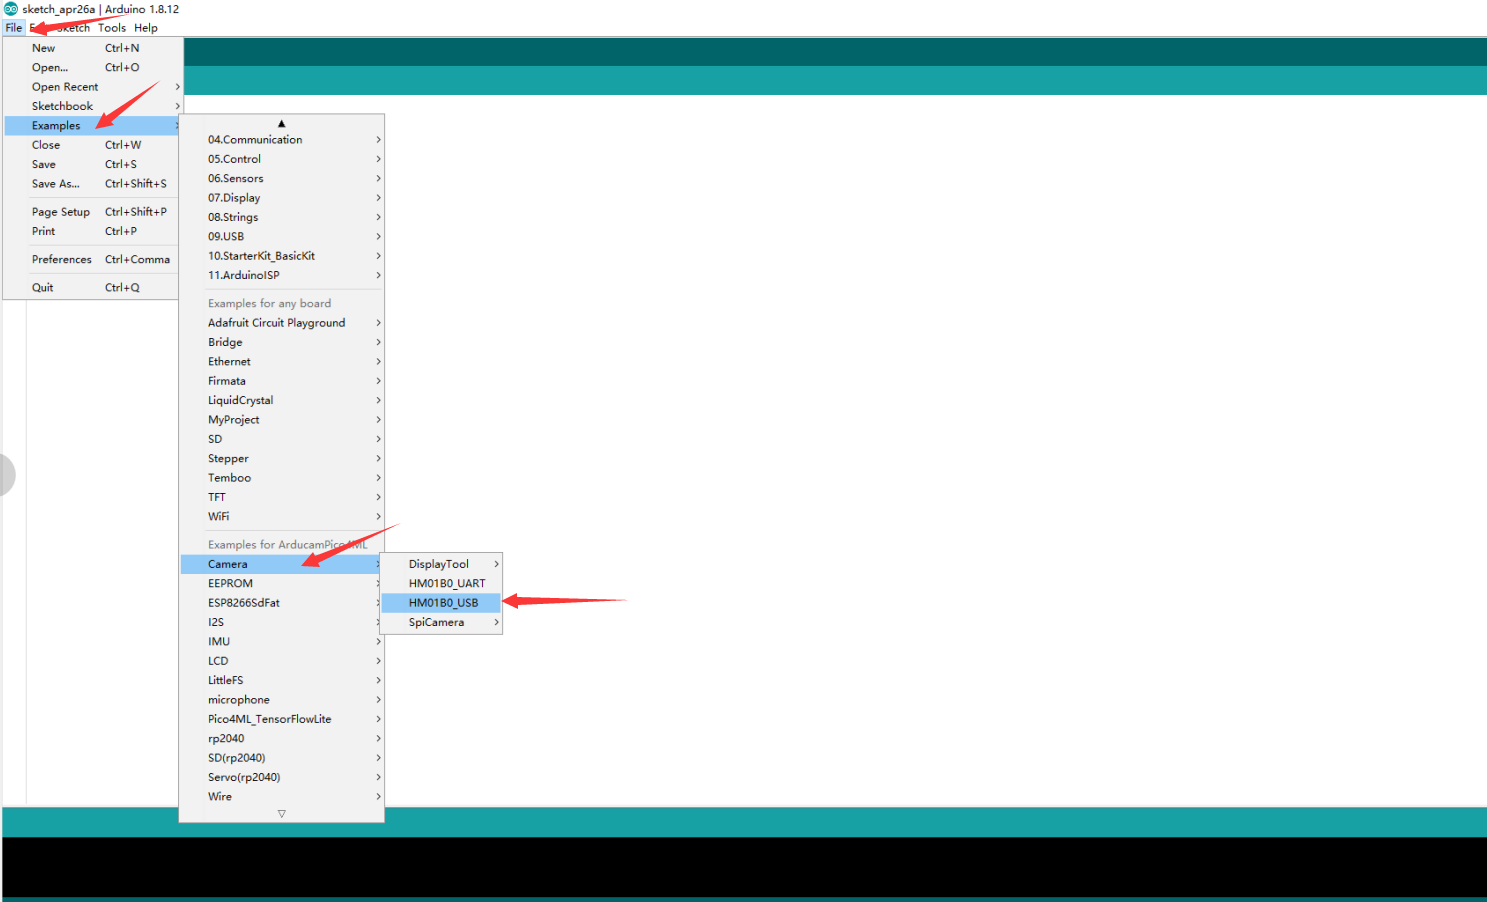
Select HM01B0 USB output example.
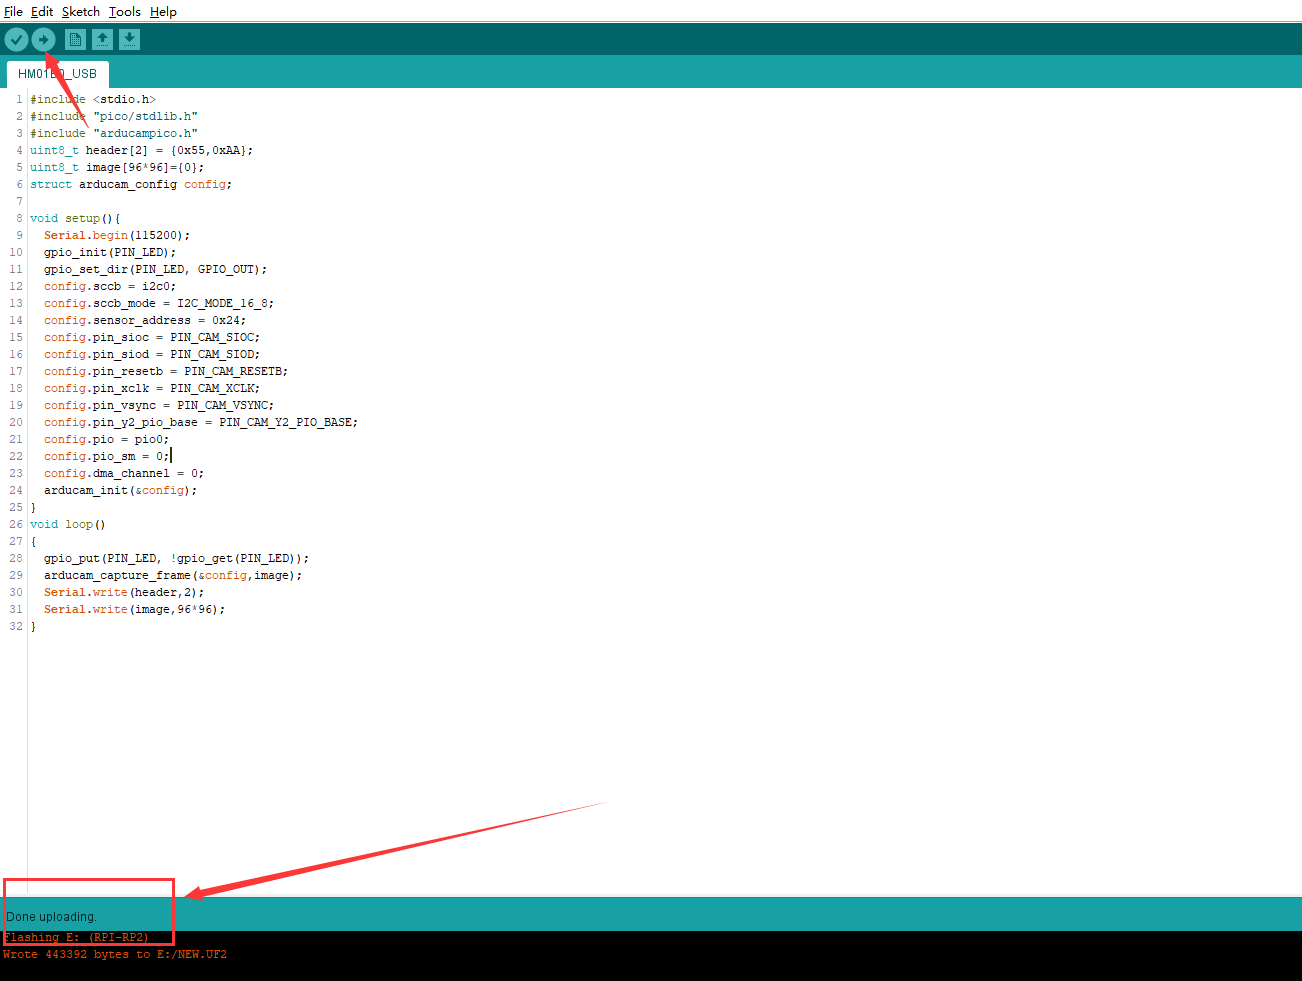
Click Download and wait for the download to complete.
- Step 4
Get Processing Script:
https://github.com/ArduCAM/RPI-Pico-Cam/blob/master/rp2040_hm01b0/display/preview.pde
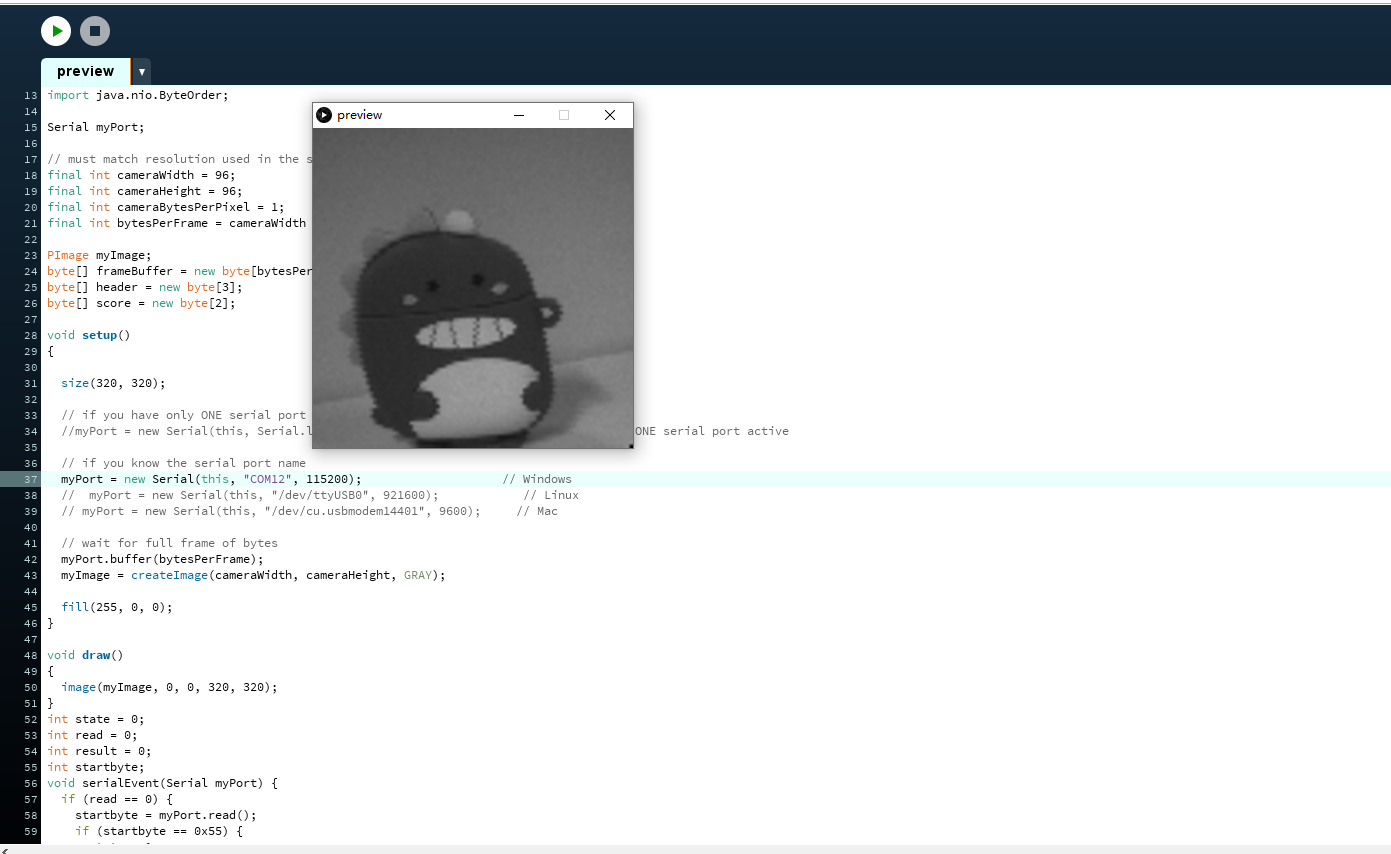
Change the port number to the port recognized by Arduino in the script, and run the script in the Processing software.

NOTE: Processing Software installation and use reference:
https://processing.org/tutorials/
- The preview image