Quick start
Hardware
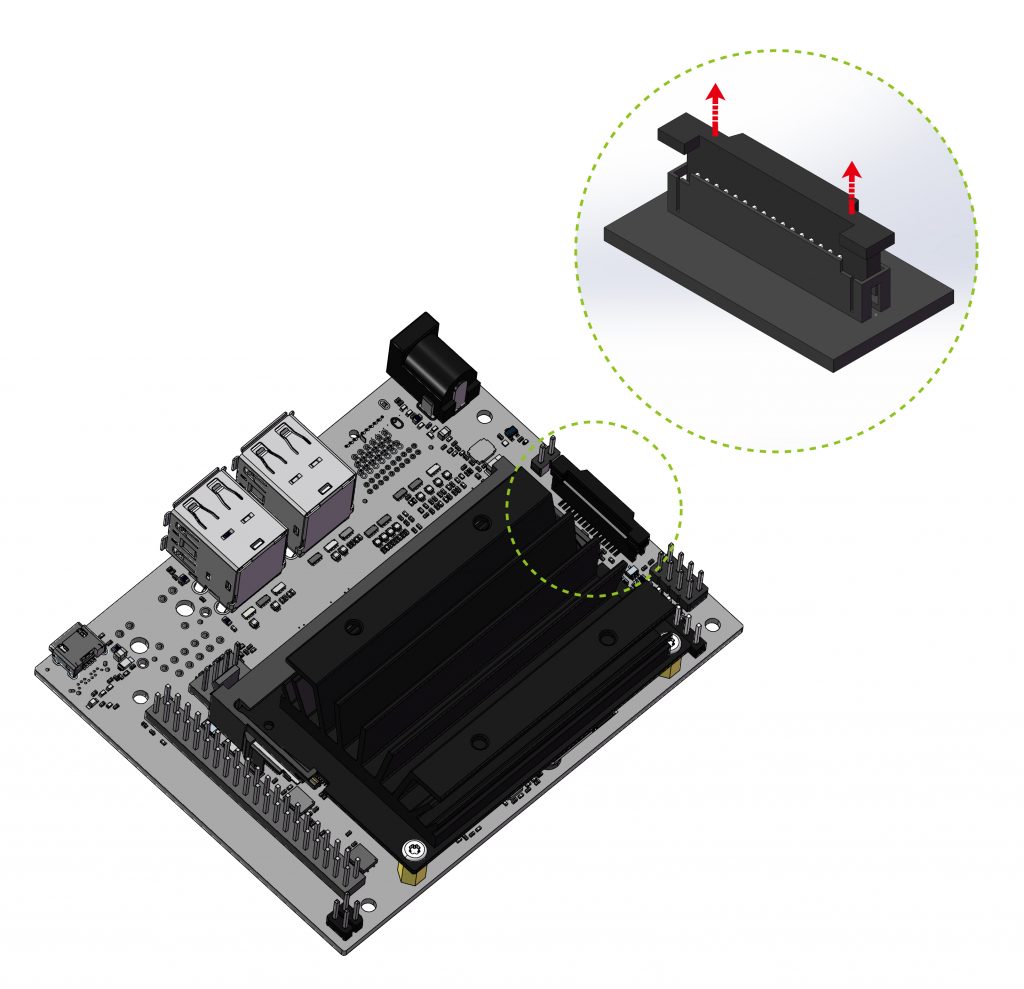
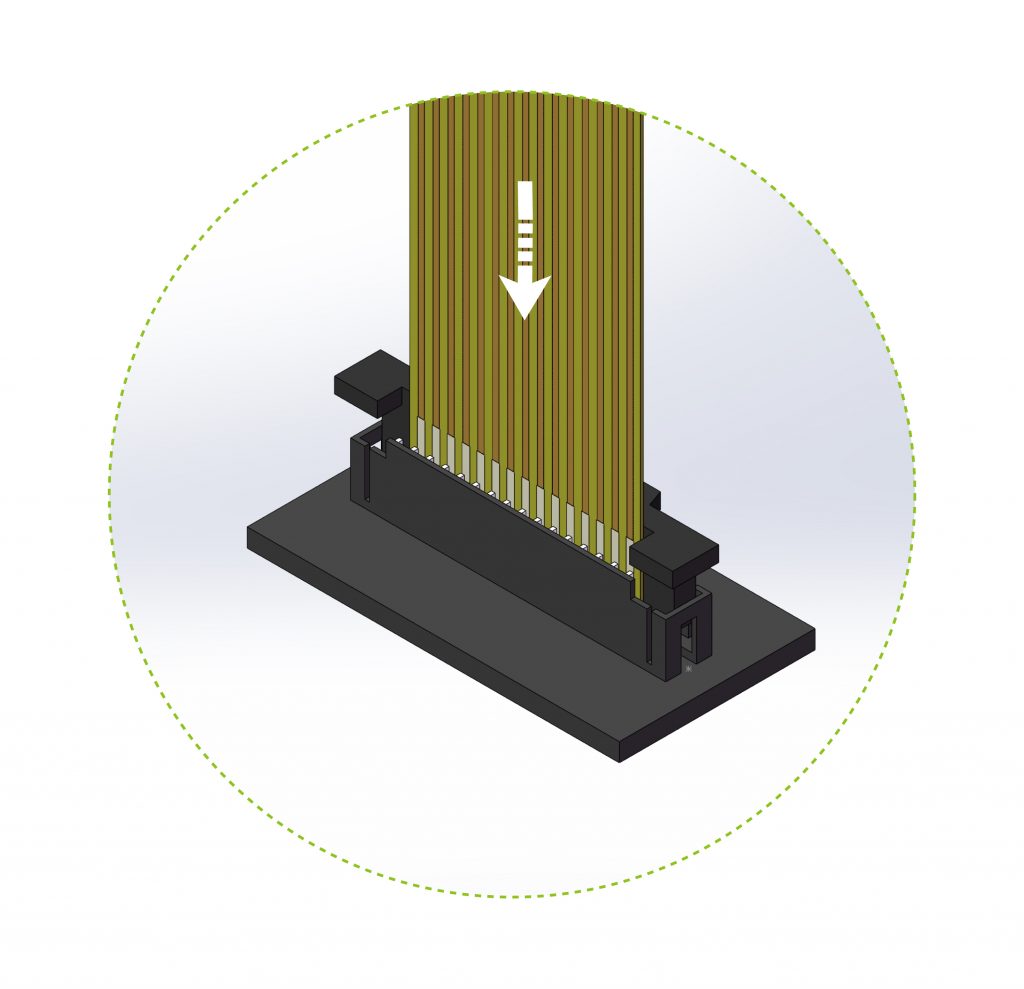
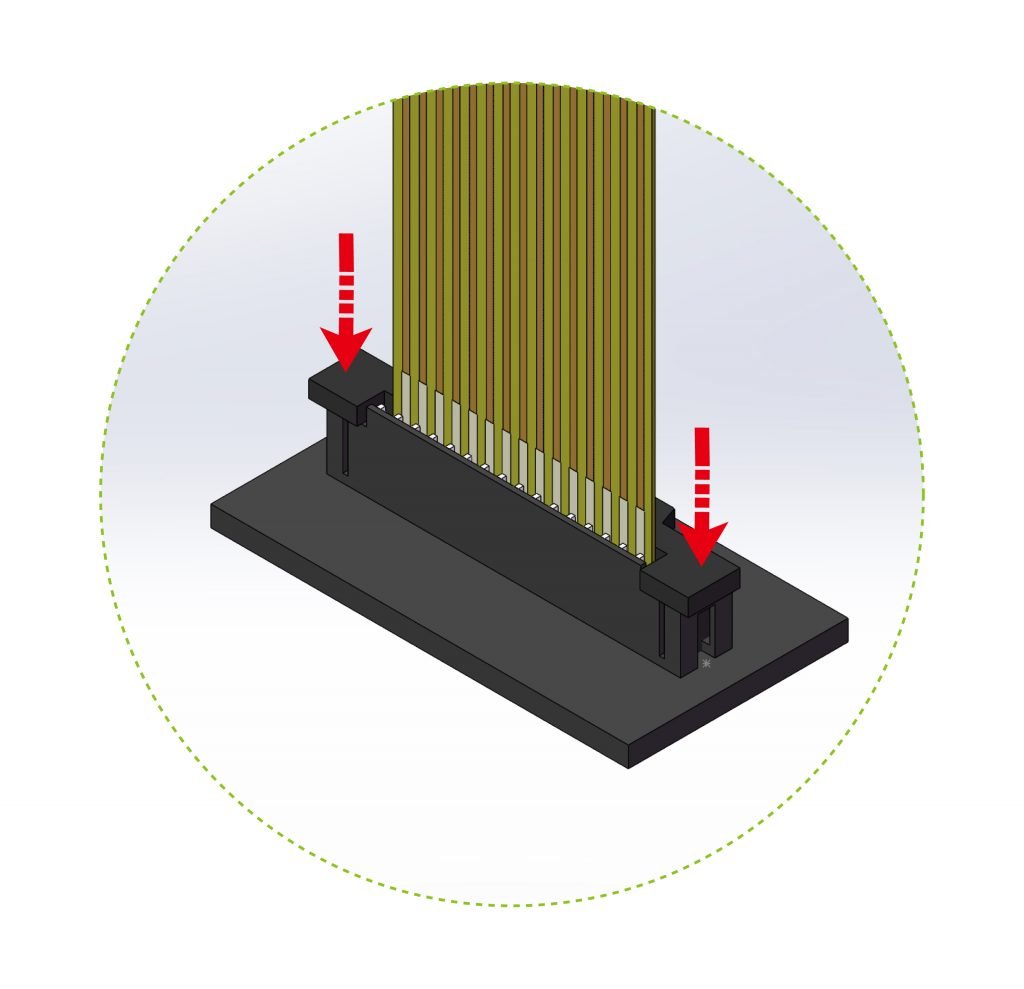
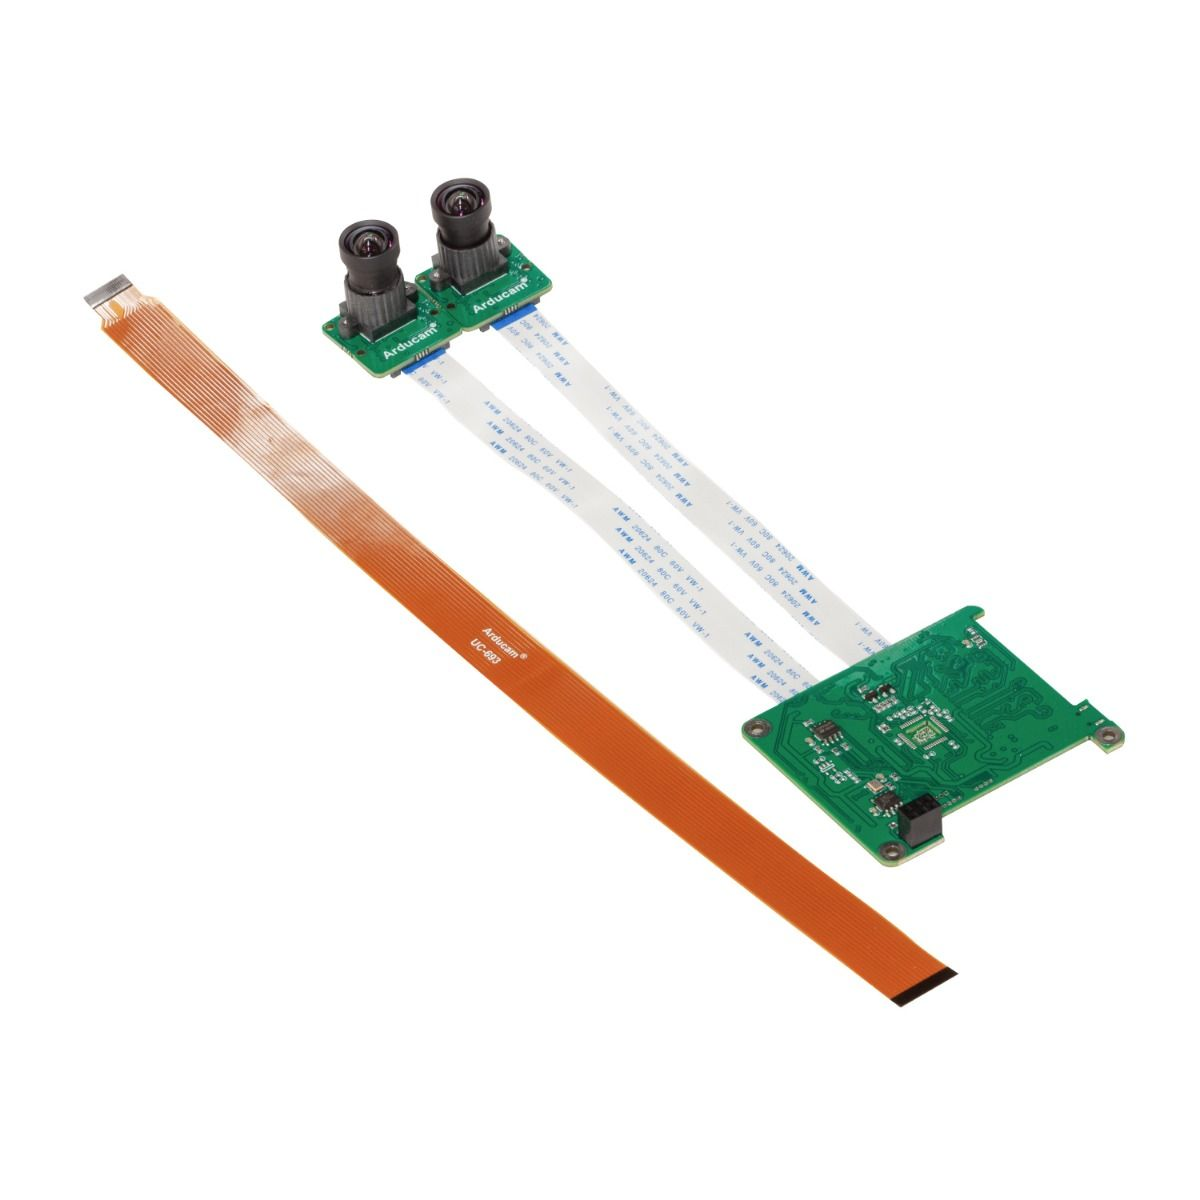
Connect the ribbon cable
 |
 |
 |
|---|---|---|
| Connect to the Camera Board | Connect to the CamArray HAT | Connect to the CamArray HAT |
 |
 |
 |
|---|---|---|
| Open the Jetson Nano connector (any one) in the direction of the arrow | Insert the ribbon cable into the connector with the contact side facing inward | Close the connector |
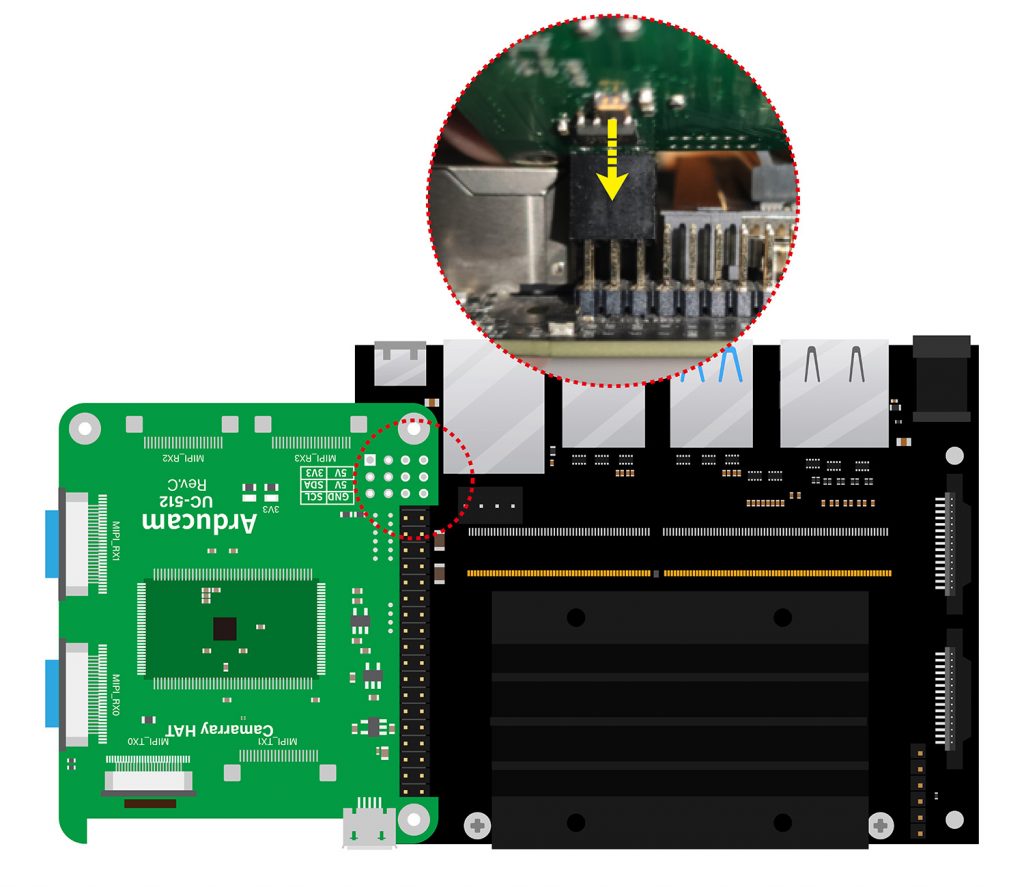
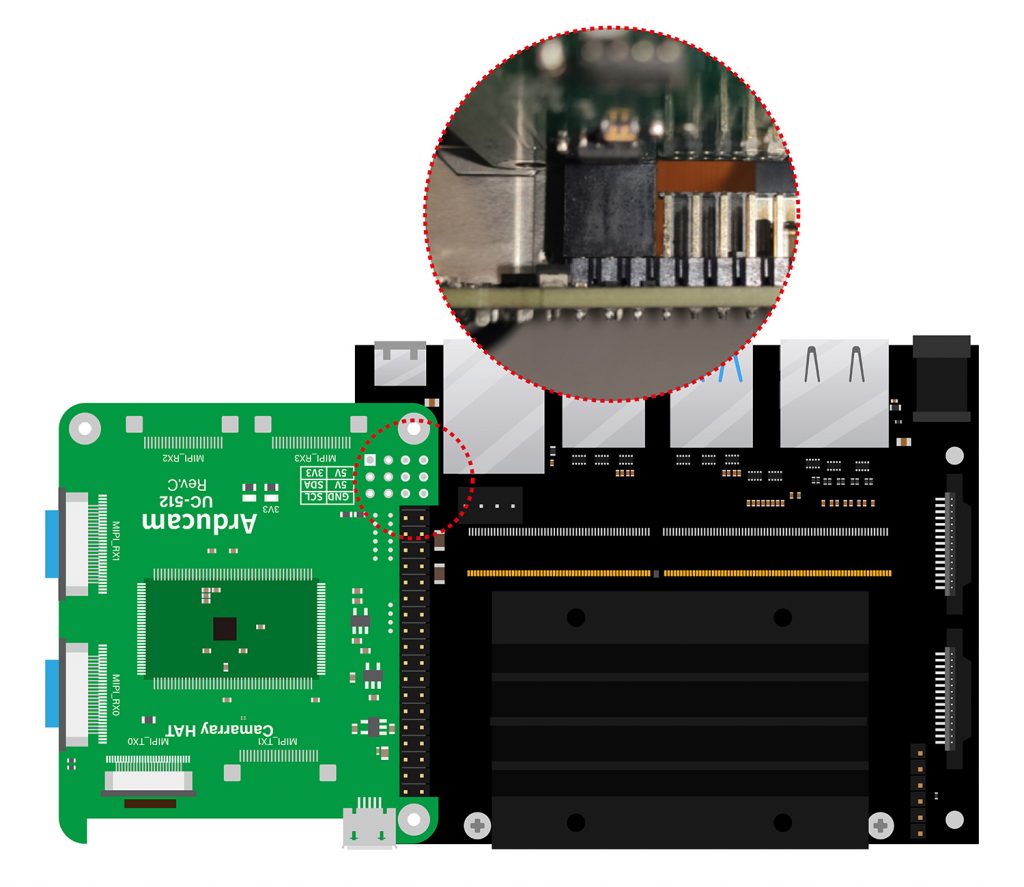
Plug CamArray HAT into Jetson Nano GPIO Header
 |
 |
|---|---|
| Step1 | Step2 |
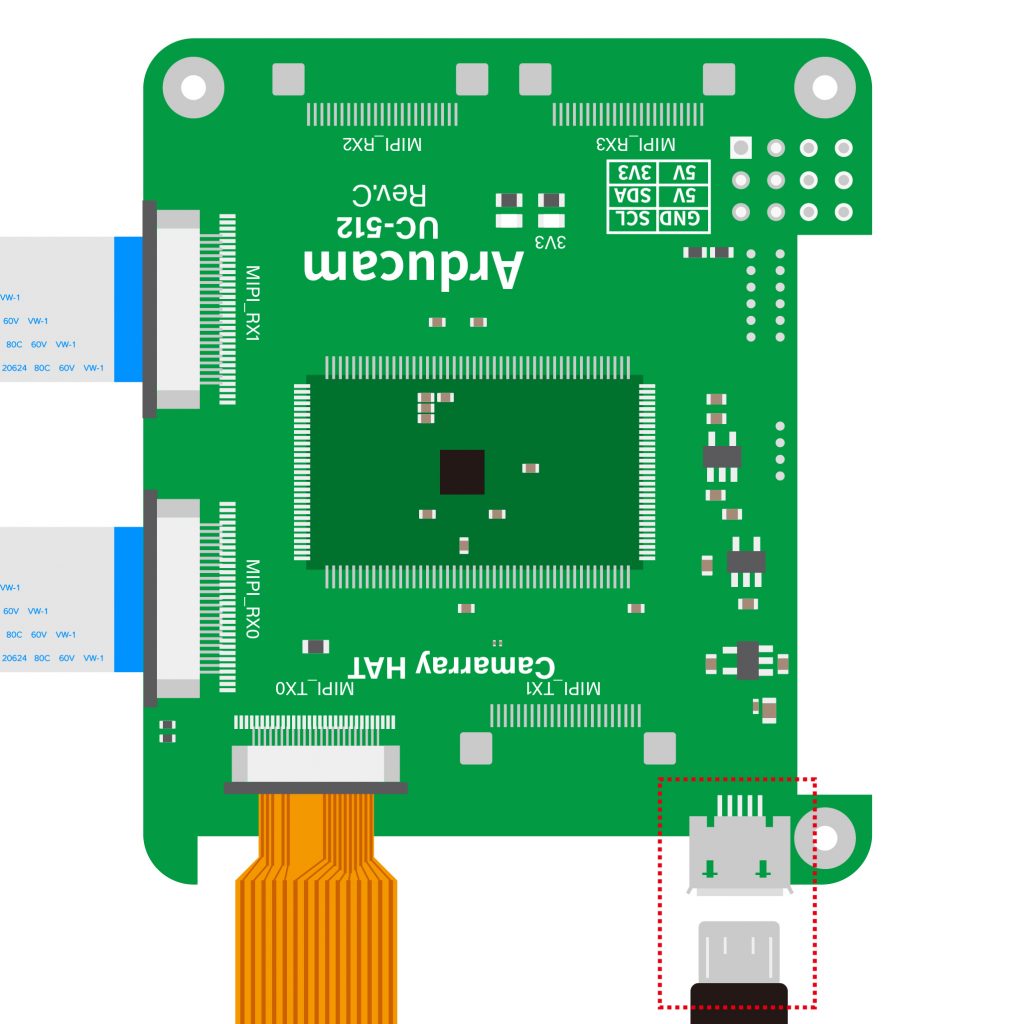
Plug CamArray HAT into Jetson Nano USB Port
In addition to the above power supply mode, you can also choose to supply via USB
 |
 |
|---|---|
| Plug the USB Port on Hat | Plug the USB Type-A Port on Jetson |
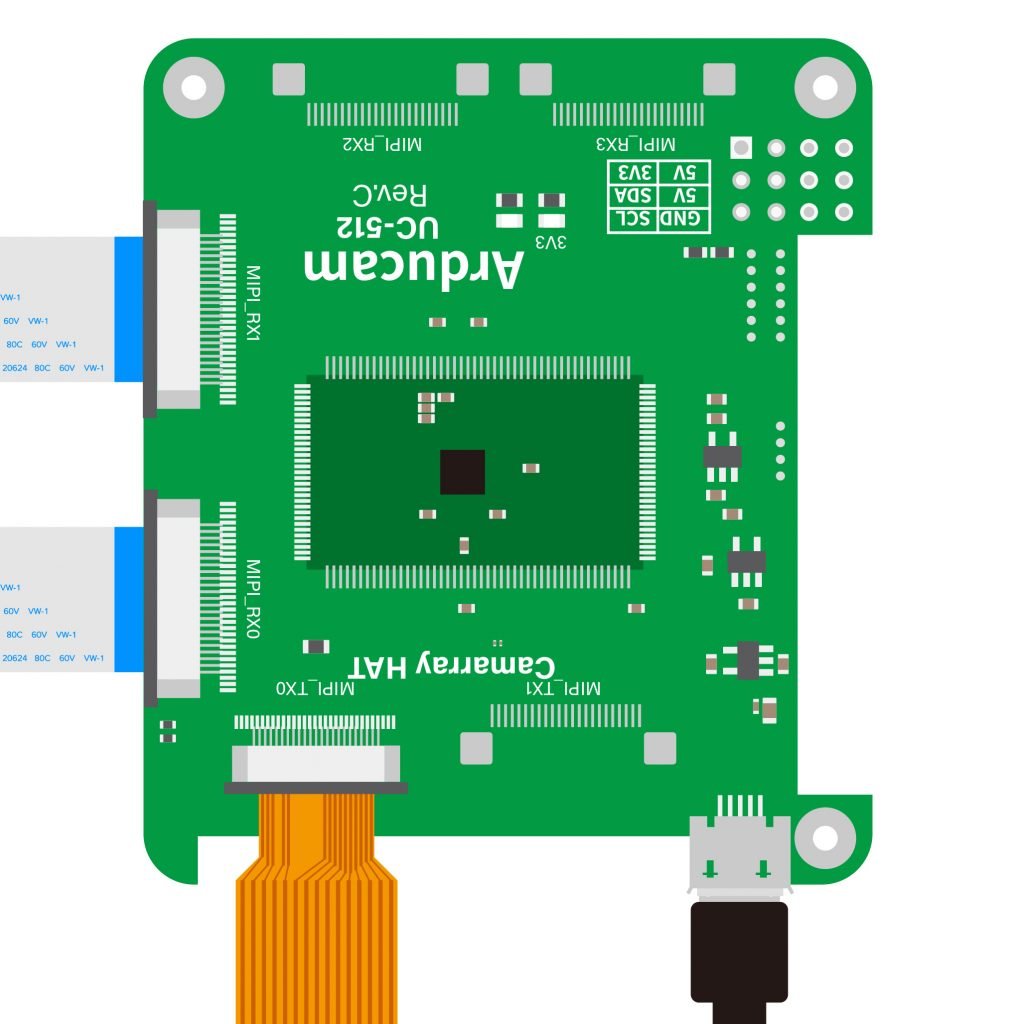
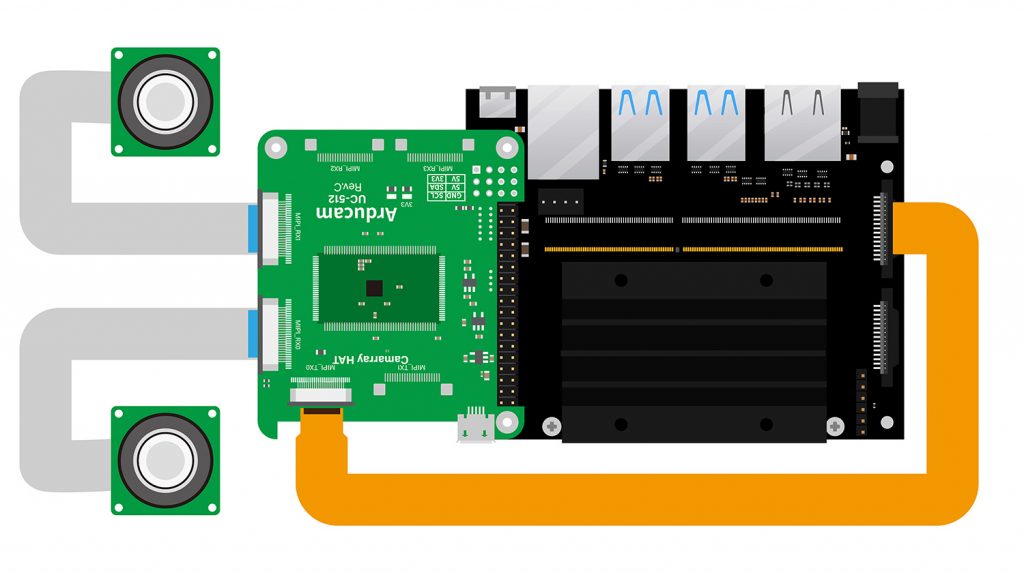
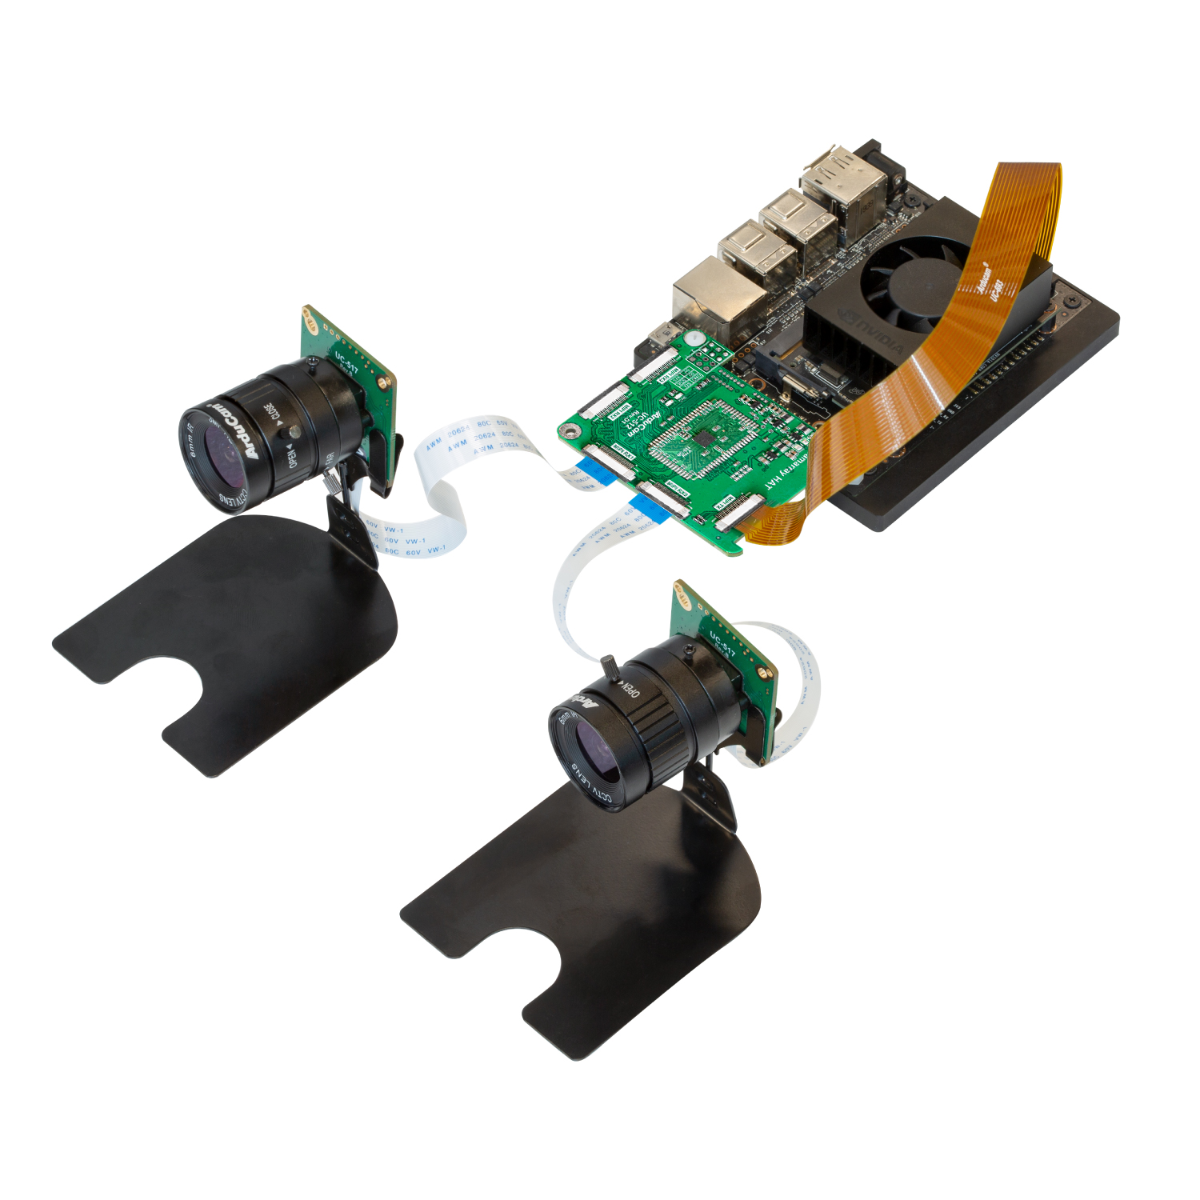
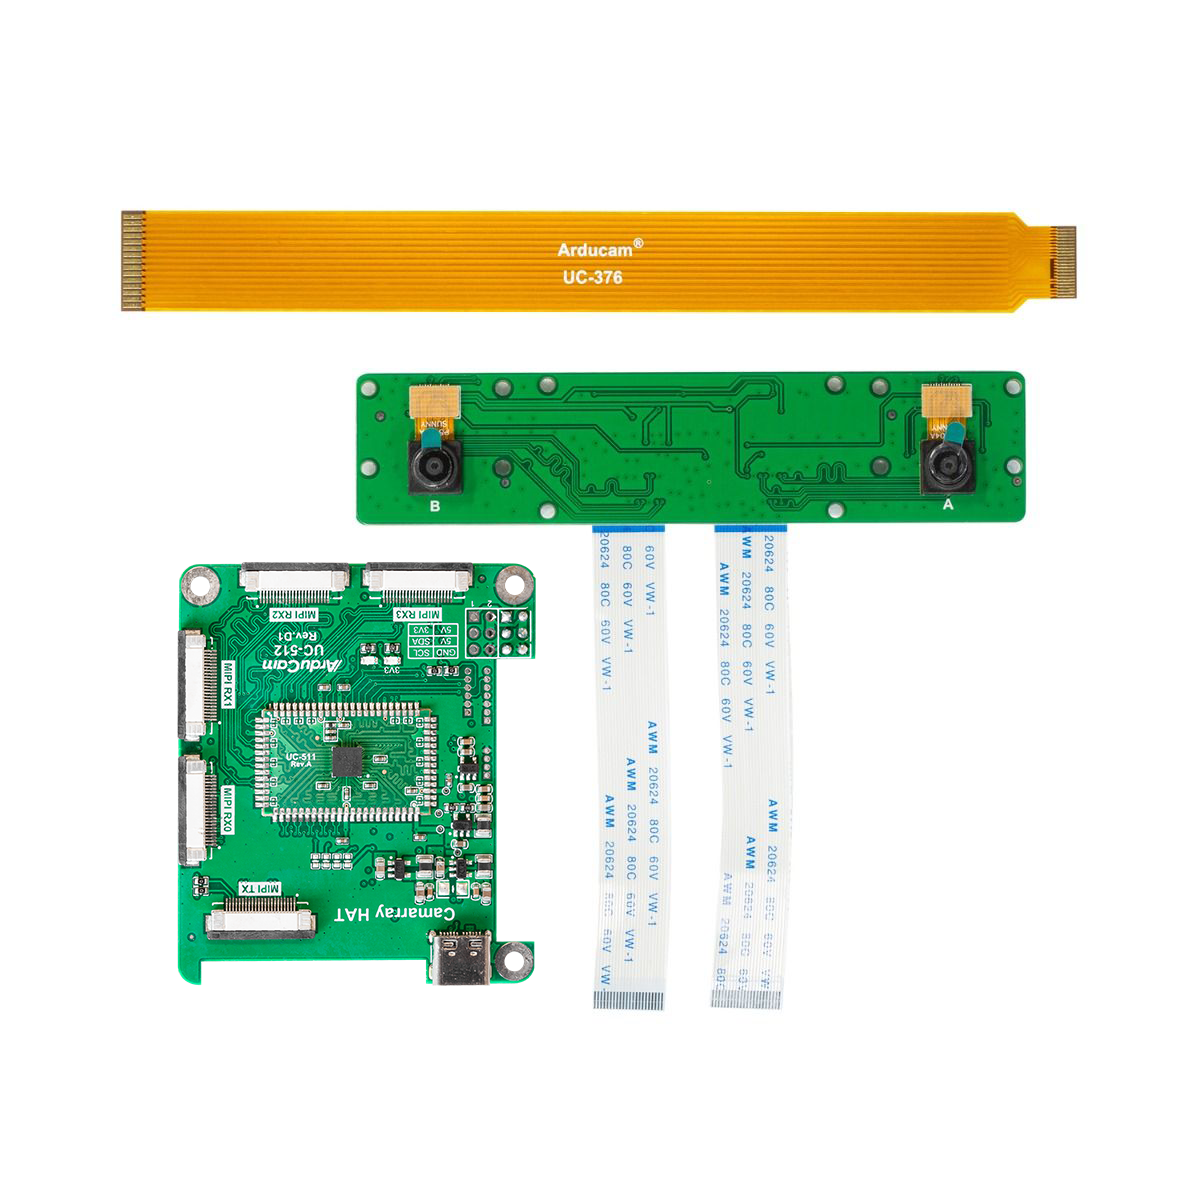
Connection Overview
Notice
The following diagram shows the connection overview of Arducam CamArray Hat and NVIDIA Jetson Nano.
Connecting the Arducam CamArray HAT to the NVIDIA Jetson Orin series is the same as that of the NVIDIA Jetson Nano, but you need to use the official carrier board.
Software
Supported Platforms and JetPack L4T versions
Please refer to the following doc for specific supported Platforms and JetPack versions:
Supported Platforms and JetPack Version - Arducam Camera for NVIDIA Jetson
For Native camera
There is two types of native camera, respectively are imx219 and imx477
| Product Image | SKU | Sensor | Resolution | Pin/Connect Type | Features | Lens Type | Field of View(HxV) | Focus Type | IR Sensitivity |
|---|---|---|---|---|---|---|---|---|---|
 |
B0347N | IMX477 | 12MP | 15/Bottom | Stereo Camera | M12 | 75°(H) x 56°(V) | Manual Focus | 650nm IR-cut Filter |
 |
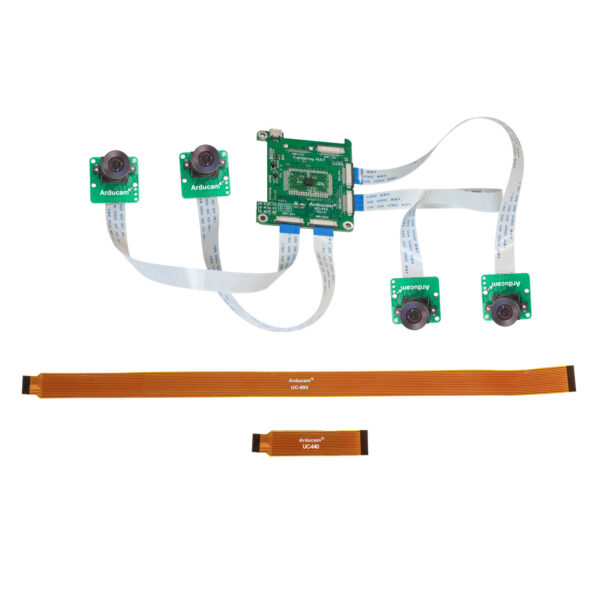
B0396 | IMX219 | 8MP | Quad Camera | Stock Lens | 62.2° (H) x 48.8° (V) | Fixed Focus | ||
 |
B0265N | IMX477 | 12MP | 15/Bottom | Stereo Camera | CS | 65°(H) x 48.7°(V) | Manual Focus | 650nm IR-cut filter |
 |
B0397 | 12MP | Quad Camera | M12 | 75°(H) x 56°(V) | ||||
 |
B0217J8 | IMX219 | 8MP | 15/Bottom | Stereo Camera | Stock Lens | 62.2° (H) x 48.8° (V) | Fixed Focus | 650nm IR-cut filter |
 |
B0388 | IMX519 | 16MP | 15/Bottom | Quad-Camera Kit | Stock Lens | 66°(H) x 49.5°(V) | Motorized Focus | 650nm IR-cut filter |
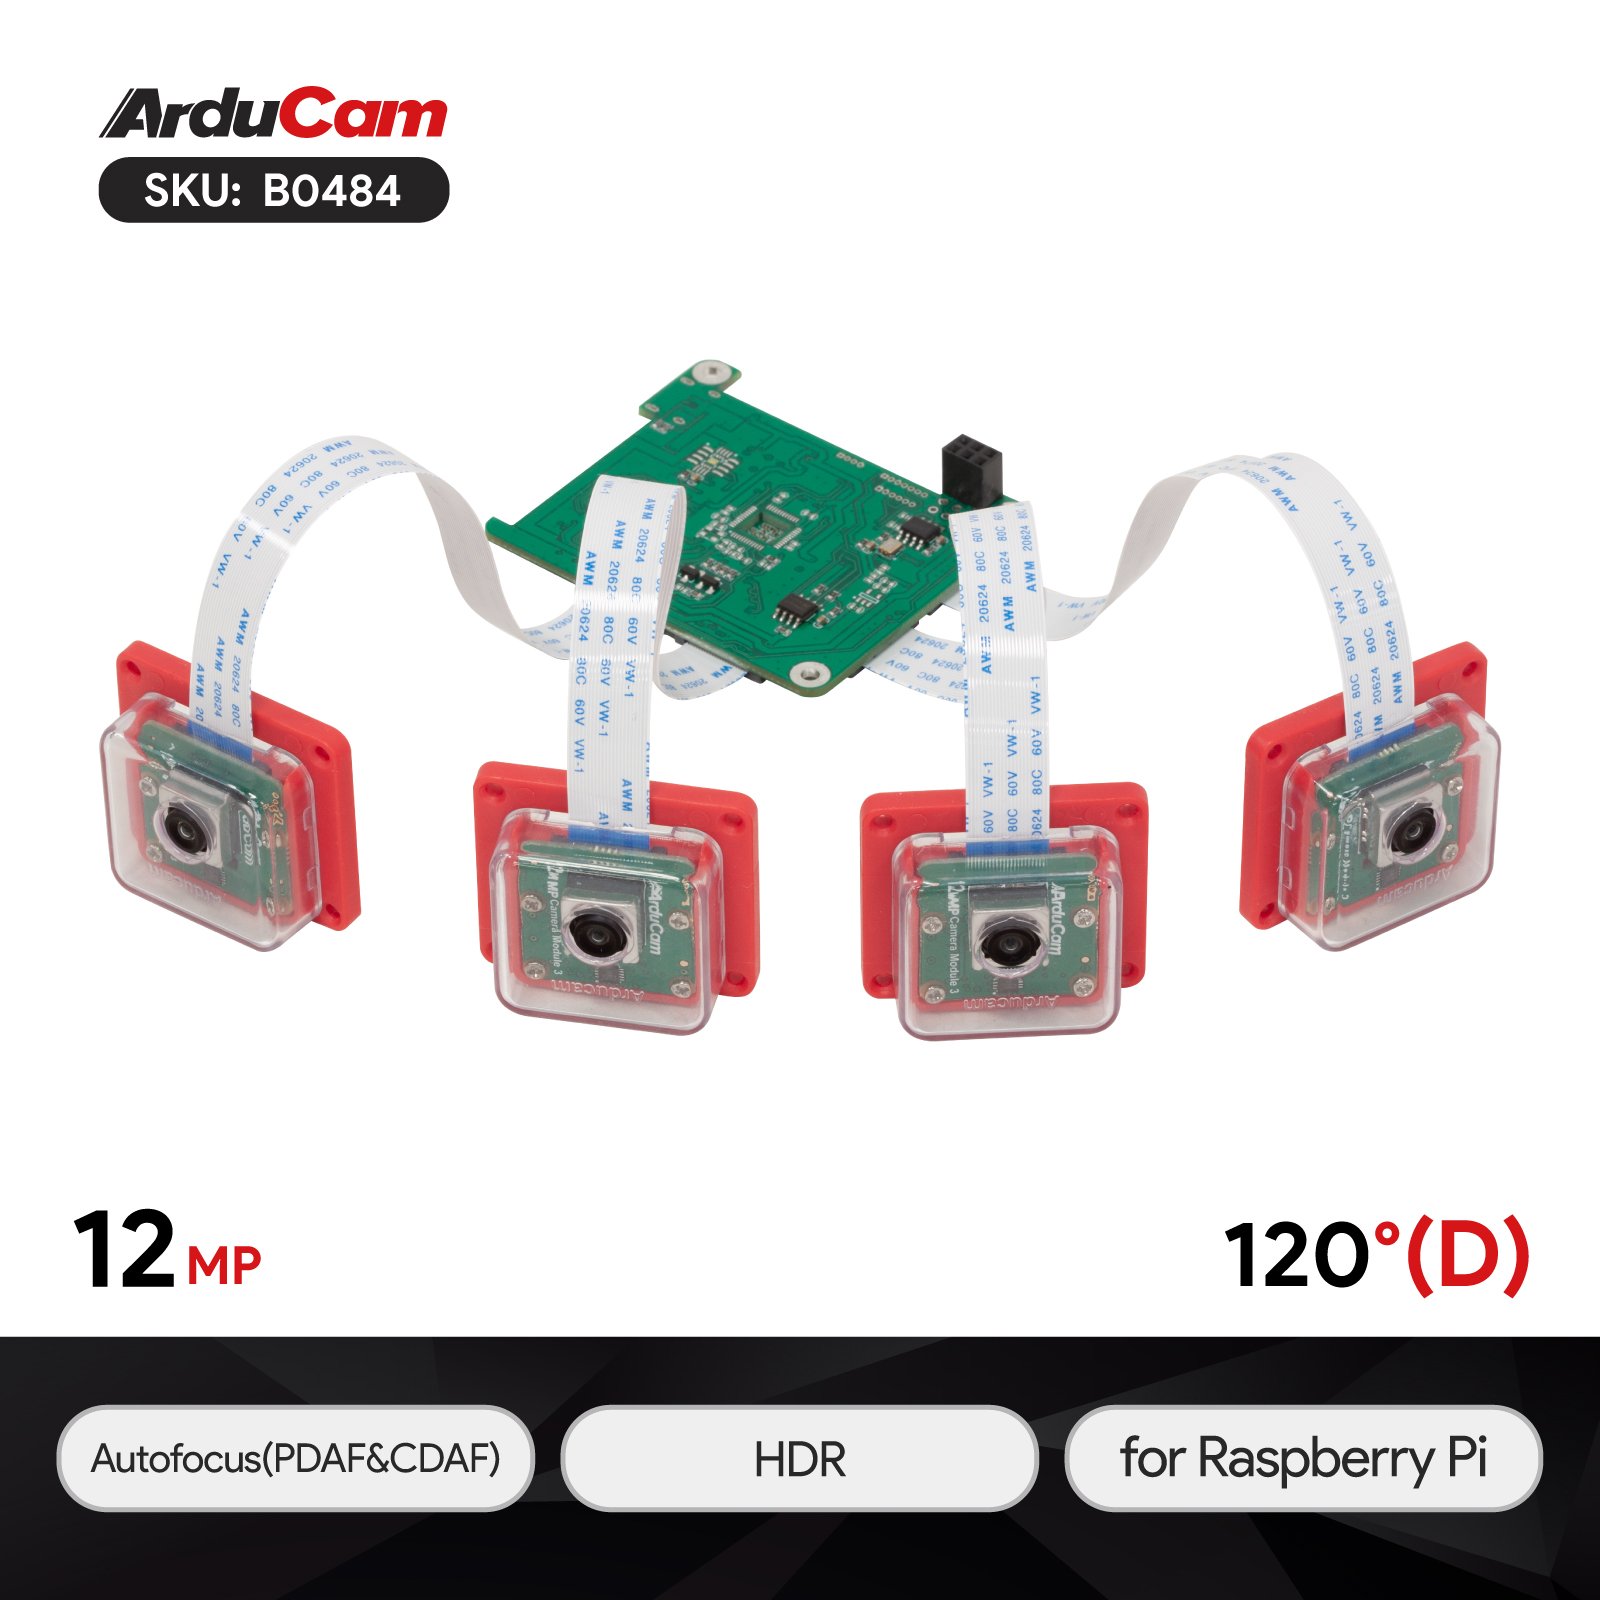 |
B0484 | IMX708 | 12MP | 15/Bottom | Wide Angle Quad-Camera Kit | Stock Lens | 120°(D)x100°(H)x72°(V) | Autofocus | 650nm IR-cut filter |
Note
If you do not find your camera please contact us.(support@arducam.com)
IMX219 Stereo Camera Kit
Step 1. Check whether the camera is detected
ls /dev/video0
Step 2. Preview the camera feed in real time
3280x2464@21fps
FRAMERATE=21
gst-launch-1.0 nvarguscamerasrc sensor-id=0 ! "video/x-raw(memory:NVMM),width=3280,height=2464,framerate=$FRAMERATE/1" ! nvvidconv ! "video/x-raw(memory:NVMM),width=1432,height=1080,framerate=$FRAMERATE/1" ! nveglglessink -e
1280x720@60fps
FRAMERATE=60
gst-launch-1.0 nvarguscamerasrc sensor-id=0 ! "video/x-raw(memory:NVMM),width=1280,height=720,framerate=$FRAMERATE/1" ! nvvidconv ! nveglglessink -e

IMX477 Stereo Camera Kit
Step1. Download automatic installation script
cd ~
wget https://github.com/ArduCAM/MIPI_Camera/releases/download/v0.0.3/install_full.sh
Step2. Install the driver
chmod +x install_full.sh
./install_full.sh -m imx477_stereo
Enter y to reboot your device.
Step3. Check whether the camera is detected
ls /dev/video0
Step4. Preview the camera feed in real time
4032x3040@20fps
Note
4032×3040 exceeds the system resolution and requires zooming to display.
FRAMERATE=20
gst-launch-1.0 nvarguscamerasrc sensor-id=0 ! "video/x-raw(memory:NVMM),width=4032,height=3040,framerate=$FRAMERATE/1" ! nvvidconv ! "video/x-raw(memory:NVMM),width=1432,height=1080,framerate=$FRAMERATE/1" ! nveglglessink -e
1920x1080@60fps
FRAMERATE=60 # Framerate can go from 2 to 60 for 1920x1080 mode
gst-launch-1.0 nvarguscamerasrc sensor-id=0 ! "video/x-raw(memory:NVMM),width=1920,height=1080,framerate=$FRAMERATE/1" ! nvvidconv ! nveglglessink -e
IMX519 Stereo Camera Kit
| Sensor | Optical Size | Resolution |
|---|---|---|
| IMX519 | 1/2.53'' | 16MP |
Step1. Download the bash script
cd ~
wget https://github.com/ArduCAM/MIPI_Camera/releases/download/v0.0.3/install_full.sh
chmod +x install_full.sh
./install_full.sh -m imx519
IMX708 Stereo Camera Kit
| Sensor | Optical Size | Resolution |
|---|---|---|
| IMX708 | 1/2.43'' | 12MP |
Step 1. Download the bash scripts
cd ~
wget https://github.com/ArduCAM/MIPI_Camera/releases/download/v0.0.3/install_full.sh
Step 2. Install the driver
chmod +x install_full.sh
./install_full.sh -m imx708
For Arducam Jetvariety camera
| Product Image | SKU | Sensor | Resolution | Pin/Connect Type | Features | Lens Type | Field of View(HxV) | Focus Type | IR Sensitivity |
|---|---|---|---|---|---|---|---|---|---|
 |
B0331 | OV9782 | 1MP | 15/Bottom | Color Global Shutter Quad Camera | M12 | 75°(H) x 46.8°(V) | Manual Focus | without IR-cut filter |
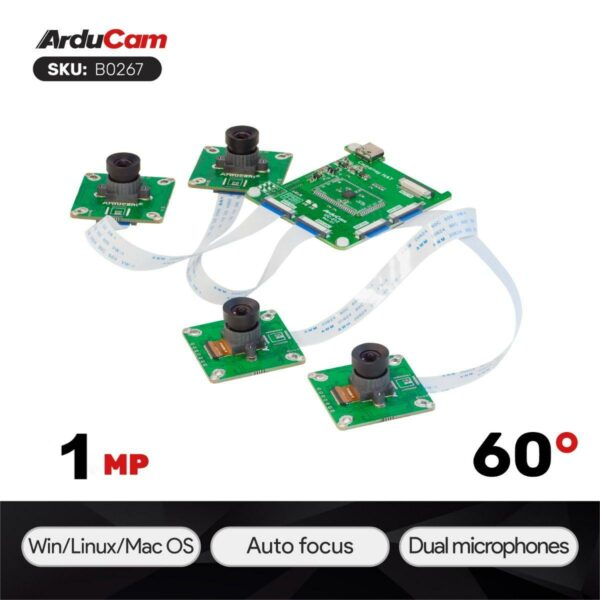 |
B0267 | OV9281 | 1MP | 15/Bottom | Mono Global Shutter Quad Camera | M12 | 75°(H) x 46.8°(V) | Manual Focus | without IR-cut filter |
 |
B0266 | Mono Global Shutter Stereo Camera | 70°(H) x 43.75°(V) | ||||||
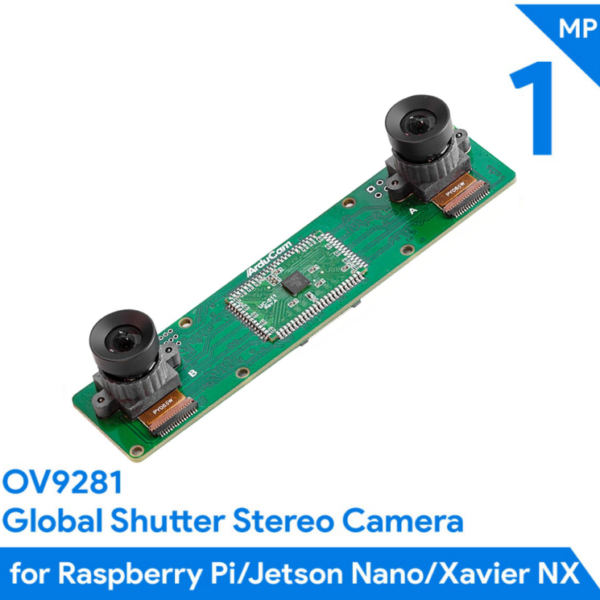 |
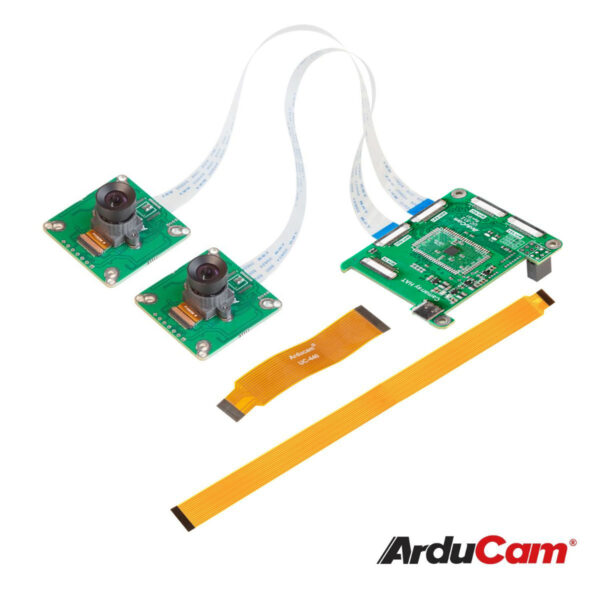
B0263 | OV9281 | 1MP | 15/Bottom | Mono Global Shutter Stereo Camera | M12 | 70°(H) x 43.75°(V) | Manual Focus | without IR-cut filter |
| B0264 | OV2311 | 2MP | 83°(H) x 67.5°(V) | ||||||
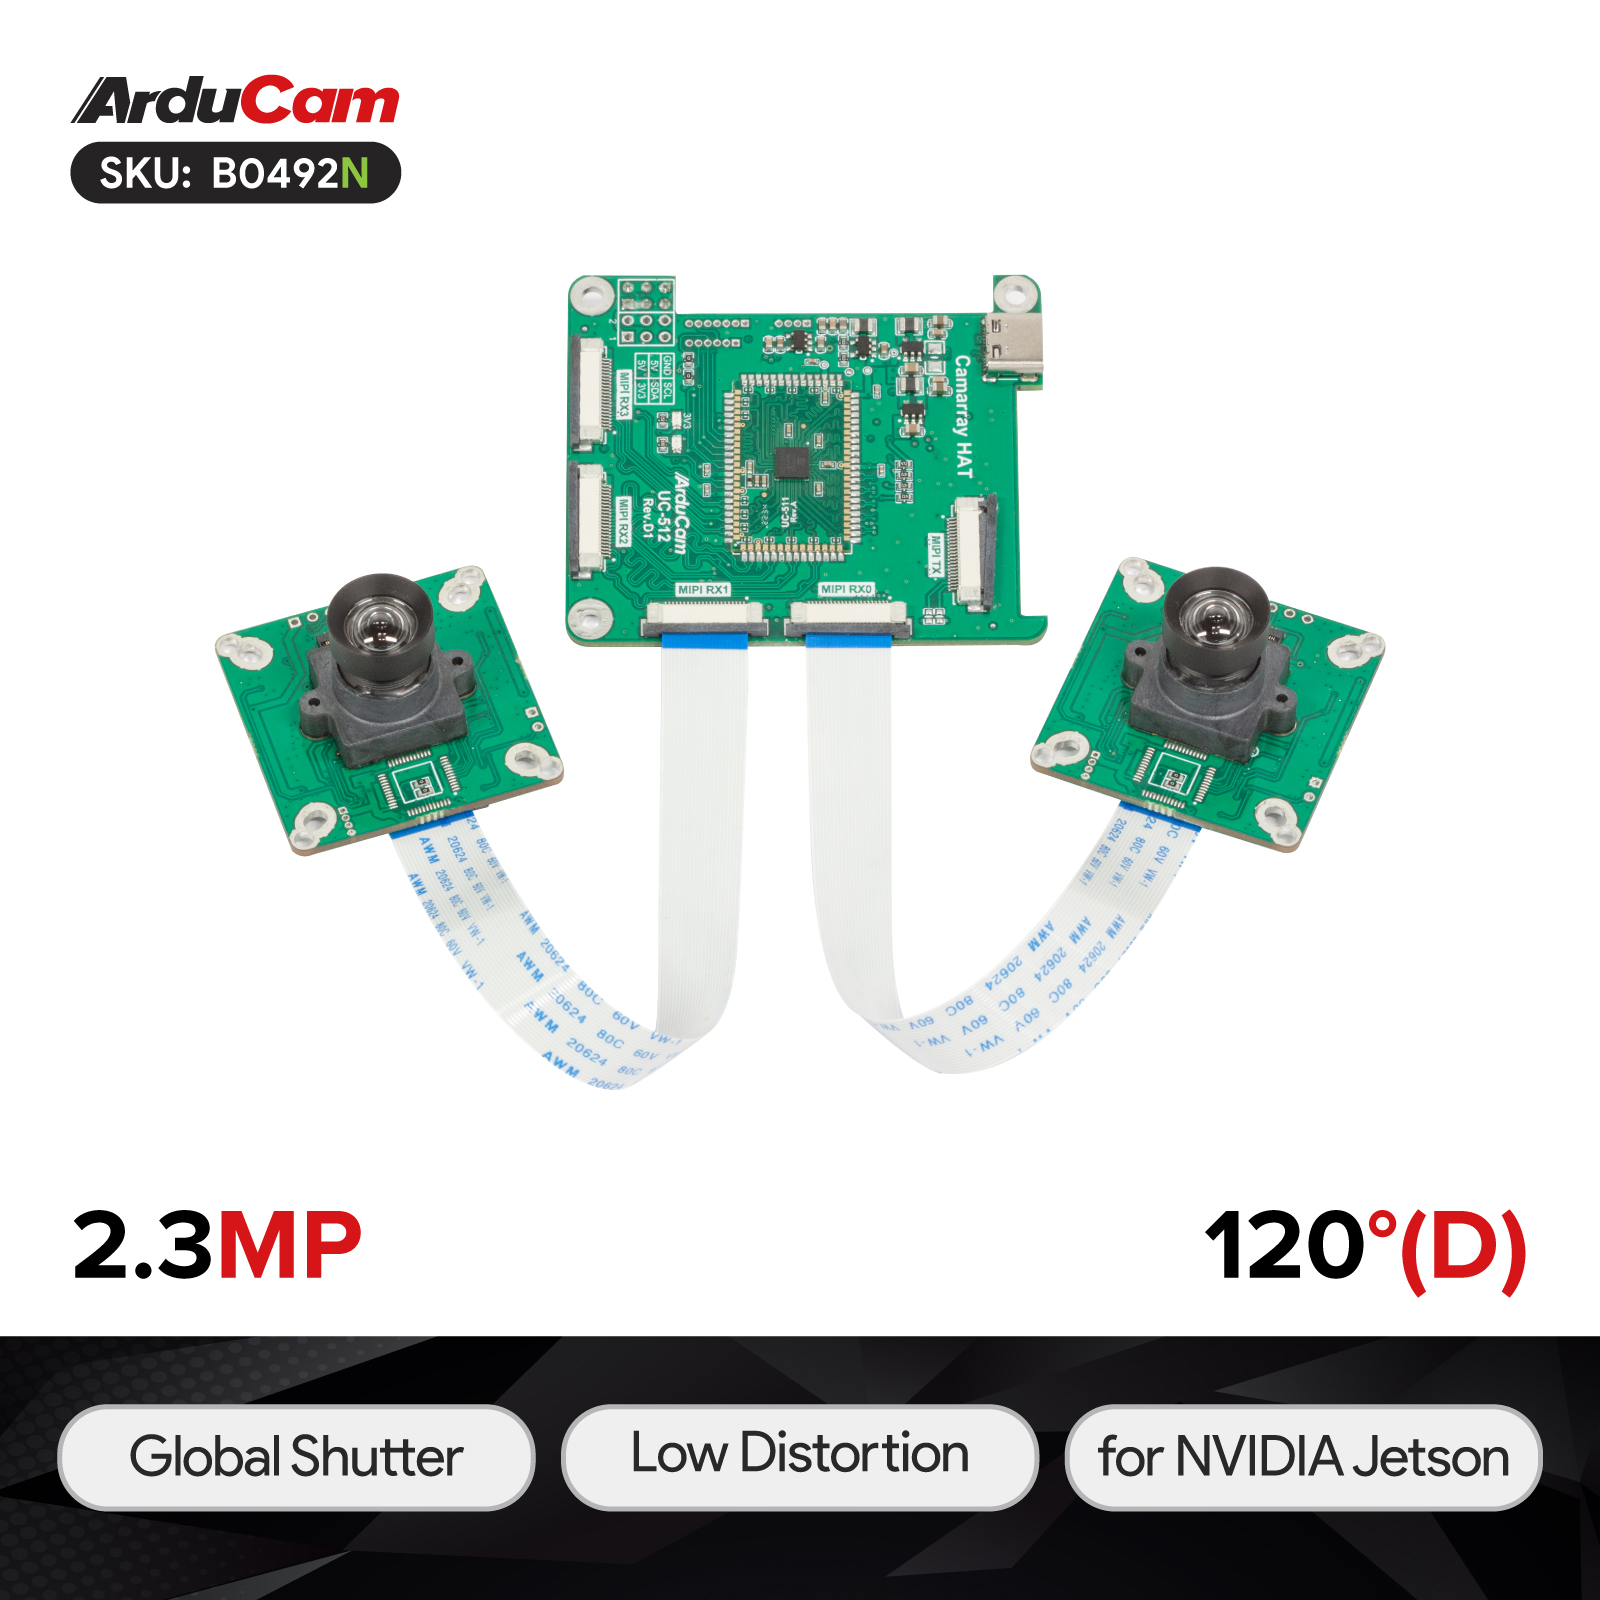 |
B0492N | AR0234 | 2MP | 22/Bottom | Color Global Shutter | M12 | 120°(D)×90°(H)×75°(V) | Manual Focus | Integrate IR-cut filter |
 |
B0217J5 | OV5647 | 5MP | 15/Bottom | Stereo Camera | Stock Lens | 54° (H) x 41° (V) | Fixed Focus | 650nm IR-cut filter |
Note
If you do not find your camera please contact us.(support@arducam.com)
Arducam Jetvariety Cameras
| Sensor | Optical Size | Resolution |
|---|---|---|
| OV9782 | 1/4'' | 1MP |
| OV9281 | 1/4'' | 1MP |
| OV2311 | 1/2.9'' | 2MP |
| AR0234 | 1/2.6'' | 2MP |
| OV5647 | 1/4'' | 5MP |
Step1. Download automatic installation script
wget https://github.com/ArduCAM/MIPI_Camera/releases/download/v0.0.3/install_full.sh
Step2. Install the driver
chmod +x install_full.sh
./install_full.sh -m arducam
Enter y to reboot your device.
How to access the camera
1. install the v4l2 python module
for python 3.x:
wget https://bootstrap.pypa.io/get-pip.py
After you type the following command and press【Enter】, it will take several minutes to finish downloading.
sudo python3 get-pip.py
sudo pip3 install v4l2-fix
Note
The V4L2 of Python3.x has a known bug that requires a manual fix, and the following error occurs when you import the v4l2 module into Python3.x:
You can refer to this link to fix this bug:
https://bugs.launchpad.net/python-v4l2/+bug/1664158
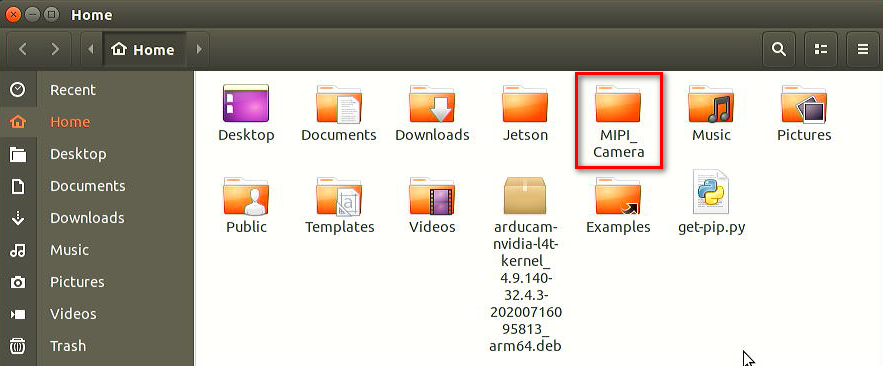
2. Download the demo code
git clone https://github.com/ArduCAM/MIPI_Camera.git
3. Check whether the camera is detected
ls /dev/video0
4. Check the video format supported
v4l2-ctl --list-formats-ext
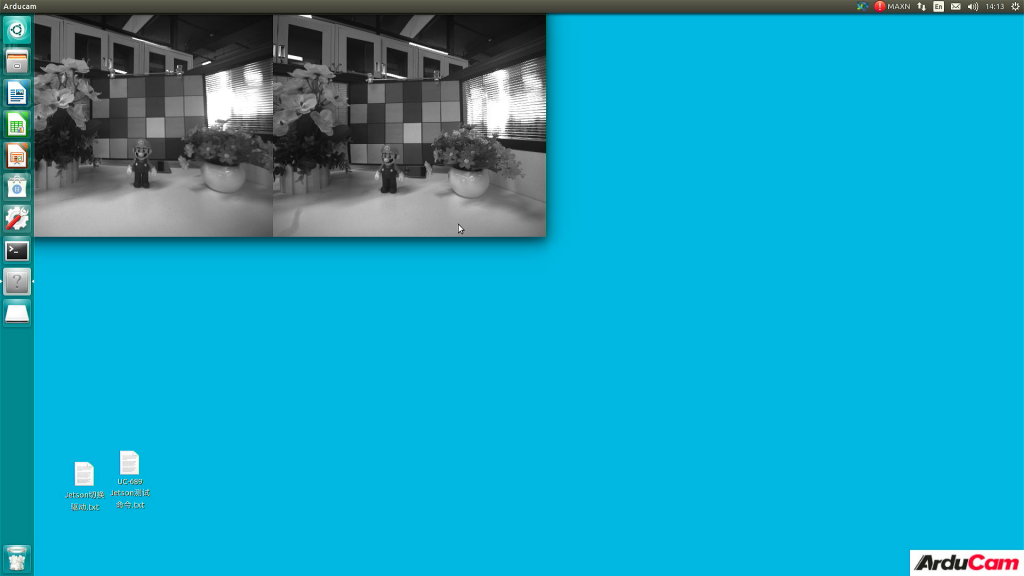
5. Display images in real time
If accessing Jetson via remote software (e.g., MobaXterm), the following command (executed only once) is required to display the image.
export DISPLAY=:0.0
Enter program directory:
cd MIPI_Camera/Jetson/Jetvariety/example/
Example as OV2311 Stereo Camera:
#RAW8
python3 arducam_displayer.py -f GREY --width 3200 --height 1300 -d 0 --fps
#RAW10
python3 arducam_displayer.py -f Y16 --width 3200 --height 1300 -d 0 --fps
GREY for RAW8 and Y16 for RAW10.
-width and -height indicate the width and height of the input image.
–fps means to display the current frames. If you don’t want to display frames, you can remove this command parameter.
For example, execute the following command:
python3 arducam_displayer.py -f GREY --width 3200 --height 1300 -d 0 --fps
The command line will refresh the display of frames in real time.
Press Ctrl+C to exit image display.
Note
Display resolution settings may affect the frames displayed.
Switch Composition Mode
Arducam Team has released the channel-switch function on specific Quad-Camera kits. You can refer to the following guide to switch the Composition Mode.
Check I2C node
You can input the following command to check if your camera kit supports switching the composition mode.
user:~ $ i2cdetect -l
i2c-1   i2c         bcm2835 (i2c@7e804000)              I2C adapter
i2c-22  i2c         bcm2835 (i2c@7e205000)              I2C adapter
i2c-0   i2c         i2c-22-mux (chan_id 0)              I2C adapter
i2c-10  i2c         i2c-22-mux (chan_id 1)              I2C adapter
If you get some messages as above, then you can continue the following steps:
Detect I2C signal
Take i2c 10 node as an example
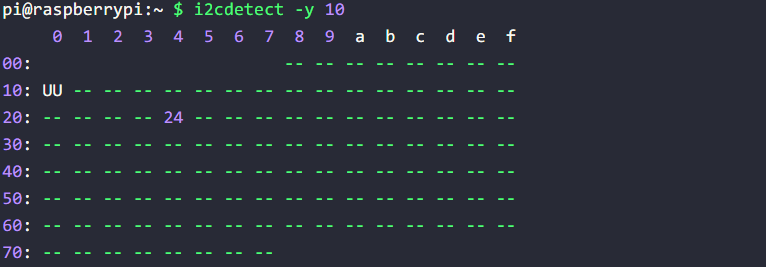
Select the Channel:
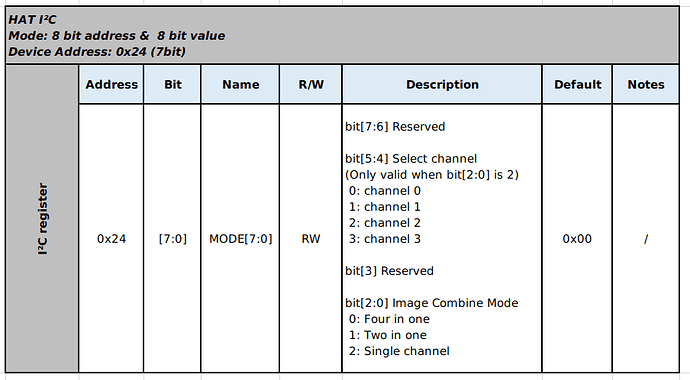
Example:
# Set to single channel 0
i2cset -y 10 0x24 0x24 0x02
# Set to single channel 1
i2cset -y 10 0x24 0x24 0x12
# Set to single channel 2
i2cset -y 10 0x24 0x24 0x22
# Set to single channel 3
i2cset -y 10 0x24 0x24 0x32
# Set to double channel (single channel 0 and single channel 1)
i2cset -y 10 0x24 0x24 0x01
# Set to double channel (single channel 2 and single channel 3)
i2cset -y 10 0x24 0x24 0x11
# Set to four in one mode (Default)
i2cset -y 10 0x24 0x24 0x00
Function Test
Single-channel test:
#Single channel test
user:~ $ i2cset -y 10 0x24 0x24 0x02
After setting the channel, you can directly use the gst-launch-1.0 command to capture images.
Dual-channel test:
#Dual channels test
user:~ $ i2cset -y 10 0x24 0x24 0x01
Note
By default, the quad-camera kit works in synchronized 4-channel mode, and NVIDIA Jetson recognizes the whole kit as one camera Any manual focus or camera control adjustments (exposure/gain/white balance/etc.) will also be applied to 4 cameras at the same time.
If you encounter any problems when using the camera kit, please directly contact support@arducam.com for help.