OV9281 Global Shutter
The external trigger mode is to accepts the external input signal to trigger the image output. When the rising edge of the external trigger signal coming, it can output an image. Therefore, it is very suitable for capturing high-speed moving objects. In addition, the sensor enables the sleep state will greatly reduce the power consumption.
1. How to use UVC Camera on Windows
1.1 Supported resolutions and frame rates
| MJPG | 1600×1200 50fps, 30fps, 15fps, 10fps |
|---|---|
| MJPG | 1280×960 50fps, 30fps, 15fps, 10fps, 5fps |
| MJPG | 1280×720 50fps, 30fps, 15fps, 10fps, 5fps |
| MJPG | 800×600 50fps, 30fps, 15fps, 10fps, 5fps |
| MJPG | 640×480 50fps, 30fps, 15fps, 10fps, 5fps |
| MJPG | 320×240 50fps, 30fps, 15fps, 10fps, 5fps |
| MJPG | 160×120 50fps, 30fps, 15fps, 10fps, 5fps |
| YUV2 | 1600×1200 5fps |
| YUV2 | 1280×720 5fps |
| YUV2 | 800×600 5fps |
1.2 Maximum frame rate of The external trigger snapshot mode
Enable manual exposure and set the shortest exposure time,
After our tests, the frame rate of the camera module can reach 100fps in external trigger mode.
1.3 External trigger function instructions
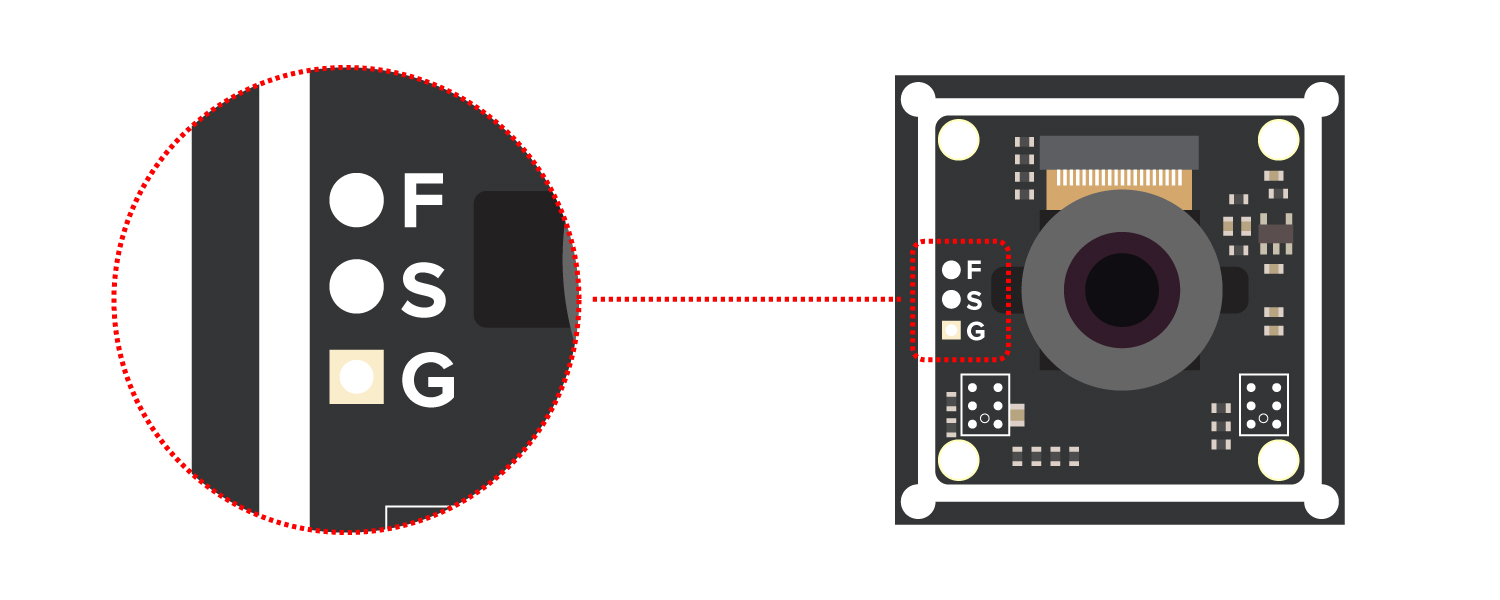
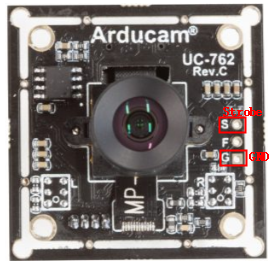
Step 1 Hardware
First of all, you need to solder the F and G pins. F is connected to the external trigger signal, and G is connected to GND.
Note
It is required that the trigger signal pulse width tFSIN_High is not less than 2us, and the frequency cannot exceed the highest external trigger frame rate supported by the current frame rate.

Step 2 Down the AMCap.exe
Please check the link below and download the AMPCap.exe
https://www.arducam.com/downloads/app/AMCap.exe
Step 3 Enable the external trigger snapshot mode
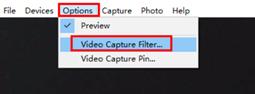
The options menu can be used to select the preview and image parameters supported by this camera.
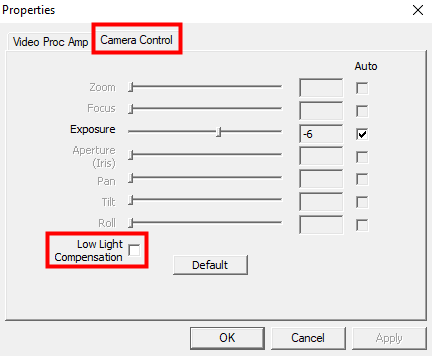
The low-brightness compensation option is enabled to enter the external trigger mode, and when it is disabled, the external trigger mode is exited.
Note
The preview video will stop when you check low-brightness compensation option and apply. The preview will recover to normal as long as you send the external trigger signal to the camera.
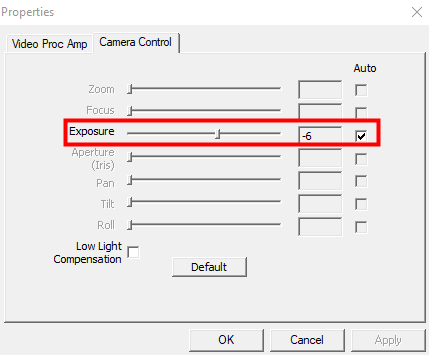
1.4 Adjust exposure Manually

There is a switch behind the Exposure slider in the Camera Control. Select it to start manual exposure mode.
Note
Uncheck the option and click the ‘Apply’.
1.5 Download and run the trigger script(on RaspberryPi)
step1 Run the following two commands
wget -O trigger.py https://github.com/ArduCAM/MIPI_Camera/releases/download/trigger_v1.0/trigger.py
python3 trigger.py
step2 Hardware connection
connect pin F to the RPI’S Trigger Signal and pin G to the RPI’S Ground(RPI’S Trigger Signal and Ground As shown in pictures below).

Note
- If each step is OK, the preview should be normal(will not be still) at this point.
- The working mechanism of the sensor is different between the streaming mode and the external trigger mode. The exposure time needs to be shortened to ensure the rate of the trigger on the external trigger mode.
1.6 The Strobe signal
When the image is output, a flash signal output from S can drive flash to enhance exposure. The stroboscopic signal of the sensor can set the light point or time parameter. However, it can only output a fixed strobe signal because of a fixed UVC Camera configuration.
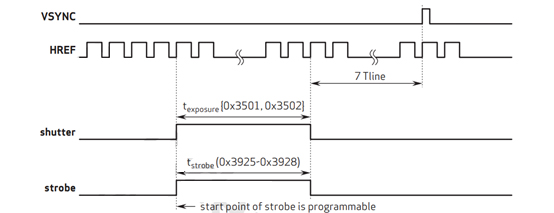
You need to solder the S and G pins when using the Strobe signal. S outputs the strobe signal and G connects to GND.
The output voltage of the Strobe signal of OV9281 UVC is 3.3V, and the effective level is high. The width of the Strobe signal corresponding to different frame rates is as follows:
| 50fps | 3.50ms |
|---|---|
| 30fps | 5.42ms |
| 15fps | 11.22ms |
| 10fps | 16.05ms |
2. How to use UVC Camera on Linux
2.1. How to access UVC Camera using Command Line
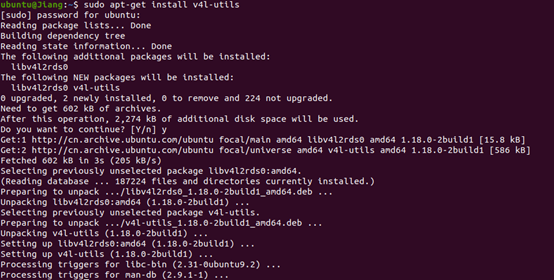
2.1.1 Install V4L utils packages
sudo apt-get update
sudo apt-get install v4l-utils

2.1.2 List all V4L device
v4l2-ctl --list-devices

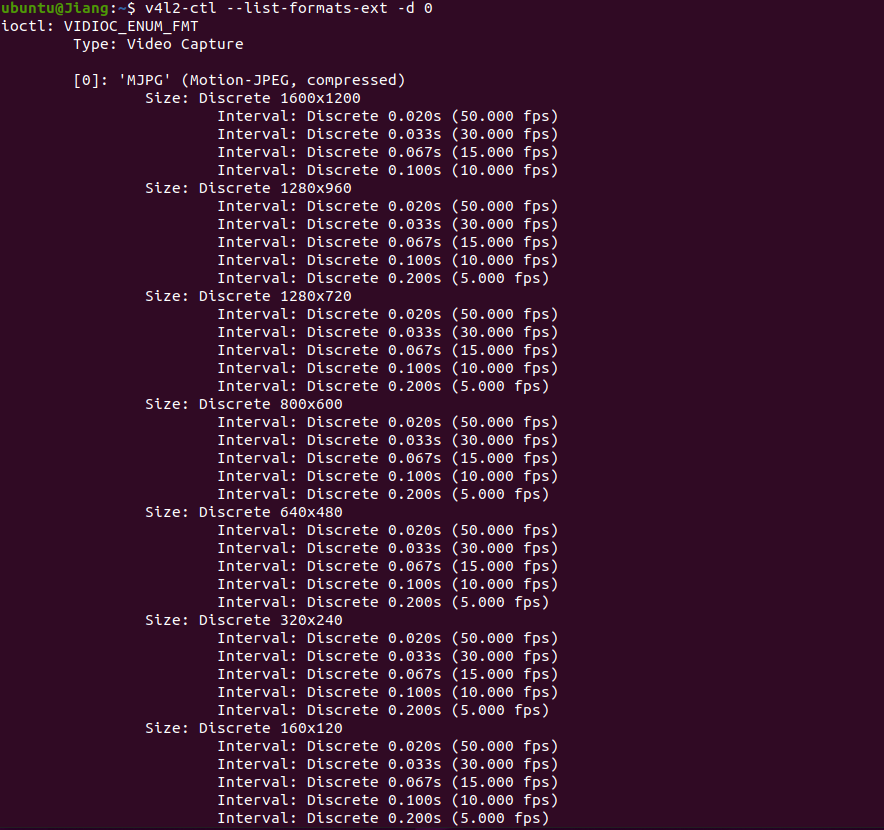
2.1.3 List all resolutions and frame rates of different formats
v4l2-ctl --list-formats-ext -d 0

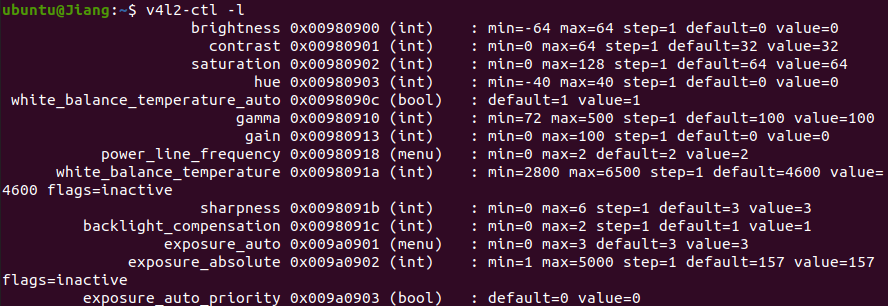
2.1.4 List all controls and their values
v4l2-ctl -l
2.1.5 Refer to the link to quick start the camera on software
2.1.6 How to use the control function
- Disable auto exposure
v4l2-ctl -c exposure_auto=1

- Set up exposure
v4l2-ctl -c exposure_absolute=500

- Enable the external trigger snapshot mode
v4l2-ctl -c exposure_auto_priority=1

2.1.7 Download and run the trigger script(on RaspberryPi)
Please refer to Section 1.5.