Quick Start Guide
General Hardware Connection
Warning
Cameras are sensitive to static. Earth yourself prior to handling the PCB.
A sink tap or similar should suffice if you don’t have an earthing strap.
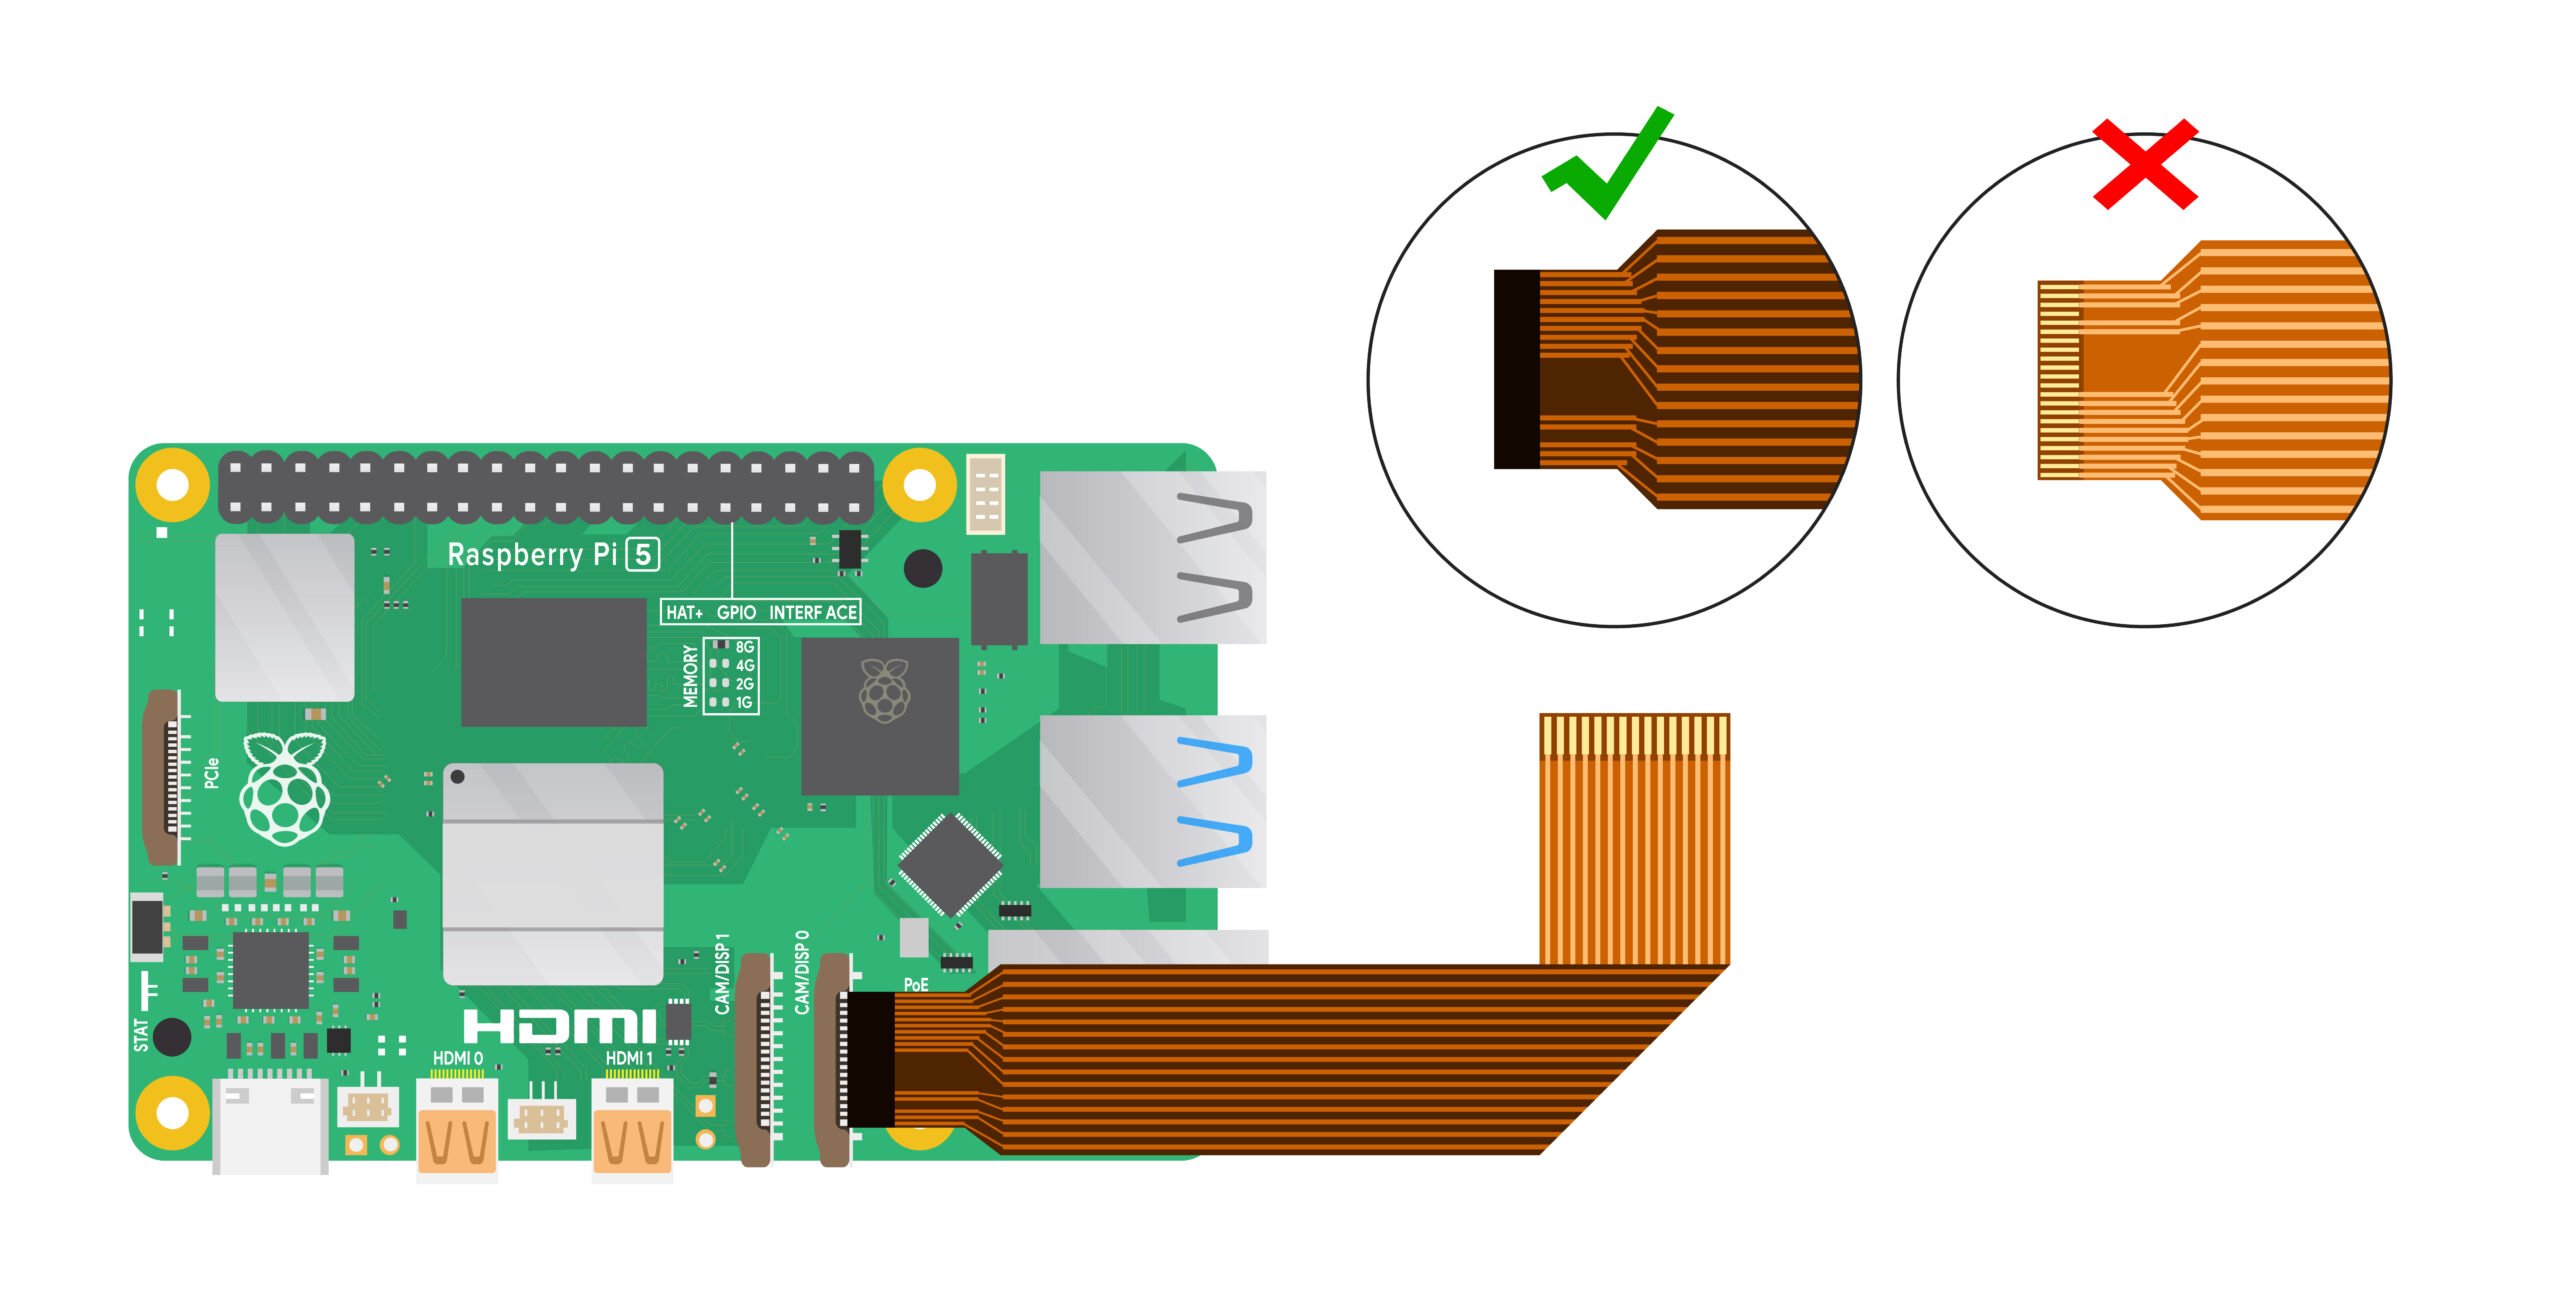
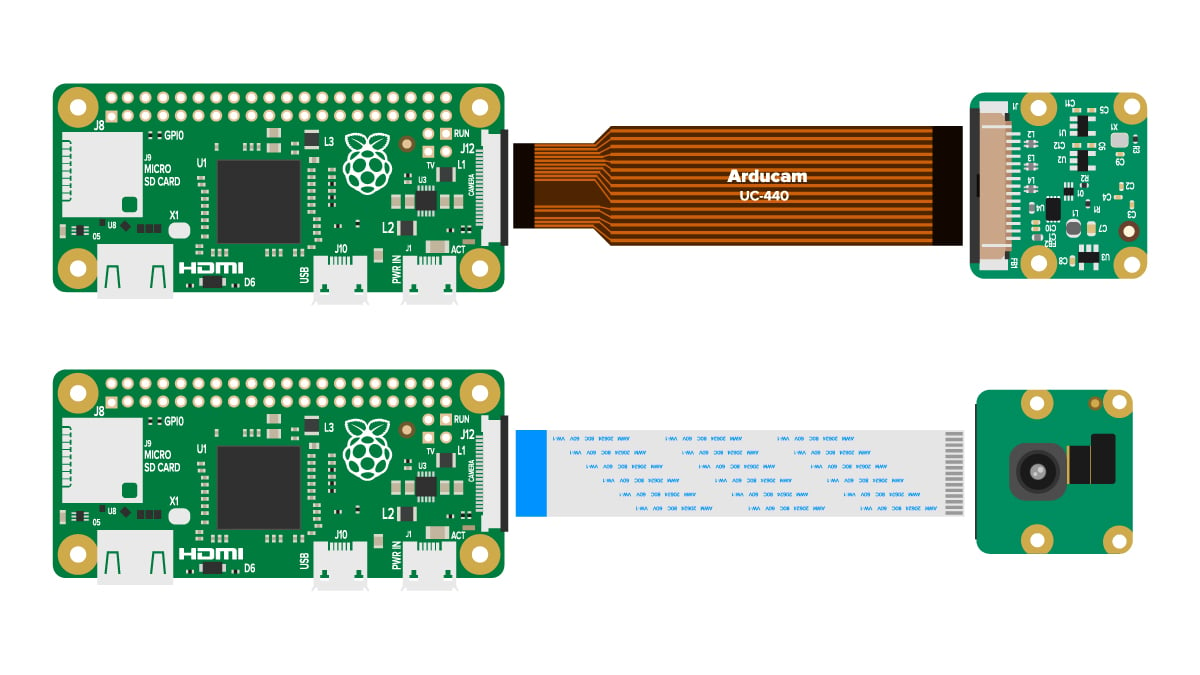
The Raspberry Pi and the camera module are connected using a flexible cable. The connection to the camera is called CSI interface and the connection to the Raspberry Pi is called MIPI interface.
Platform Introduction
Tip
Here we will display the basic hardware info of the mainly used raspberry pi platforms.
| Model | SoC | Memory | GPIO |
|---|---|---|---|
 Raspberry Pi 5 |
BCM2712 | 4GB 8GB |
40-pin GPIO header |
 Raspberry Pi 4B |
BCM2711 | 1GB 2GB 4GB 8GB |
40-pin GPIO header |
 Raspberry Pi 3B+ |
BCM2837b0 | 1GB | 40-pin GPIO header |
 Raspberry Pi Zero 2 W |
RP3A0 | 512MB | 40-pin GPIO header(unpopulated) |
 Raspberry Pi Compute Module 3 |
BCM2837 | 1GB | / |
 Raspberry Pi Compute Module 4 |
BCM2711 | 1GB 2GB 4GB 8GB |
/ |
For more details, you can refer to the Raspberry Pi official website:
https://www.raspberrypi.com/documentation/computers/raspberry-pi.html
Connection Diagram
Tip
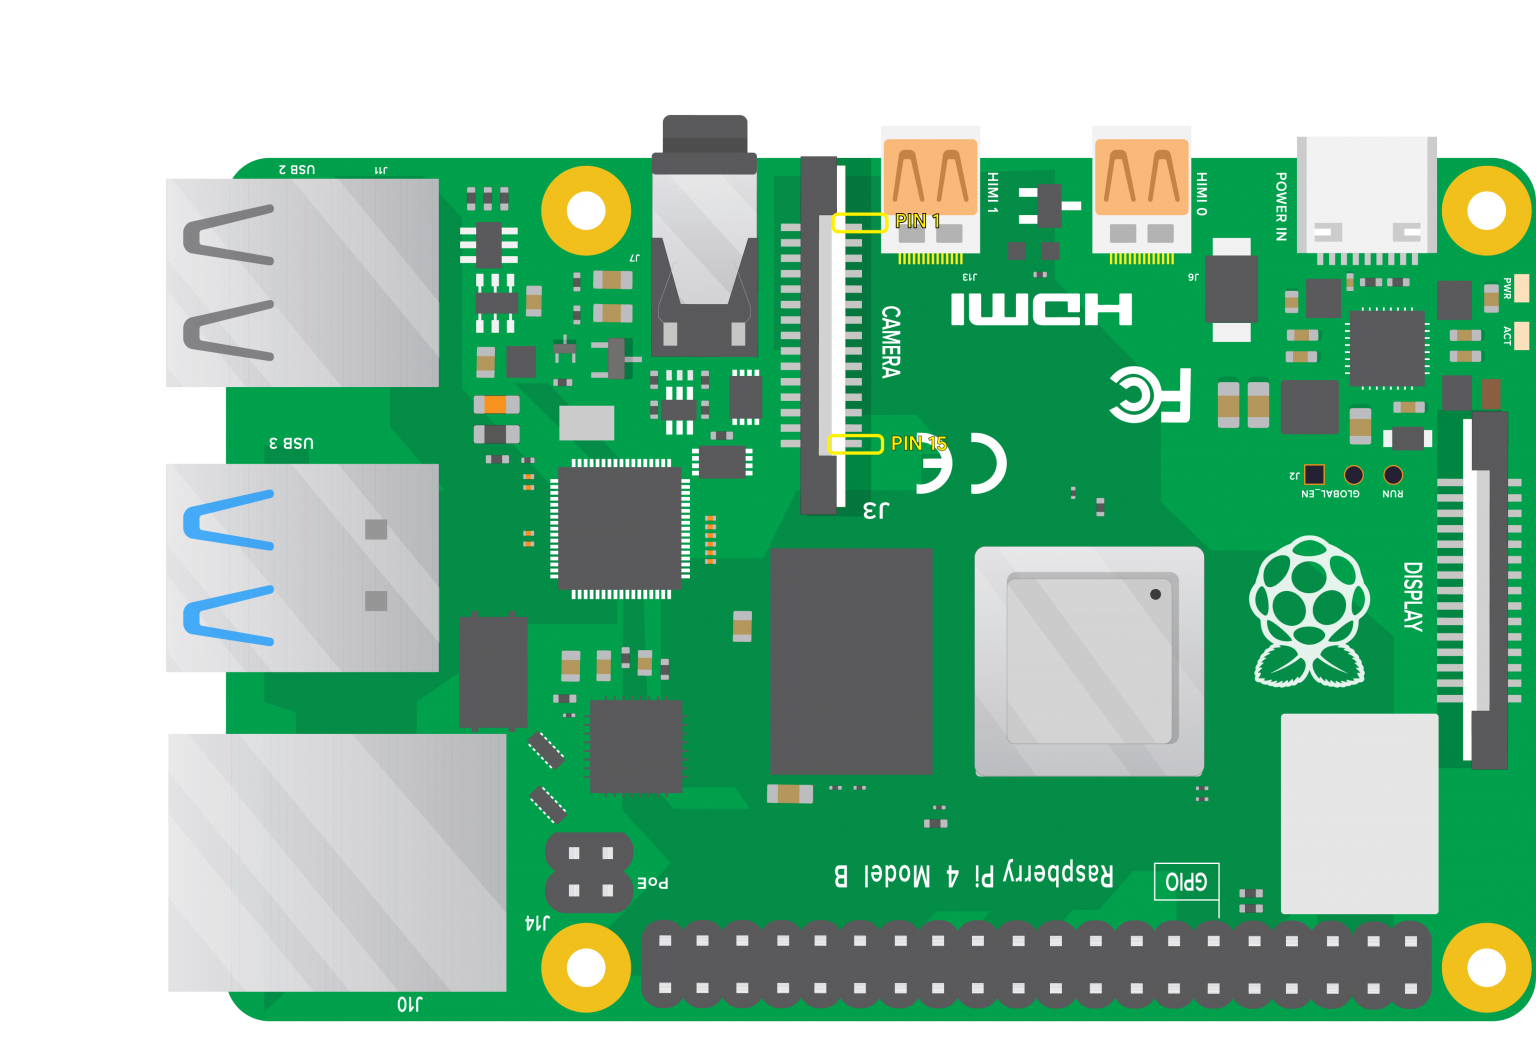
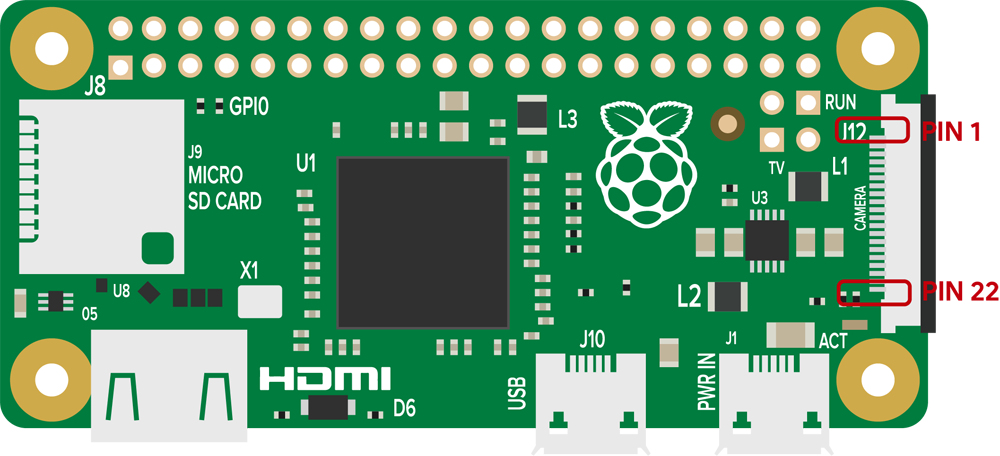
There are two different kinds of Raspberry Pi MIPI port connectors: 15-pin and 22-pin. The 15-pin connector is mostly seen on standard Raspberry Pi model; the 22-pin is on Raspberry Pi Zero-W and Compute Module IO Board.
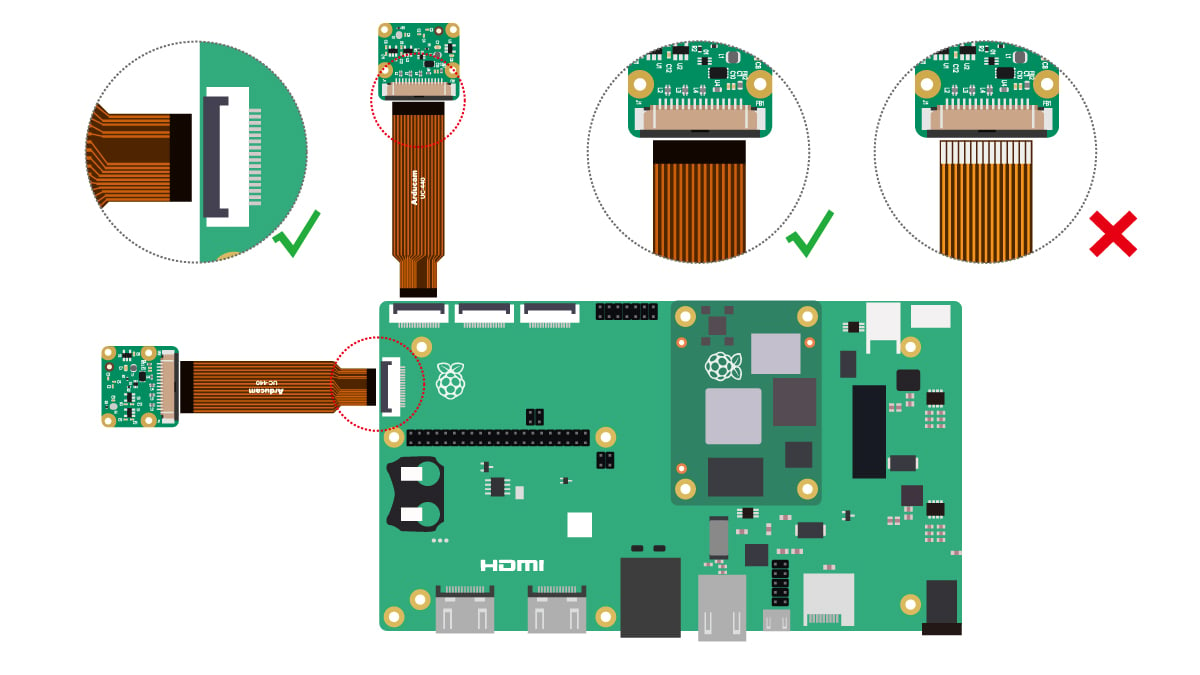
The silver contacts of the cable have different orientations when connecting to different cameras. For specific connection methods, please refer to the introduction on the product page of each camera.
Plug the flex cable into the connector labeled CAMERA on the Raspberry Pi.
Note
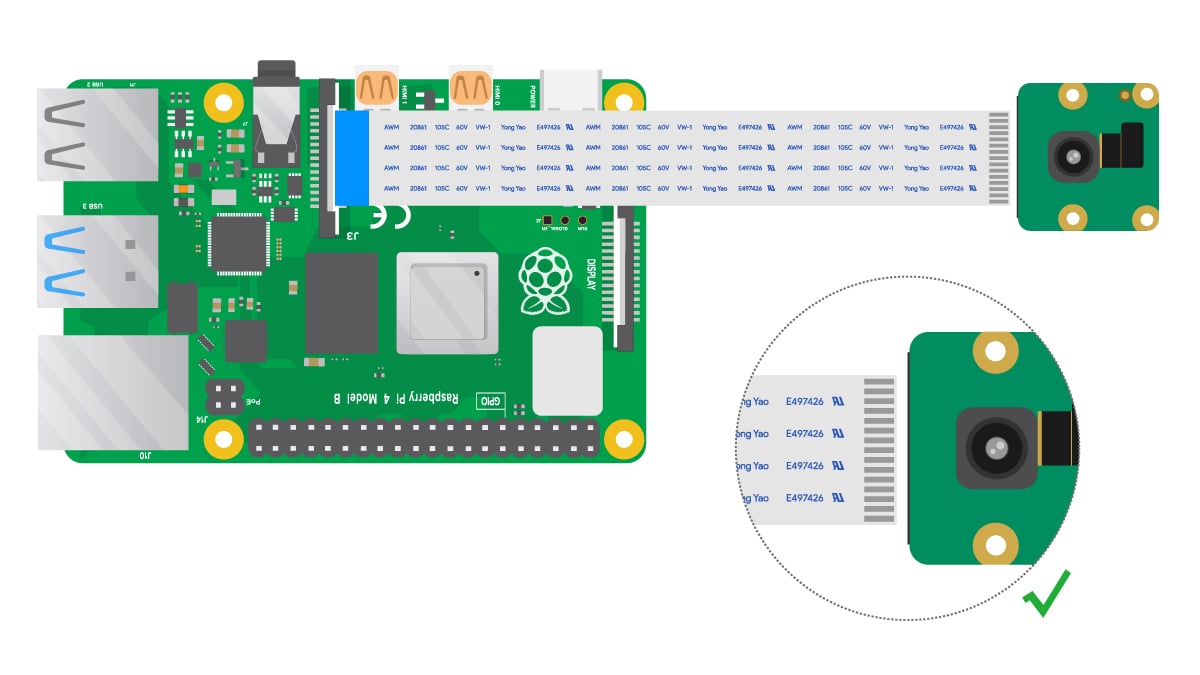
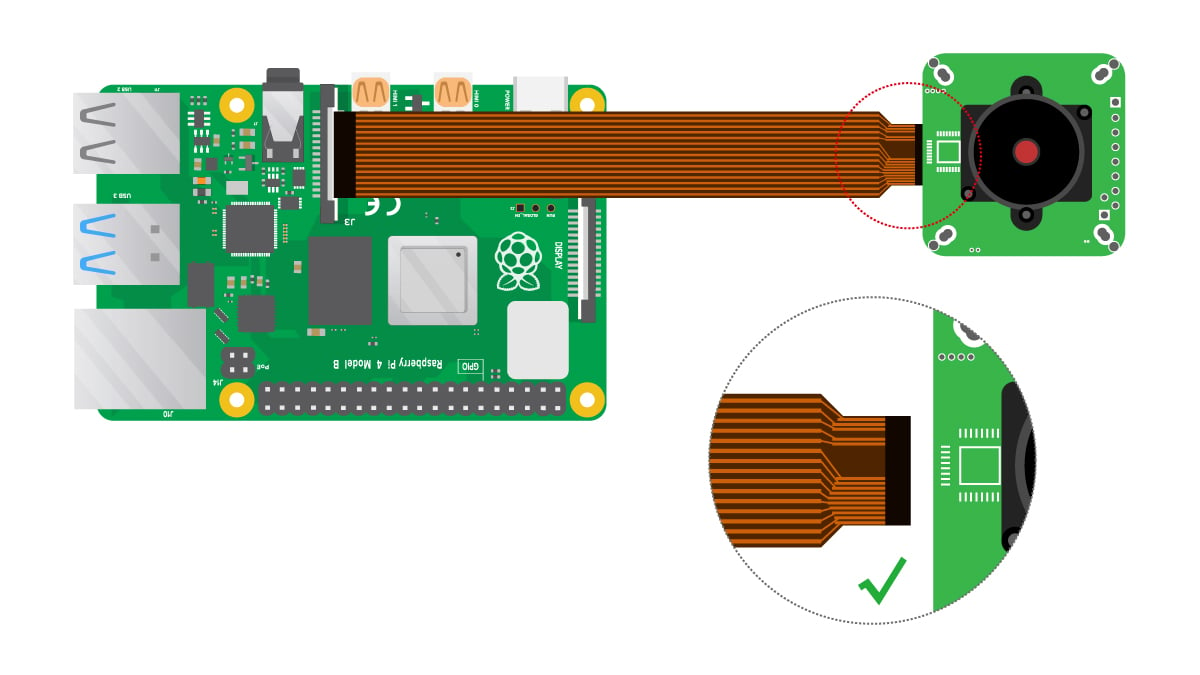
Since the camera board designs of different cameras are different, there are two connection methods on the camera side: the upper cable Pin port and the lower cable Pin port.
The camera-side cable connection methods in all the following pictures are for reference only. For specific camera-side connection methods, please refer to the detailed introduction on each product page.
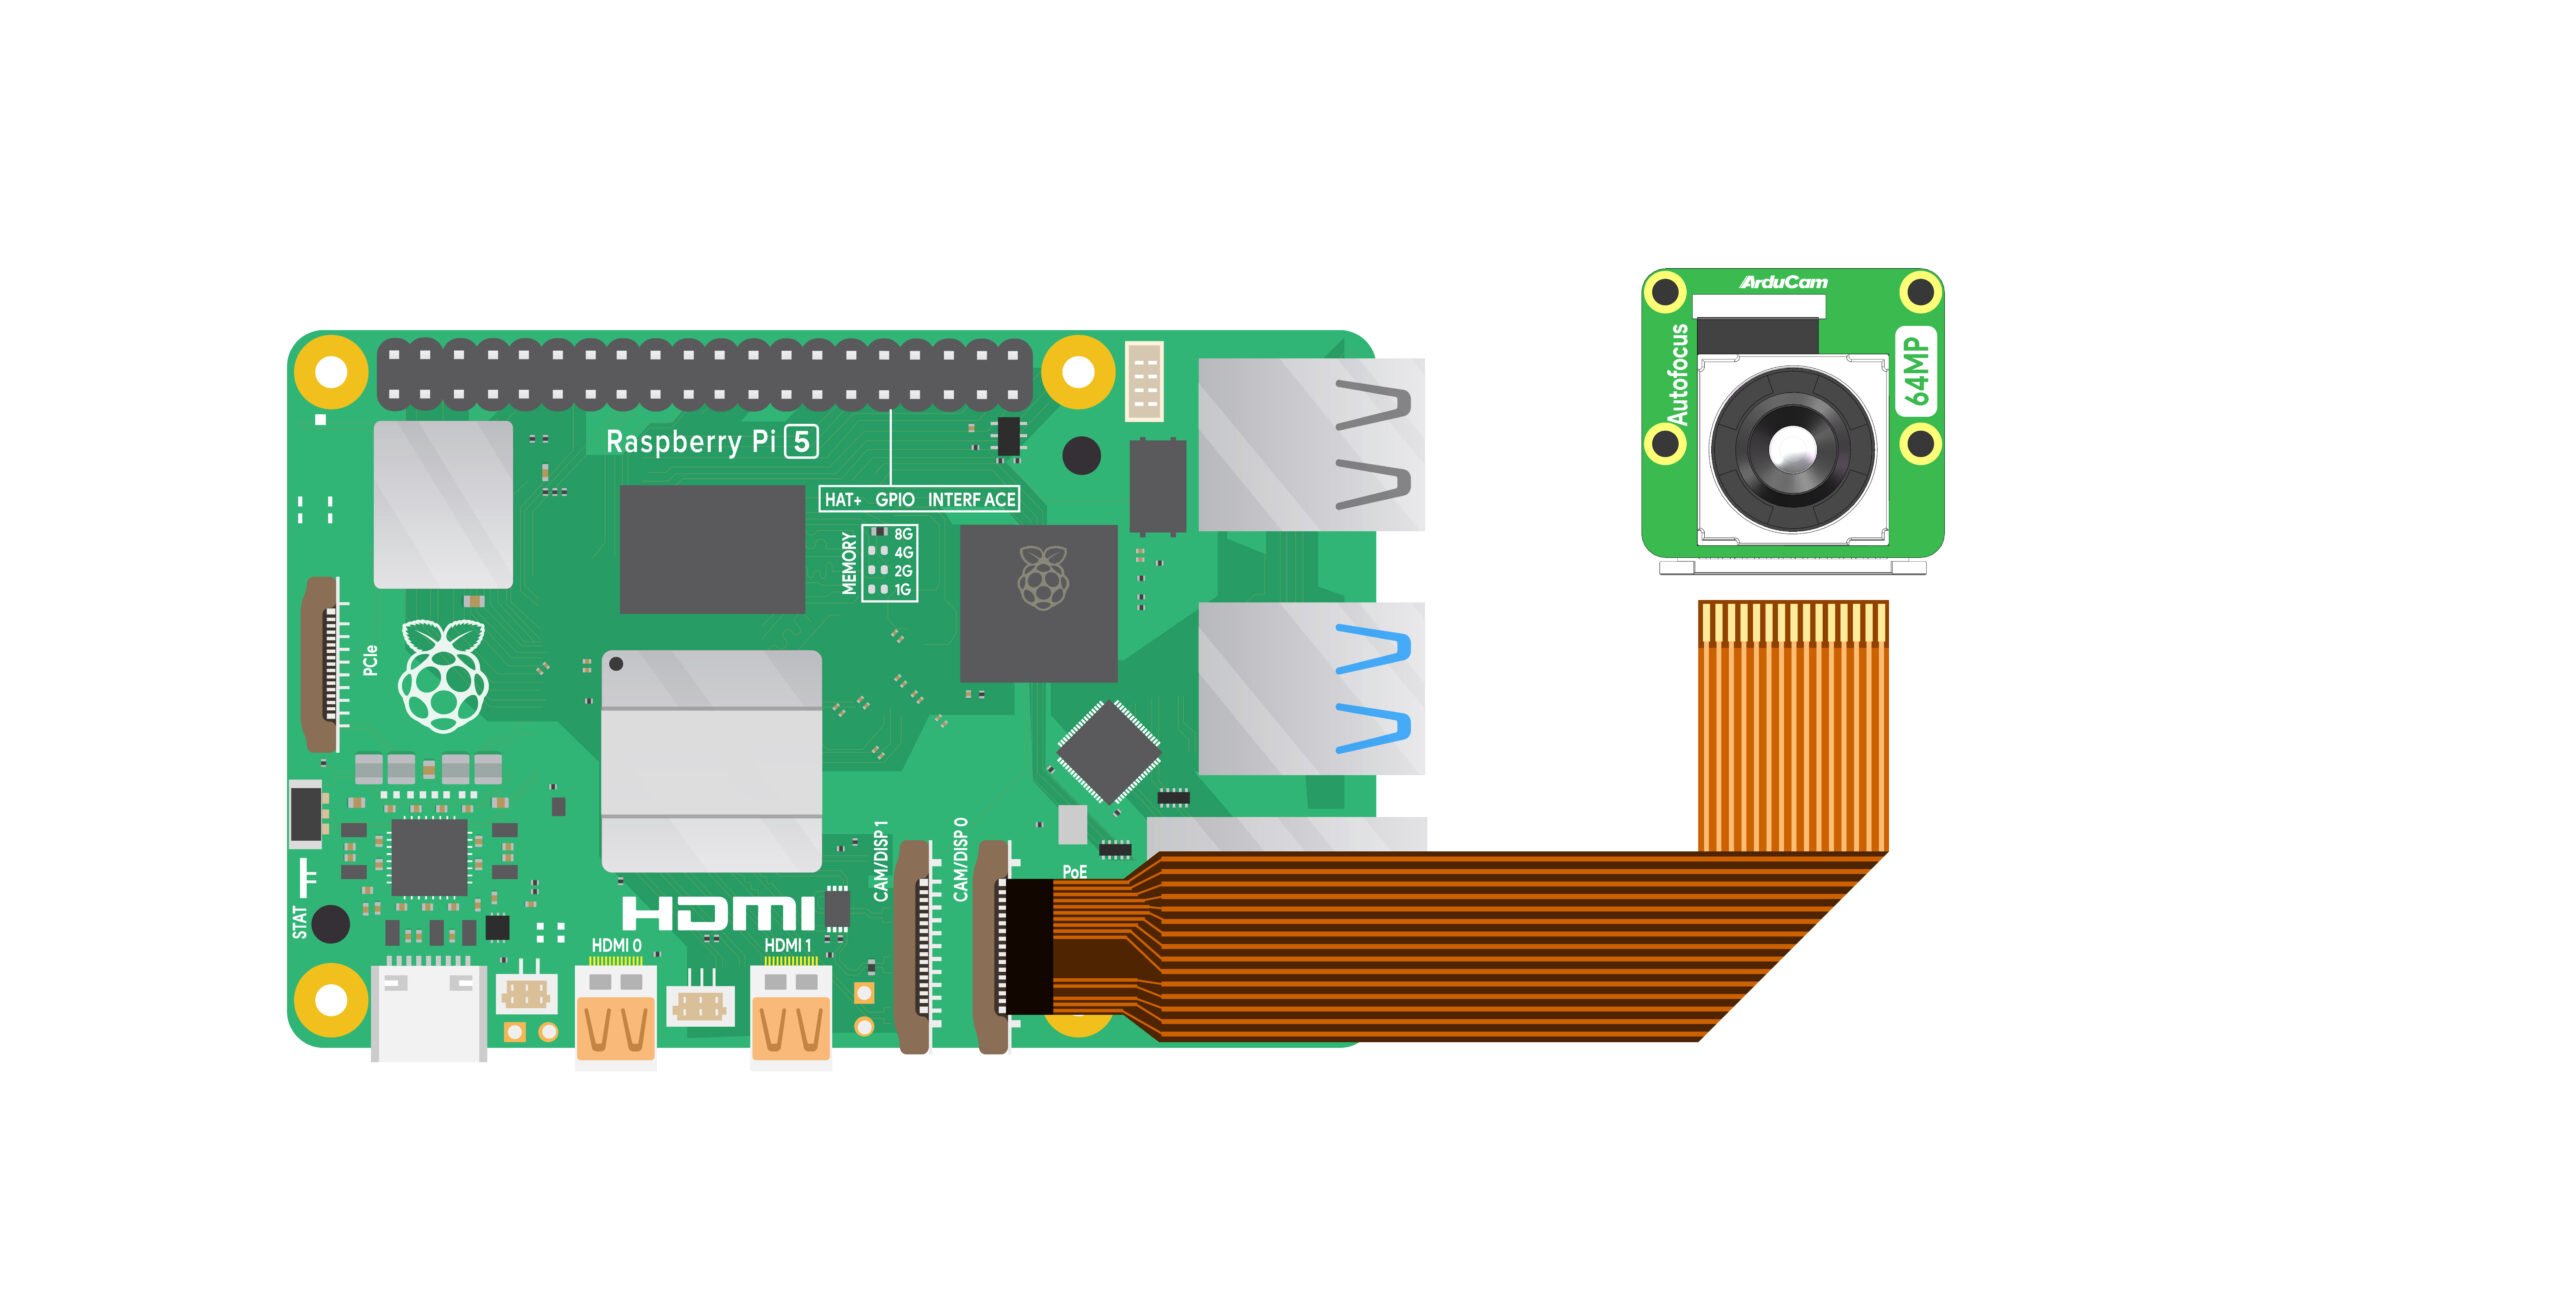
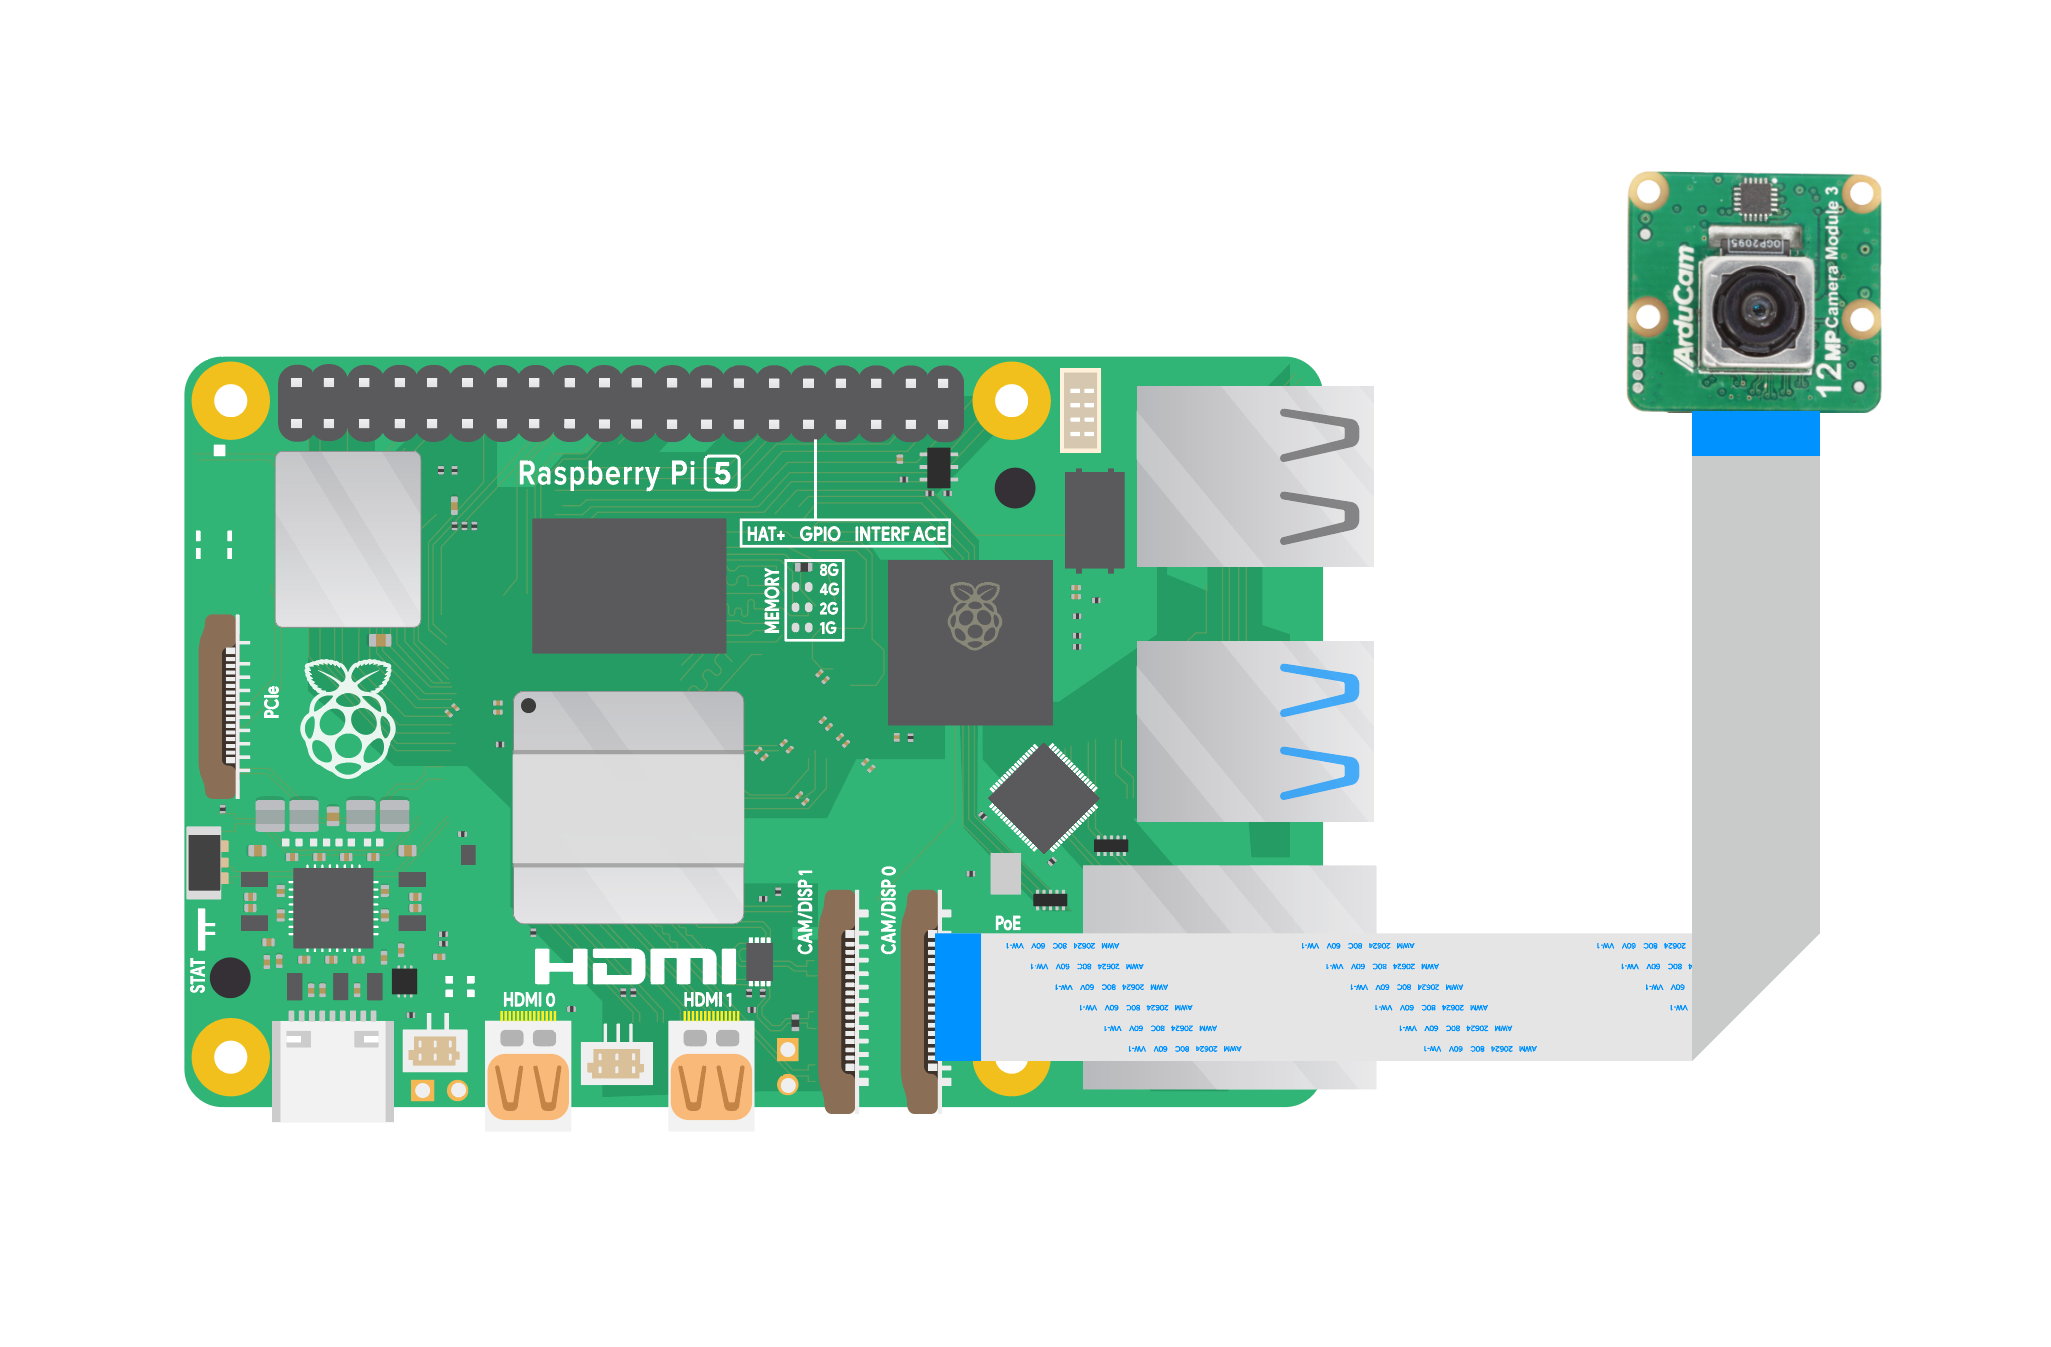
For Raspberry Pi 5:
The Raspberry Pi 5 has two camera csi connectors, both located between the Ethernet and HDMI ports. When you plug in the cable, the silver contacts face the Ethernet port.
- 15pin-22pin Connection
 |
 |
- 22pin-22pin Connection
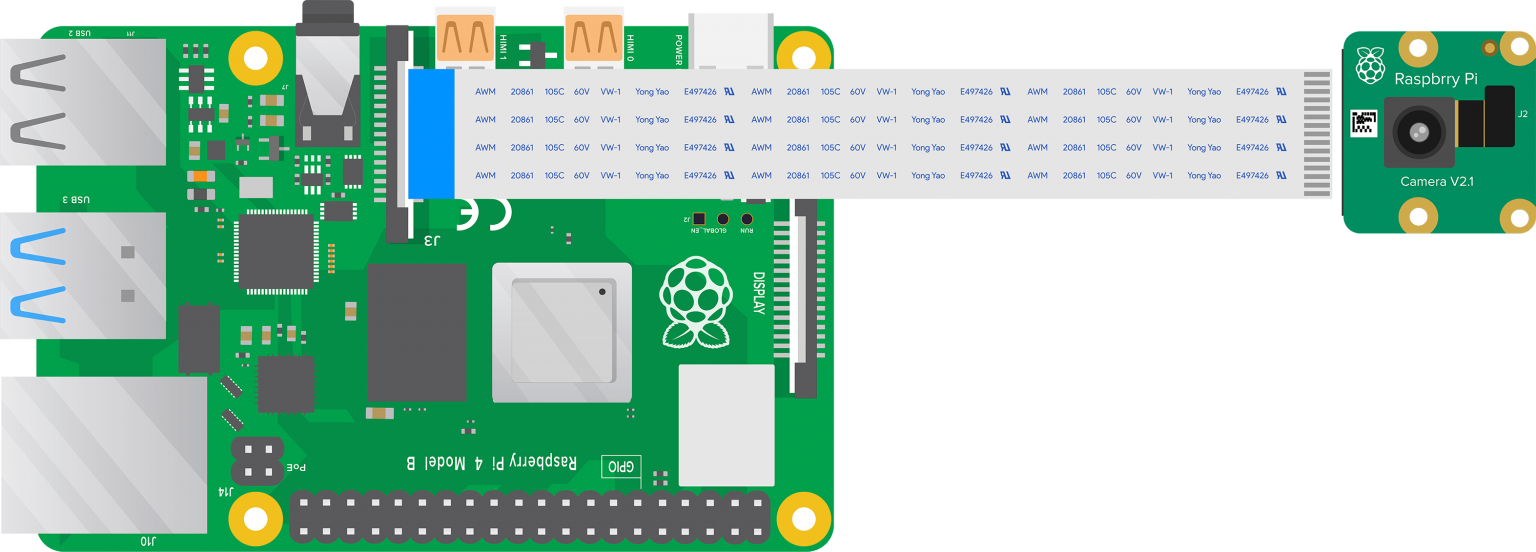
For Raspberry Pi 3-4:
The camera connector is between the Ethernet and HDMI ports. When plugging in the cable, the silver contacts must face the HDMI port.
- 15pin-15pin Connection
 |
|
 |
 |
- 15pin-22pin Connection
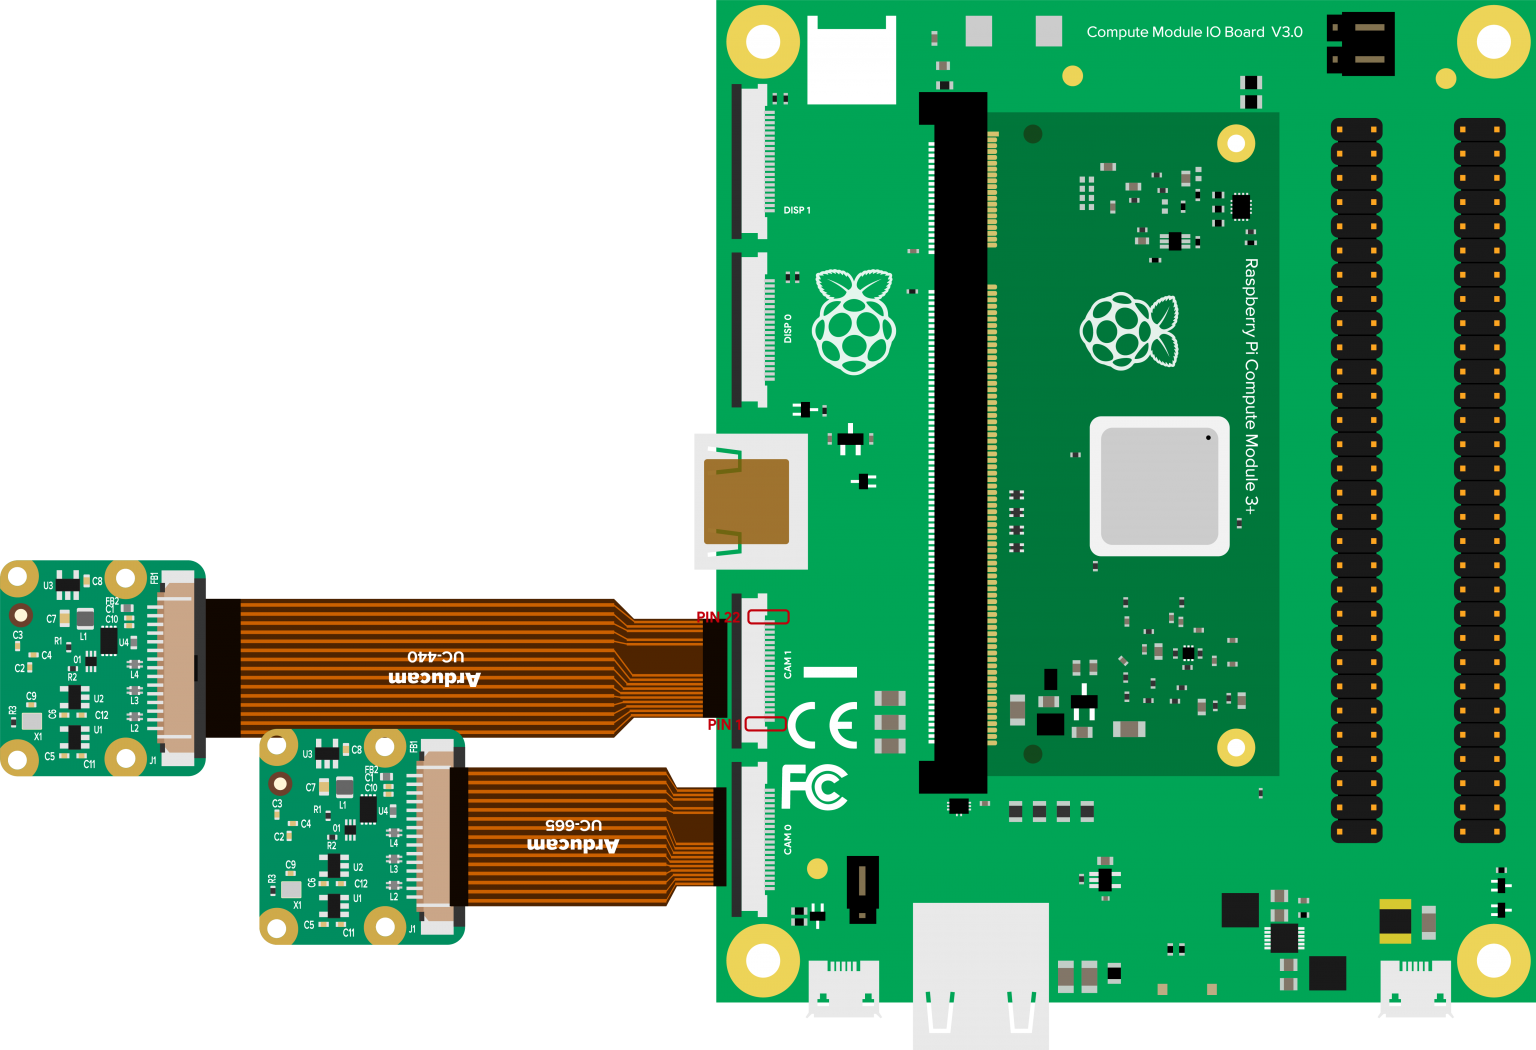
For Raspberry Pi Zero series and Compute Module:
The camera connector is located on the side of the board at the interface labeled camera. When inserting the cable, the board should be facing up and the silver contacts should be facing down.
To open the connector, gently pull upward on the tab on the top of the connector. The flex cable should be inserted firmly into the connector, being careful not to bend the flex cable at too acute an angle. To close the connector, push the top part of the connector down while holding the flex cable in place.
- 22pin-22pin & Pi Zero/ Pi Zero 2 W
 |
 |
- 22pin-22pin & CM3/CM4
 |
 |
Software
Pivariety Cameras
Pivariety cameras Sensor list:
| Resolution | Camera Module |
|---|---|
| 2MP | IMX462 |
| 2MP | OG02B10 |
| 2MP | OV2311 |
| 2.3MP | AR0234 |
| 16MP | IMX298 |
| 18MP | AR1820 |
| 21MP | IMX230 |
Note
Since Raspberry Pi Bullseye OS 6.1.21, the arducam-pivariety driver has been merged into the Raspberry Pi kernel and the name of the device tree is changed to arducam-pivariety, dtoverlay=arducam-pivariety is required to set the overlay.
Supported Platforms and OS
| Note for Supported Platform and OS | |||
|---|---|---|---|
| Platform | Bookworm(rpicam/libcamera) | Bullseye(libcamera) | Buster(raspistill) |
| Raspberry Pi 5 | √ | ||
| Raspberry Pi 4B / 3B+ / 3A+ / Zero / Zero 2 W | √ | √ | |
| Raspberry Pi CM3 / CM3+ / CM4 (extra adapter board required) |
√ | √ | |
Use libcamera to access Arducam Pivariety Camera
Info
If you are using Arducam Pivariety camera module on Raspberry Pi 5, please connect your camera module to camera 1 port.(The camera 1 port is enabled default.)
Raspberry Pi Bullseye OS 6.1.21 and Later/Bookworm OS
Step 1. Download the bash scripts
wget -O install_pivariety_pkgs.sh https://github.com/ArduCAM/Arducam-Pivariety-V4L2-Driver/releases/download/install_script/install_pivariety_pkgs.sh
chmod +x install_pivariety_pkgs.sh
Step 2. Install libcamera
./install_pivariety_pkgs.sh -p libcamera_dev
Step 3. Install libcamera-apps
./install_pivariety_pkgs.sh -p libcamera_apps
Step 4. Modify .Config file
- For Raspberry Pi Bookworm users running on Pi 5, please do the following:
sudo nano /boot/firmware/config.txt
#Find the line: [all], add the following item under it:
dtoverlay=arducam-pivariety
#Save and reboot.
If you want to enable the camera kit on the
cam0port of Pi5, please refer to the following modifications:
sudo nano /boot/firmware/config.txt
#Find the line: [all], add the following item under it:
dtoverlay=arducam-pivariety,cam0
#Save and reboot.
- For Raspberry Pi Bookworm/Bullseye users running on Pi 4, please do the following:
Bookworm OS on Pi4
sudo nano /boot/firmware/config.txt
#Find the line: [all], add the following item under it:
dtoverlay=arducam-pivariety
#Save and reboot.
Bullseye OS on Pi4 (Bullseye 6.1.21 and later versions)
sudo nano /boot/config.txt
#Find the line: [all], add the following item under it:
dtoverlay=arducam-pivariety
#Save and reboot.
- For Bullseye users running on Pi 0 ~ 3, please also:
Open a terminal
Run sudo raspi-config
Navigate to Advanced Options
Enable Glamor graphic acceleration
Reboot your Pi
If you encounter the display issues, please also execute the following steps:
Open a terminal
Run sudo raspi-config
Navigate to Advanced Options
Navigate to GL Driver
Select GL (Full KMS)
Reboot your Pi
Step5. Use libcamera to access Arducam Pivariety Camera
Preview 5 seconds.
libcamera-still -t 5000
If you don't have a display screen, you can save an image without displaying it. And an image of test.jpg will be saved in the current directory.
libcamera-still -t 5000 -n -o test.jpg
Before Raspberry Pi Bullseye OS 6.1.21
Step 1. Install Bash Script
wget -O install_pivariety_pkgs.sh https://github.com/ArduCAM/Arducam-Pivariety-V4L2-Driver/releases/download/install_script/install_pivariety_pkgs.sh
chmod +x install_pivariety_pkgs.sh
Step 2. Install libcamera
./install_pivariety_pkgs.sh -p libcamera_dev
Step 3. Install libcamera-apps
./install_pivariety_pkgs.sh -p libcamera_apps
Step 4. Install Camera drivers
# PivarietyPlease se
./install_pivariety_pkgs.sh -p kernel_driver
sudo reboot
Step5. libcamera-apps
Preview 5 seconds.
libcamera-still -t 5000
If you do not have a display screen, you can save an image without displaying it. And an image of test.jpg will be saved in the current directory.
libcamera-still -t 5000 -n -o test.jpg
Use V4L2 Tools to Manually Control Arudcam Pivariety Camera
Step 1. Modify the Config File
sudo nano /boot/config.txt
Please manually add dtoverlay=arducam-pivariety,media-controller=0 at the end of the last line of config.txt file:
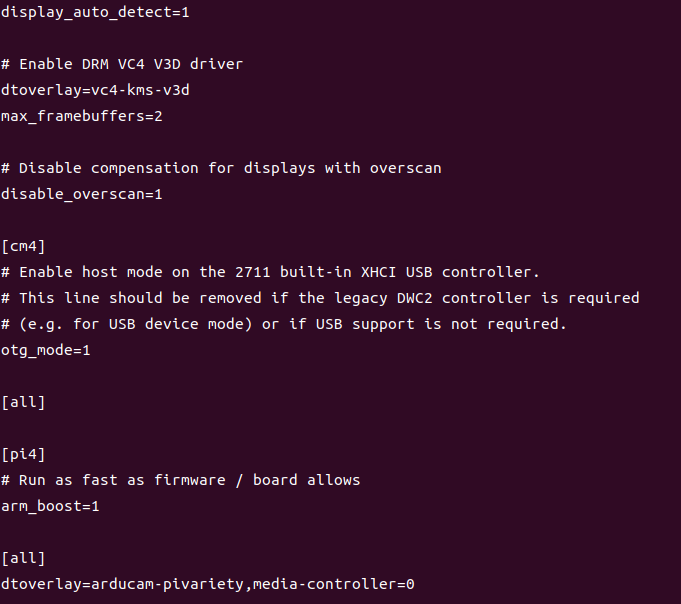
Save and reboot
sudo reboot
Step 2. Check the video0 node
ls /dev/video*

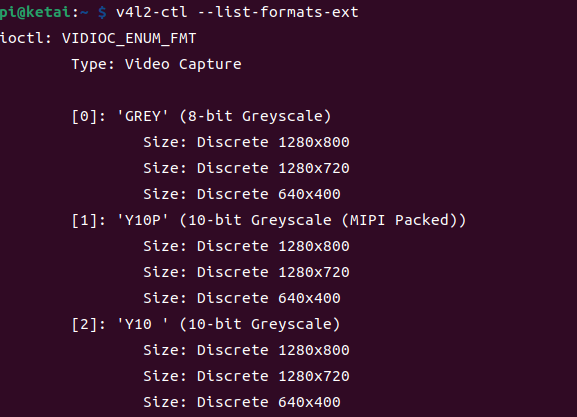
Step 3. Check the capture formats and controllers
v4l2-ctl --list-formats-ext
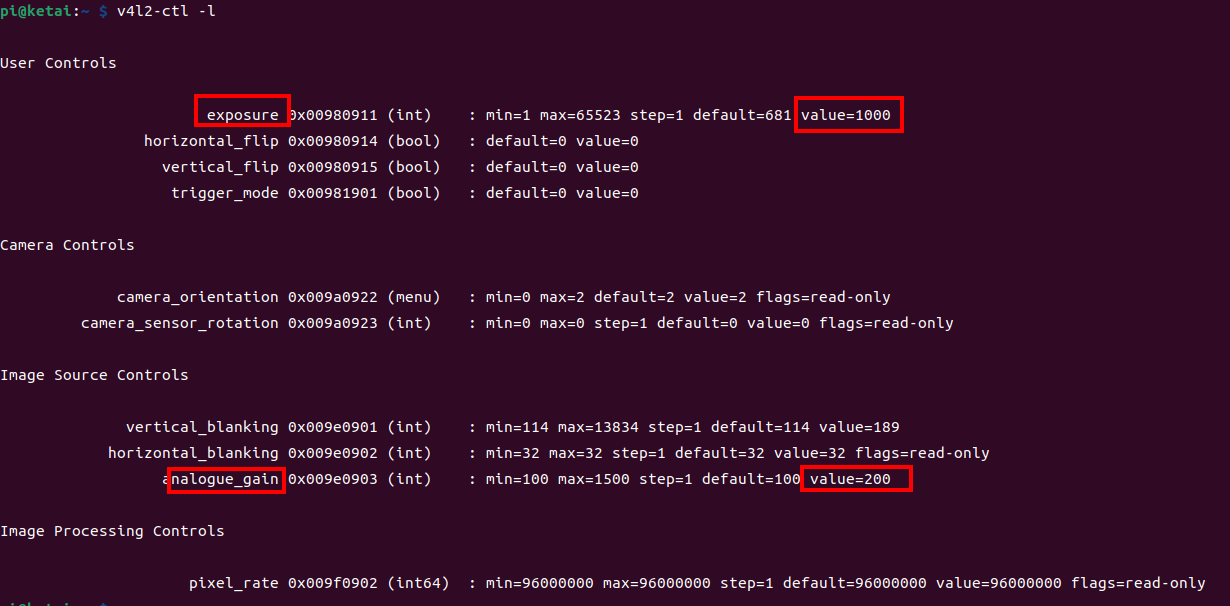
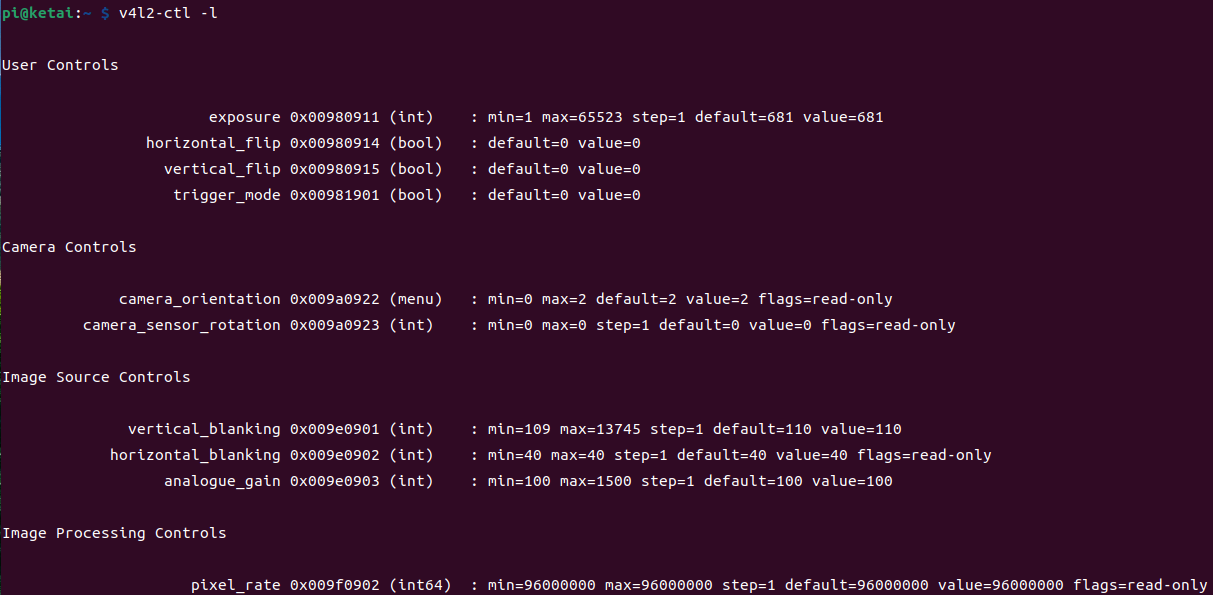
v4l2-ctl -l
Step 4. Fetch Data
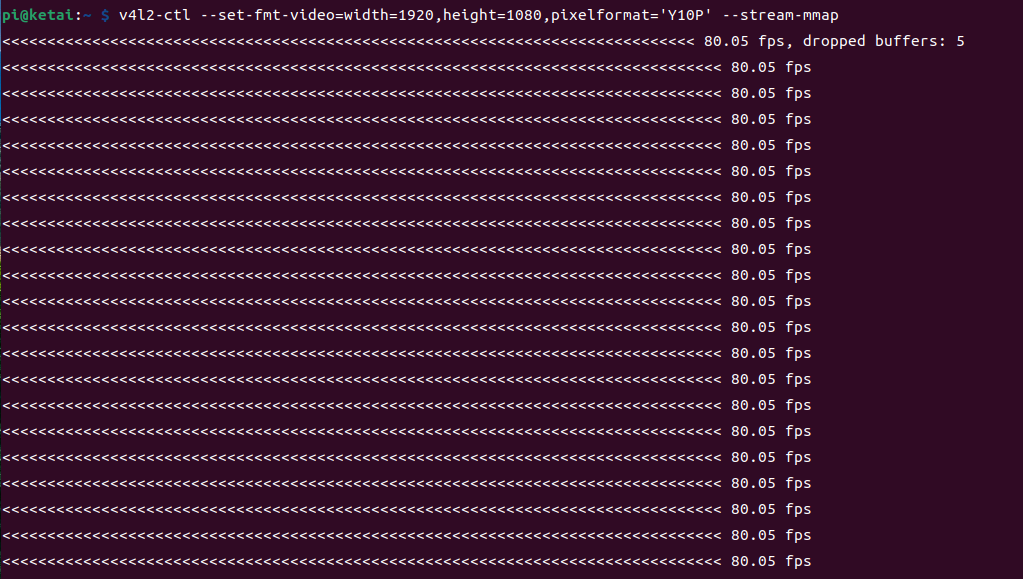
- Test the frame rate
v4l2-ctl --set-fmt-video=width=1920,height=1080,pixelformat='GREY' --stream-mmap
- Save one-frame image
v4l2-ctl --device /dev/video0 --set-fmt-video=width=1920,height=1080,pixelformat='Y10P' --stream-mmap --stream-to=frame.raw --stream-count=1

- Adjust exposure and gain
v4l2-ctl --device /dev/video0 -c exposure=1000 -c analogue_gain=200 --set-fmt-video=width=1920,height=1080,pixelformat='Y10P' --stream-mmap --stream-to=frame.raw --stream-count=1

- Chech whether it is success
v4l2-ctl -l