64MP Hawkeye
Introduction
A 64-megapixel ultra-high resolution autofocus camera module exclusively built for the latest and future generations of Raspberry Pis.
By bringing a sensor inside modern-day flagship phones to Raspberry Pi. you can take DSLR like still images at the maximum resolution of 9152 x 6944. And with an autofocus lens, the ePTZ, and the continuous-autofocus features (PDAF function is supported after September, 2023)
You now get more horsepower to build more applications, to cover more industries, to unlock more fields, at a much lower cost.
For seasoned makers, Pi Hawk-eye is designed to ensure you a smooth development, it is compatible with everything you already have: the v1/v2 form-factor, the MIPI CSI-2 connection, the latest libcamera software, the standard tripod mount, etc.
Image Sensor
| Sensor Model | 64MP Hawkeye |
|---|---|
| Shutter Type | Rolling Shutter |
| Active Pixels | 9152 (H) × 6944 (V) |
| Resolution | 64MP |
| Image Sensor Format | Type 1/1.7″ |
| Pixel Size | 0.8 µm x 0.8 µm |
| CSI-2 Data Output | 2-lane mode |
| Data Format | JPEG/YUV/RGB/RAW10 |
Motorized Focus
Arducam 64MP Hawkeye Motorized Focus Camera Modules are designed for you to control the focus via software, so you can see closer and see where you want to see.
Product
| Product Image | SKU | Pin/Connect Type | Features | Lens Type | Field of View(D/H/V) | Focus Type | IR Sensitivity |
|---|---|---|---|---|---|---|---|
 |
B0399 | 22pin/Top | High Resolution | Stock Lens | 72°(H) x 54.6°(V) | Autofocus | 650nm IR cut filter |
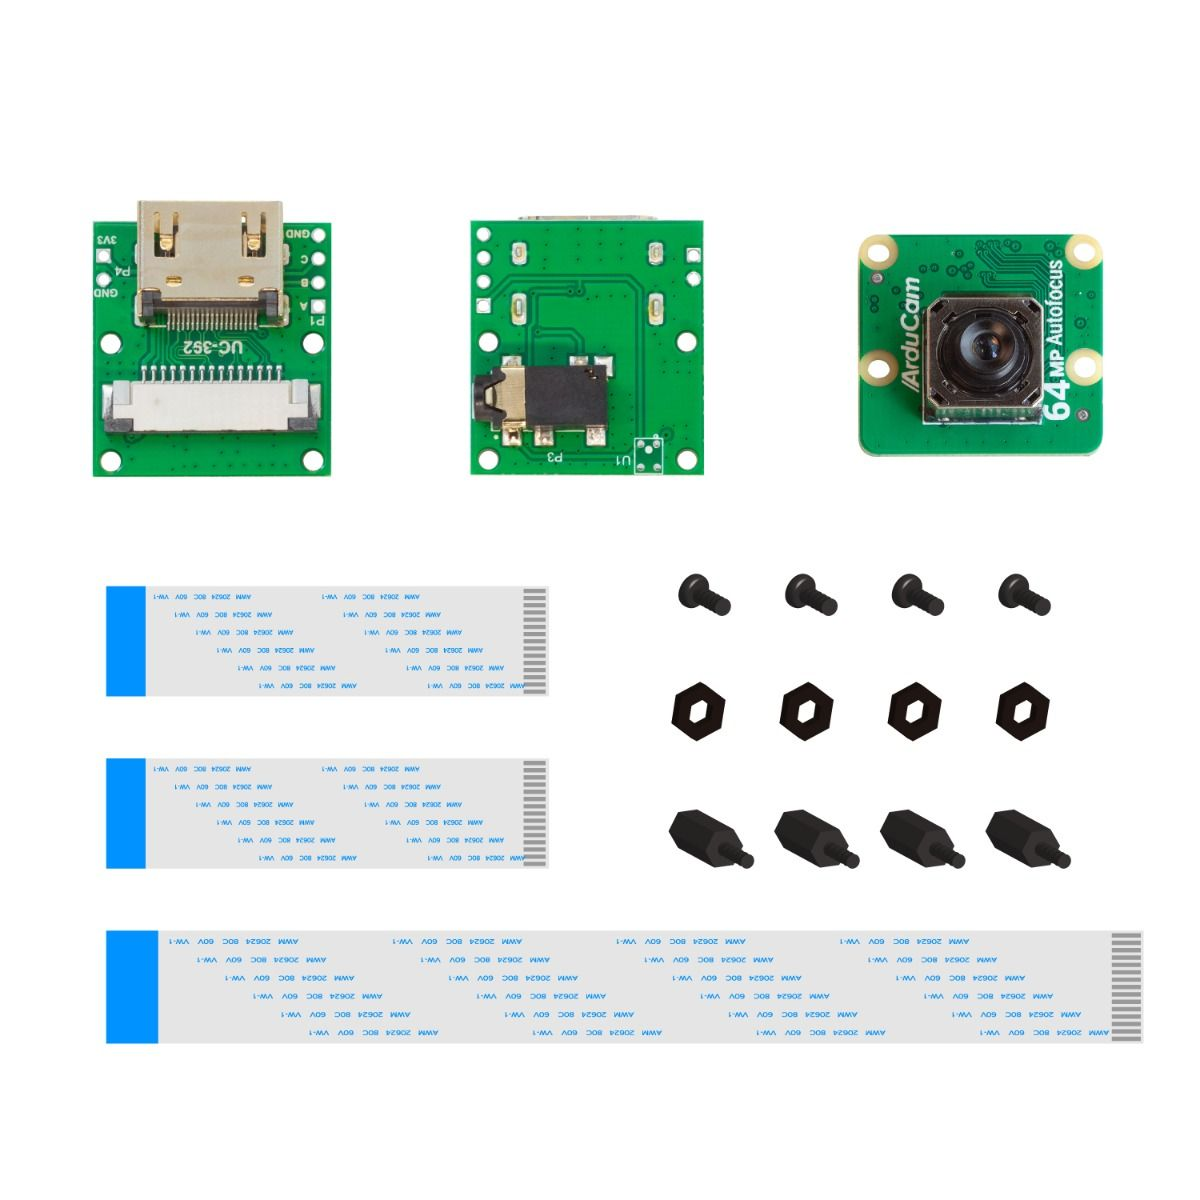 |
B0399B0091 | HDMI Extension Kit | |||||
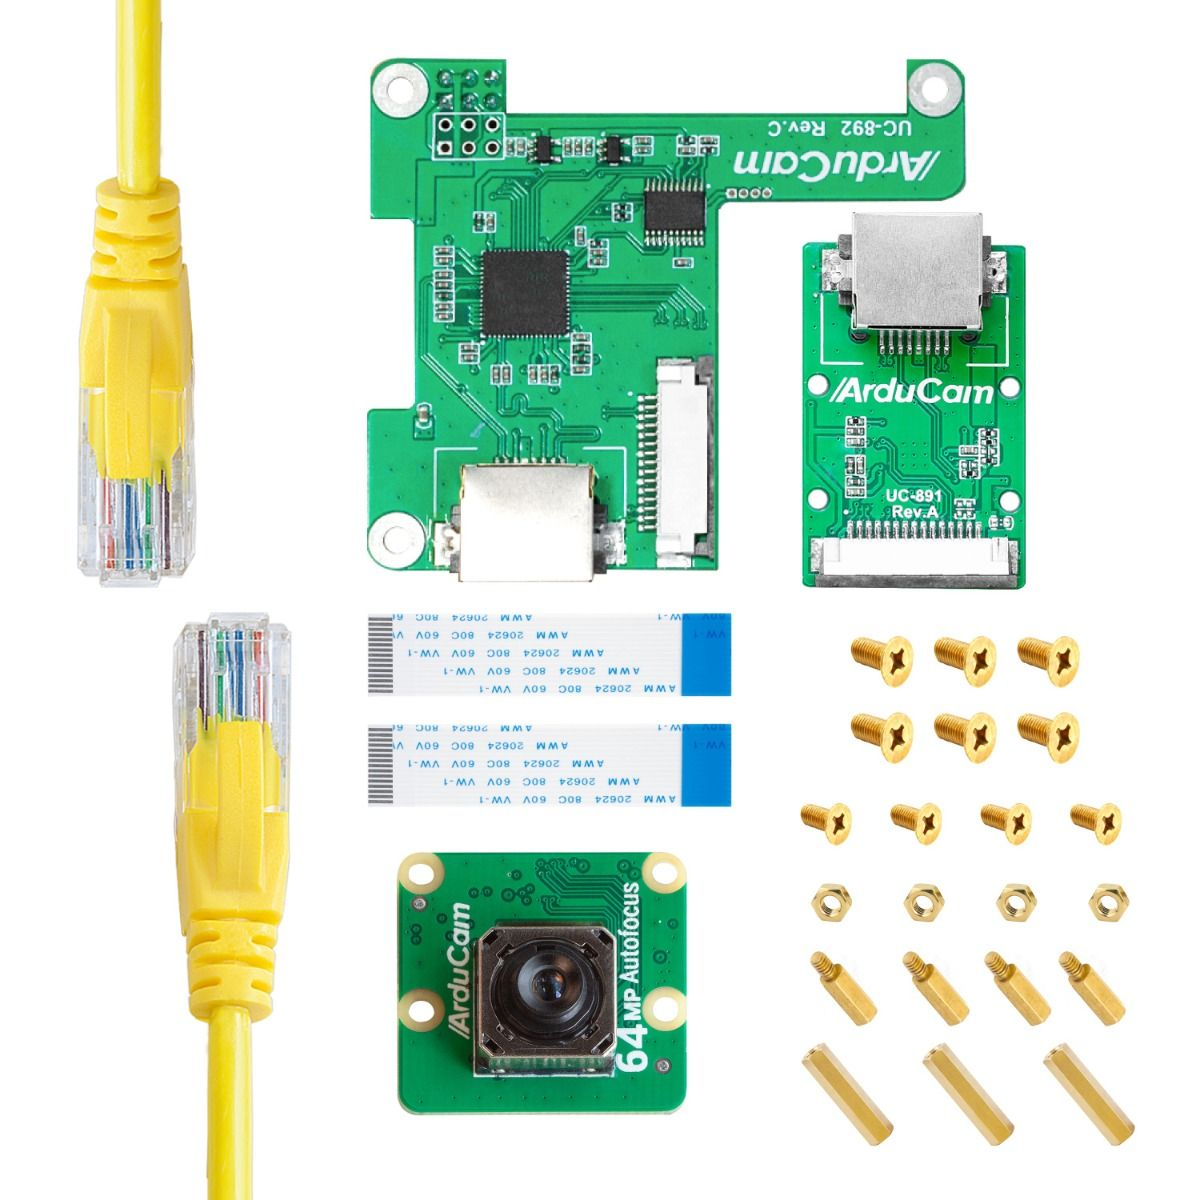 |
B0399U6248 | Ethernet Extension Kit | |||||
 |
B0399B0283 | Pan-Tilt Kit |
Supported Platforms and OS
| Note for Supported Platform and OS | |||
|---|---|---|---|
| Platform | Bookworm(rpicam/libcamera) | Bullseye(libcamera) | Buster(raspistill) |
| Raspberry Pi 5 | √ | ||
| Raspberry Pi 4B / 3B+ / 3A+ / Zero / Zero 2 W | √ | √ | |
| Raspberry Pi CM3 / CM3+ / CM4 (extra adapter board required) |
√ | √ | |
Hardware Connection
Please refer to the following doc for common hardware connection method of RPI Camera:
Quick Start Guide - Hardware Connection
Software Guide
Abstract
The earliest Raspberry Pi Bullseye version supported is 5.15.30 the version before it can not be supported.
After Raspberry Pi Bullseye 6.1.21/Bookworm kernel, Arducam 64MP Hawkeye Camera starts to support PDAF function.
Raspberry Pi Bullseye OS 6.1.21 and Later/Bookworm OS
Step 1. Download the bash scripts
wget -O install_pivariety_pkgs.sh https://github.com/ArduCAM/Arducam-Pivariety-V4L2-Driver/releases/download/install_script/install_pivariety_pkgs.sh
chmod +x install_pivariety_pkgs.sh
Step 2. Install libcamera
./install_pivariety_pkgs.sh -p libcamera_dev
Step 3. Install libcamera-apps
./install_pivariety_pkgs.sh -p libcamera_apps
Step 4. Modify .Config file
- For Raspberry Pi Bookworm users running on Pi 5, please execute:
sudo nano /boot/firmware/config.txt
#Find the line: [all], add the following item under it:
dtoverlay=arducam-64mp
#Save and reboot.
If you want to enable the camera kit on the
cam0port of Pi5, please refer to the following modifications:
sudo nano /boot/firmware/config.txt
#Find the line: [all], add the following item under it:
dtoverlay=arducam-64mp,cam0
#Save and reboot.
- For Raspberry Pi Bookworm/Bullseye users running on Pi 4, please execute:
Bookworm OS on Pi4
sudo nano /boot/firmware/config.txt
#Find the line: [all], add the following item under it:
dtoverlay=arducam-64mp
#Save and reboot.
Bullseye OS on Pi4 (Bullseye 6.1.21 and later versions)
sudo nano /boot/config.txt
#Find the line: [all], add the following item under it:
dtoverlay=arducam-64mp
#Save and reboot.
- For Bookworm/Bullseye users running on Pi 0 ~ 3, please execute:
Bookworm OS on Pi0-Pi3
sudo nano /boot/firmware/config.txt
#Find the line: [all], add the following item under it:
dtoverlay=arducam-64mp
#Save and reboot.
Bullseye OS on Pi0-Pi3
sudo nano /boot/config.txt
#Find the line: [all], add the following item under it:
dtoverlay=arducam-64mp
#Save and reboot.
Open a terminal
Run sudo raspi-config
Navigate to Advanced Options
Enable Glamor graphic acceleration
Reboot your Pi
If you encounter the display issues, please also execute the following steps:
Open a terminal
Run sudo raspi-config
Navigate to Advanced Options
Navigate to GL Driver
Select GL (Full KMS)
Reboot your Pi
Step5. Use libcamera to access Arducam 64MP Camera
Preview 5 seconds.
libcamera-still -t 5000
If you don't have a display screen, you can save an image without displaying it. And an image of test.jpg will be saved in the current directory.
libcamera-still -t 5000 -n -o test.jpg
For more instructions, please refer to: libcamera User Guide
Before Raspberry Pi Bullseye OS 6.1.21
Step 1. Download the bash scripts
wget -O install_pivariety_pkgs.sh https://github.com/ArduCAM/Arducam-Pivariety-V4L2-Driver/releases/download/install_script/install_pivariety_pkgs.sh
chmod +x install_pivariety_pkgs.sh
Step 2. Install libcamera
./install_pivariety_pkgs.sh -p libcamera_dev
Step 3. Install libcamera-apps
./install_pivariety_pkgs.sh -p libcamera_apps
Step 4. Install Camera drivers
./install_pivariety_pkgs.sh -p 64mp_pi_hawk_eye_kernel_driver
Please reboot your Pi when you finish the installation.
sudo reboot
Step5. Using libcamera to Access Arducam 64MP Camera
Preview 5 seconds.
libcamera-still -t 5000
If you don't have a display screen, you can save an image without displaying it. And an image of test.jpg will be saved in the current directory.
libcamera-still -t 5000 -n -o test.jpg
For more instructions, please refer to: libcamera User Guide
AF/Manual Focus Function
Abstract
For cameras with focus motors, we have added autofocus parameters to enable single autofocus and continuous autofocus functions.
Please refer to the following doc for details:
Autofocus/Manual Focus Function for Arducam 64MP Camera
Controlling Raspberry Pi Cameras with Your Smartphone (Android)
If you require to control Arducam Pi Native Cameras on Android platform, you can refer to the following doc for details:
Access Arducam Cameras on Android Platform