Getting Started: Arducam ToF Camera for Raspberry Pi
A quick step-by-step tutorial to help you jump-start your Machine Vision adventure with the Arducam ToF camera for Raspberry Pi.
Note
Raspberry Pi Bullseye/Bookworm OS is required for this camera (04/04/2022 and later releases), a fresh install is highly recommended.
How ToF Works?
"ToF" stands for "Time of Flight".
A ToF Camera emits modulated lights (CW method) and uses the time it takes for the said lights to be reflected back to measure the distance/depth info of any given object/scene, and you can obtain depth data (X, Y & Z coordinate position) in every pixel.
Light travel is calculated with d=C/2f, where C is the speed of light and f is the modulation frequency.
Hardware Connection
Hardware Connection on Pi4
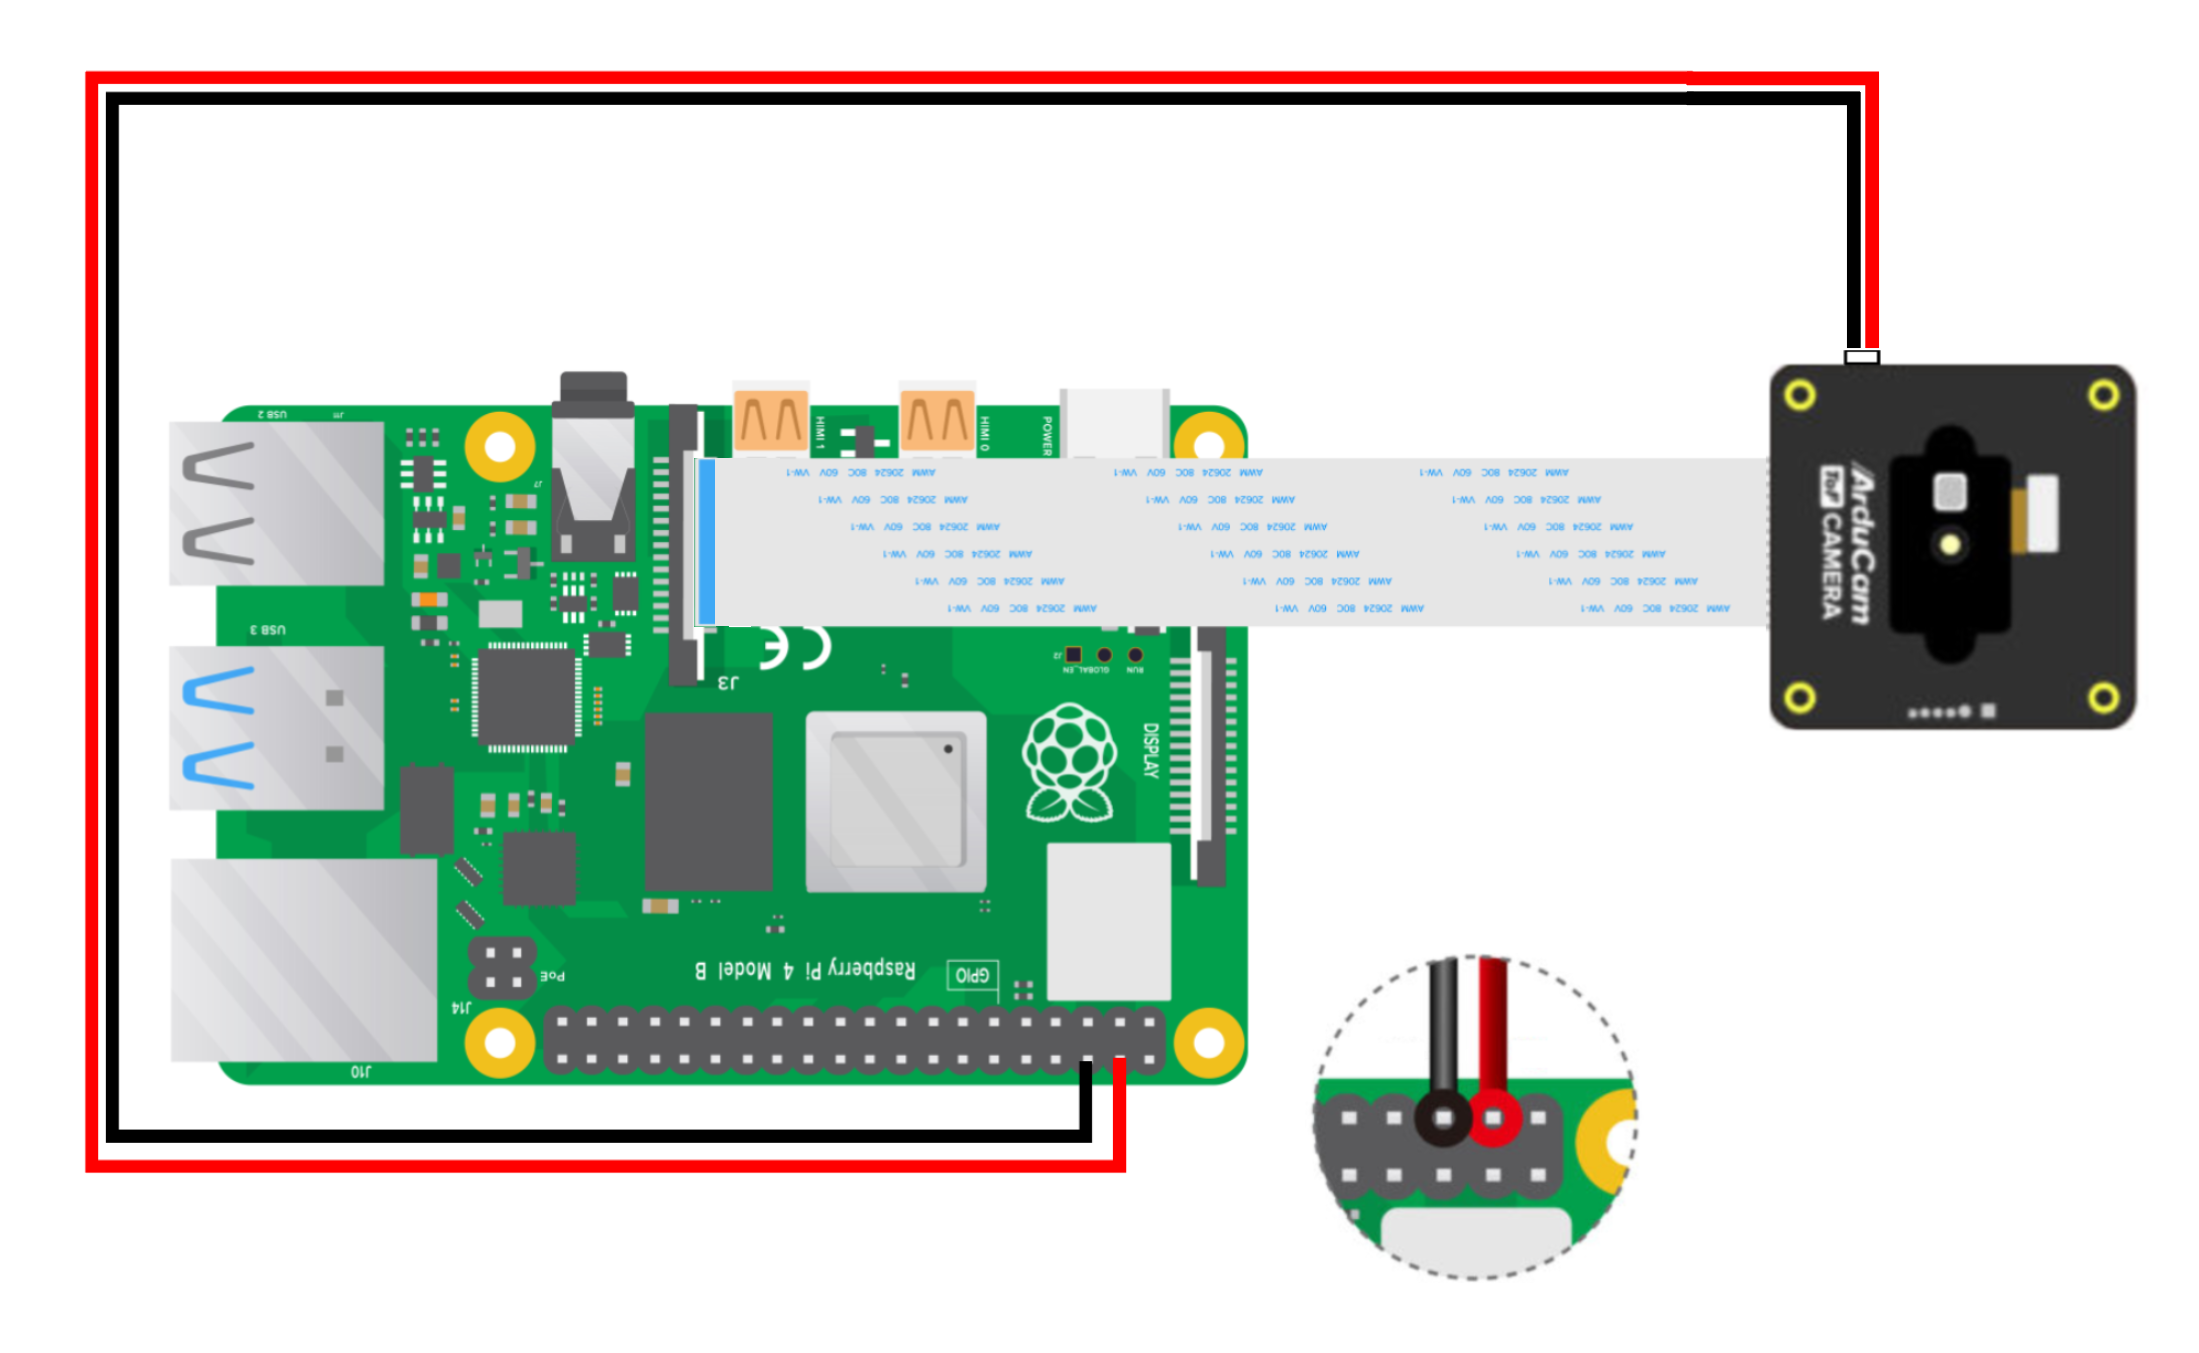
For a more detailed graphic guide on how to connect, please find out here.
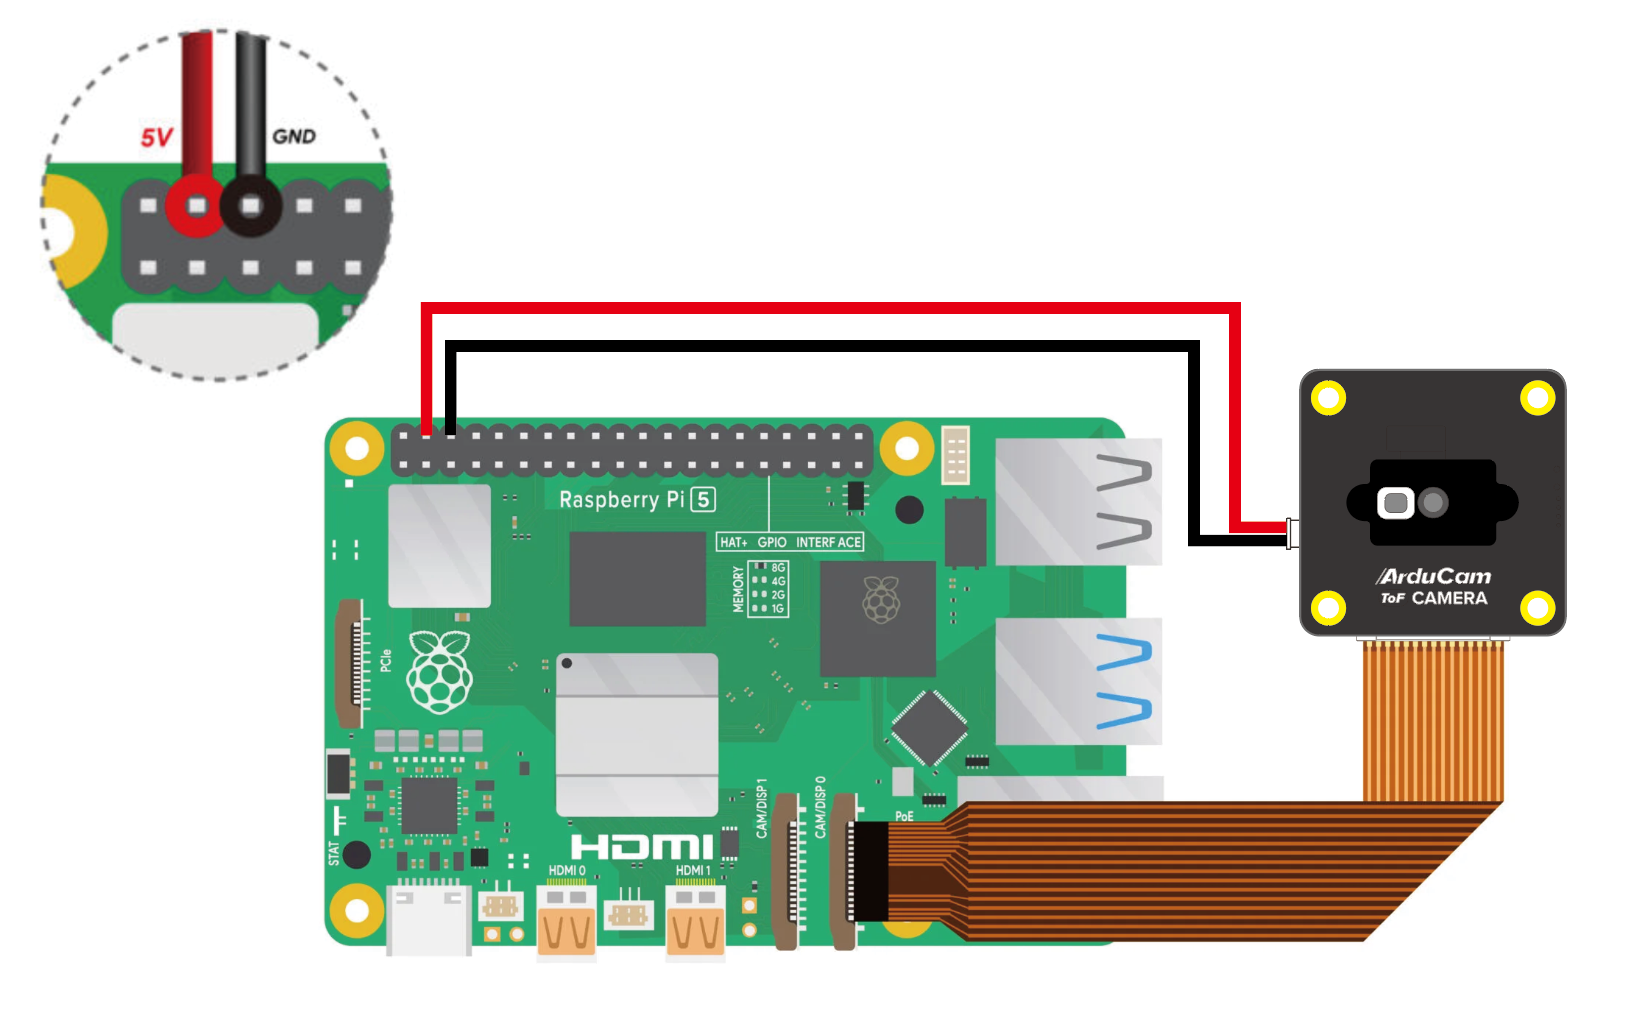
Hardware Connection on Pi5
Software Guide
Preparation on Pi5
Attention on Raspberry Pi 5
You will require updating the camera firmware for the first time using Arducam ToF on Pi5. Please refer to the following content to update:
-
Enter Recovery Mode
Please refer to the following content to enable the recovery mode:
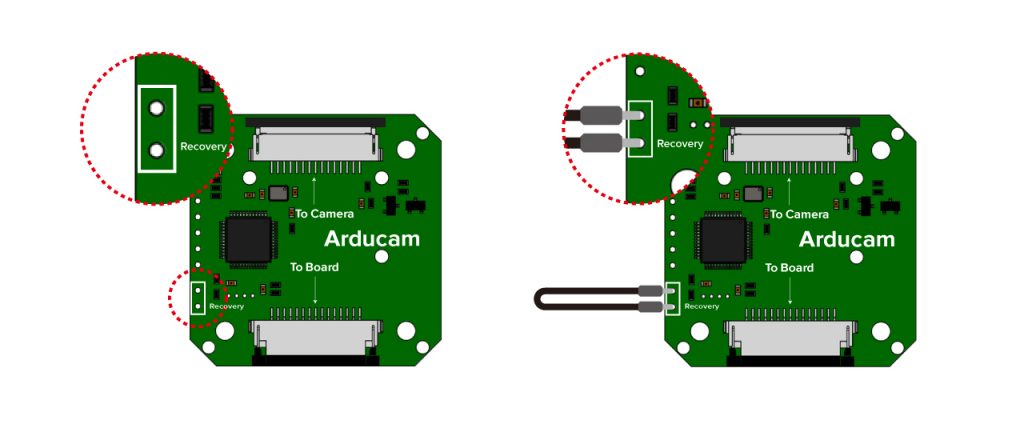
Step1. Connect Arducam ToF camera to Raspberry Pi
Step2. Keep your Raspberry Pi Power off
Please keep your RPI Power off and Enable recovery on Arudcam ToF camera board using Dupont Line:
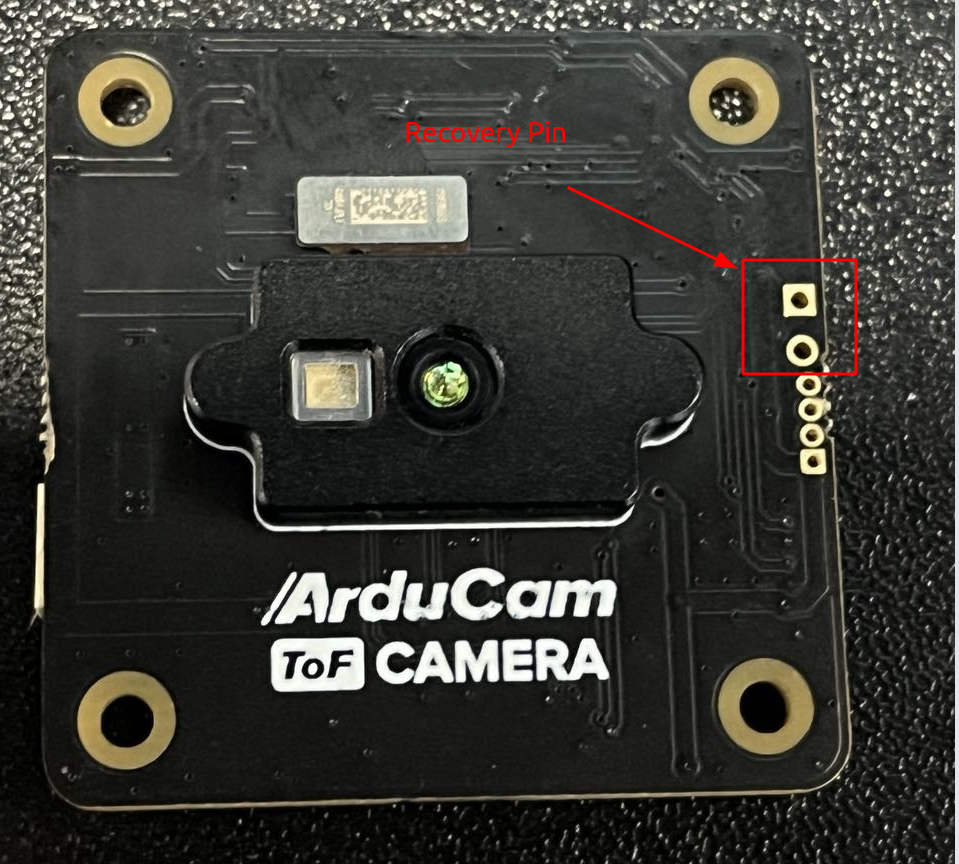
[The following camera diagram is for reference only:]
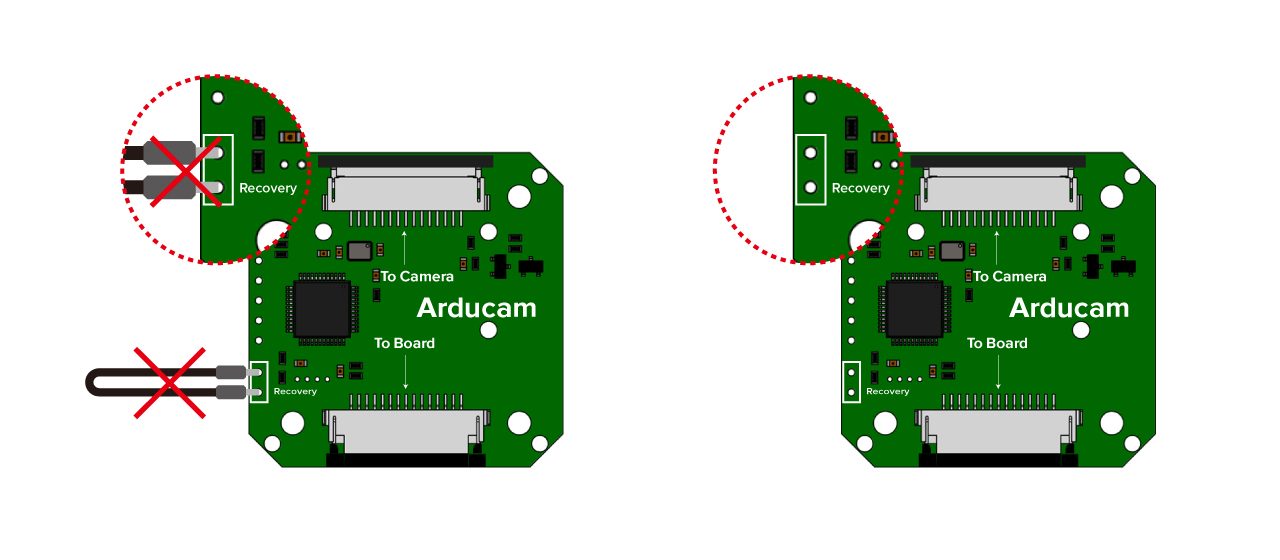
Step3. Power on your Raspberry Pi
Please Disable recovery after powering on RPi:
[The following camera diagram is for reference only:]
-
Download Firmware Update Tool
Arducam_ToF_B0410_Firmware_Update_Tool
-
Install Dependencies
sudo apt update -y && sudo apt install -y libtinfo5
-
Unzip the Update Tool
Tip
You can check whether it is 32bit or 64bit through the dpkg --print-architecture command. Then you can execute the following commands according to the os version:
tar xzvf B0410_Tof_Firmware.tar.gz
# for 64bit os
cd B0410_Tof_Firmware/aarch64/

# for 32bit os
cd B0410_Tof_Firmware/armv7l/

tar xzvf B0410_Tof_Firmware.tar.gz

cd b0410_tof_firmware/
-
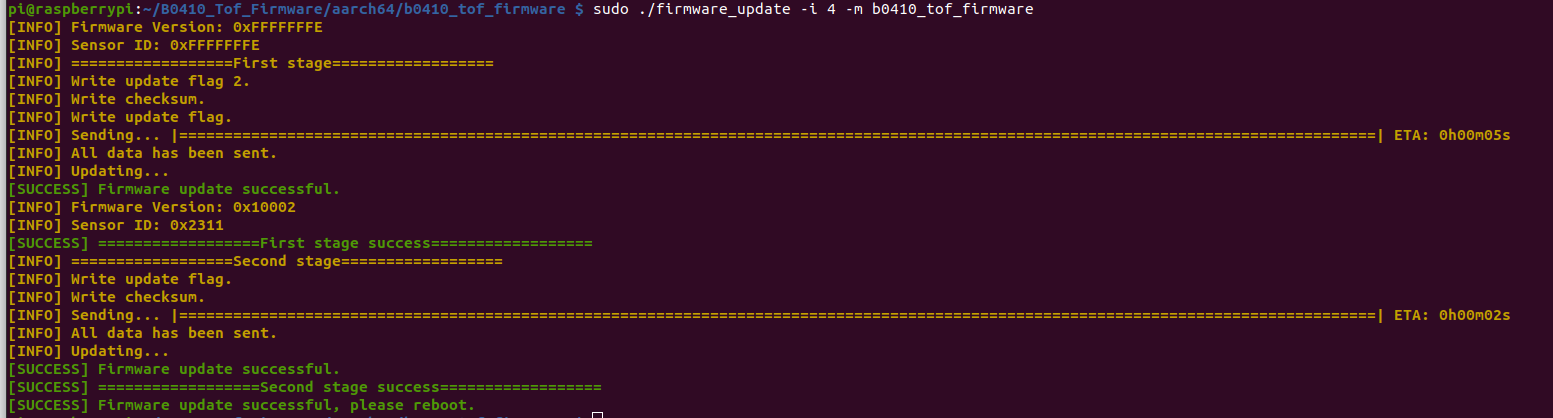
Update Firmware
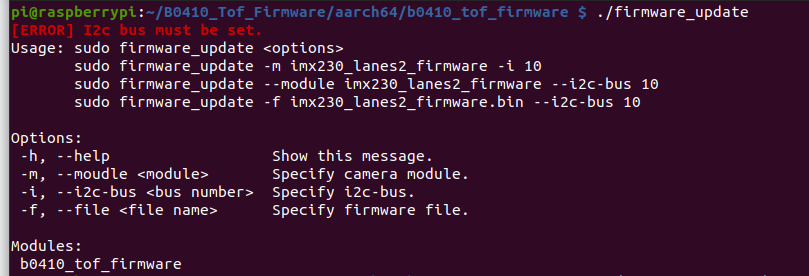
Check i2c bus:
dmesg | grep arducam

Execute the update:
sudo ./firmware_update -i 4 -m b0410_tof_firmware
Warning
You need to enter Recovery mode before updating. Please refer to the following operation to enter the Recovery mode:
If the Firmware Version is not 0xFFFFFFFE, it means that the Recovery mode has not been entered.
Reboot
sudo reboot
-
Appendix
help message:
Next
For Raspberry Pi 4 users and Raspberry Pi 5 users who have updated the camera firmware, please refer to the following content to continue using the camera:
Step 1. Pull the repository
git clone https://github.com/ArduCAM/Arducam_tof_camera.git
Step 2. Change the directory to Arducam_tof_camera
cd Arducam_tof_camera
Step 3. Installation (Driver, Dependencies, SDK, OpenCV)
./Install_dependencies.sh
When you see the reboot prompt, enter y. Raspberry Pi will automatically reboot.
Step 4. Compile & run
./compile.sh
Once it’s successfully compiled, live camera previews will automatically pop up.
Instructions for Safe Use
To properly use the Arudcam ToF Camera, kindly note:
- Before connecting, you should always power the Raspberry Pi off and remove the power supply first.
- Make sure the cable on the camera board is locked in place.
- Make sure the cable is correctly inserted in the Raspberry Pi board’s MIPI CSI-2 connector.
- Avoid high temperatures.
- Avoid water, moisture, or conductive surfaces while in operation.
- Avoid folding, or straining the flex cable.
- Avoid cross-threading with tripods.
- Gently push/pull the connector to avoid damaging the printed circuit board.
- Avoid moving or handling the printed circuit board excessively while it’s in operation.
- Handle by the edges to avoid damage from electrostatic discharge.
- Where the camera board is stored should be cool and as dry as possible.
- Sudden temperature/humidity changes can cause dampness in the lens and affect the image/video quality.