Get Started with 108MP Evaluation Kit on Windows
It’s super easy to capture full-resolution still images with the 108MP dev kit, follow the below guide so you can get the camera up and running within no time.
What you need
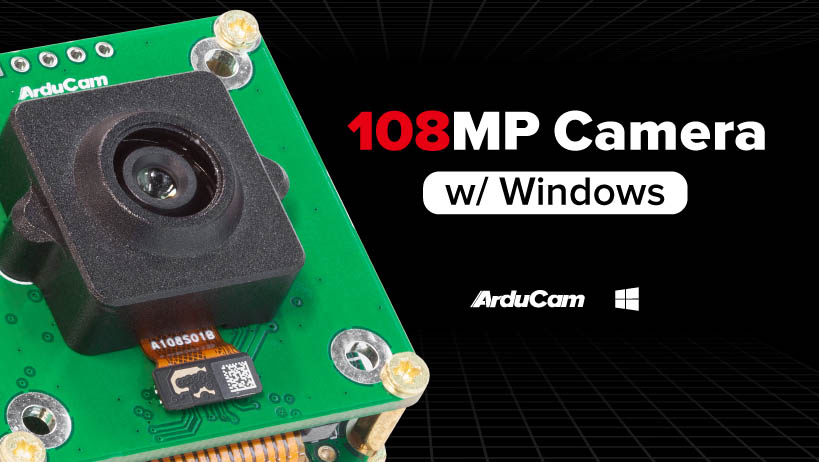
- Arducam 108MP Camera Kit
- USB 3.0 Cable (included in the kit)
- Any computer running Windows
- Windows GUI installation program
- Config file for the 108MP Camera
Step 1. Install the USB 3.0 driver for windows.
Please refer to this guide.
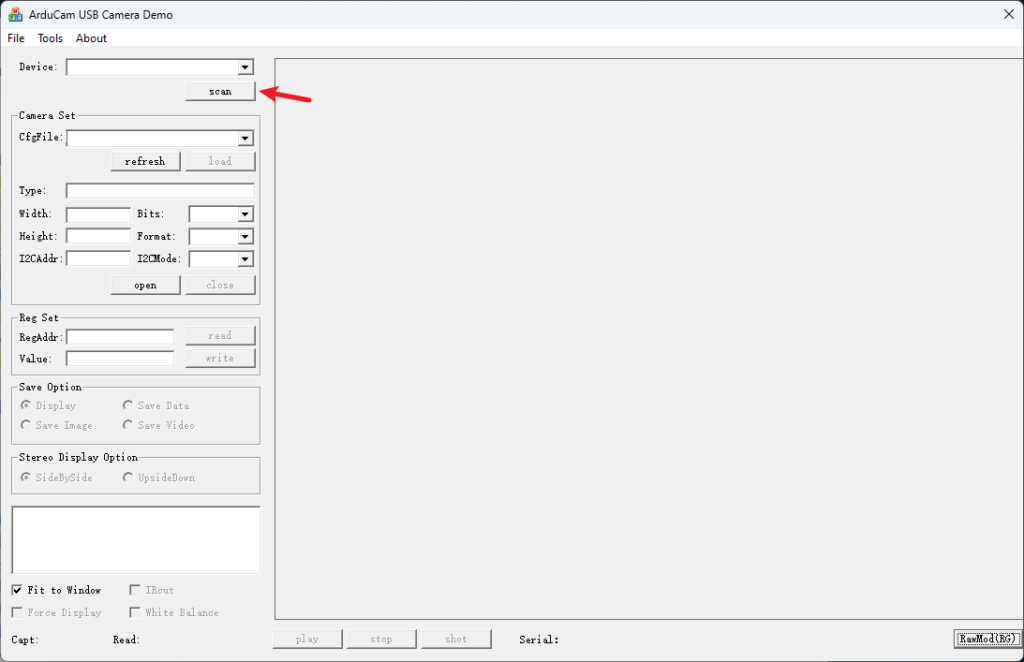
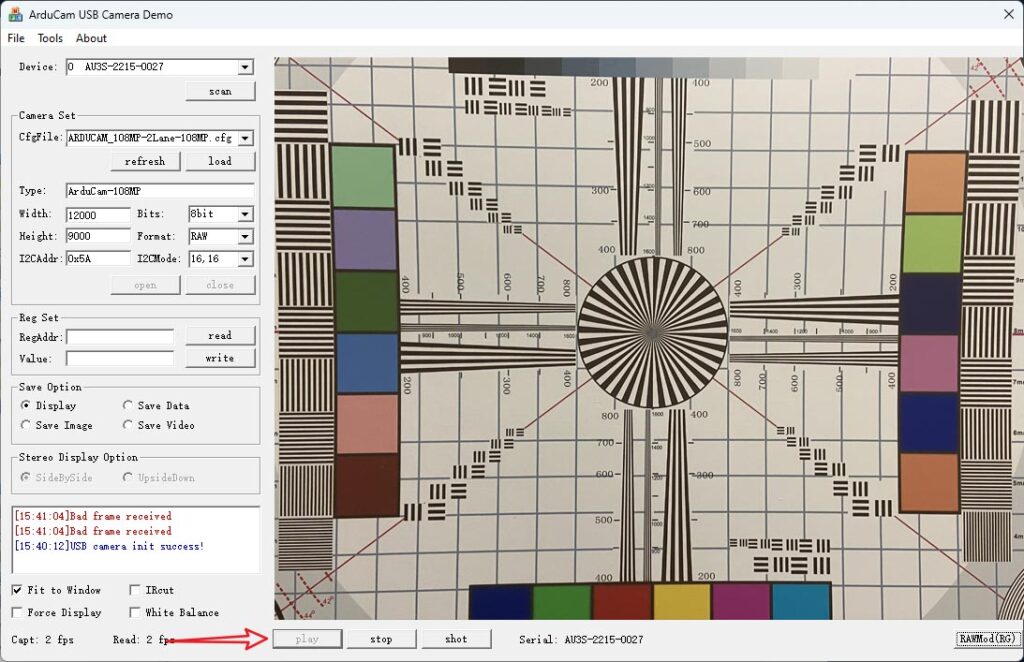
Step 2. Connect the camera to your computer, open the GUI program, and click “scan”.
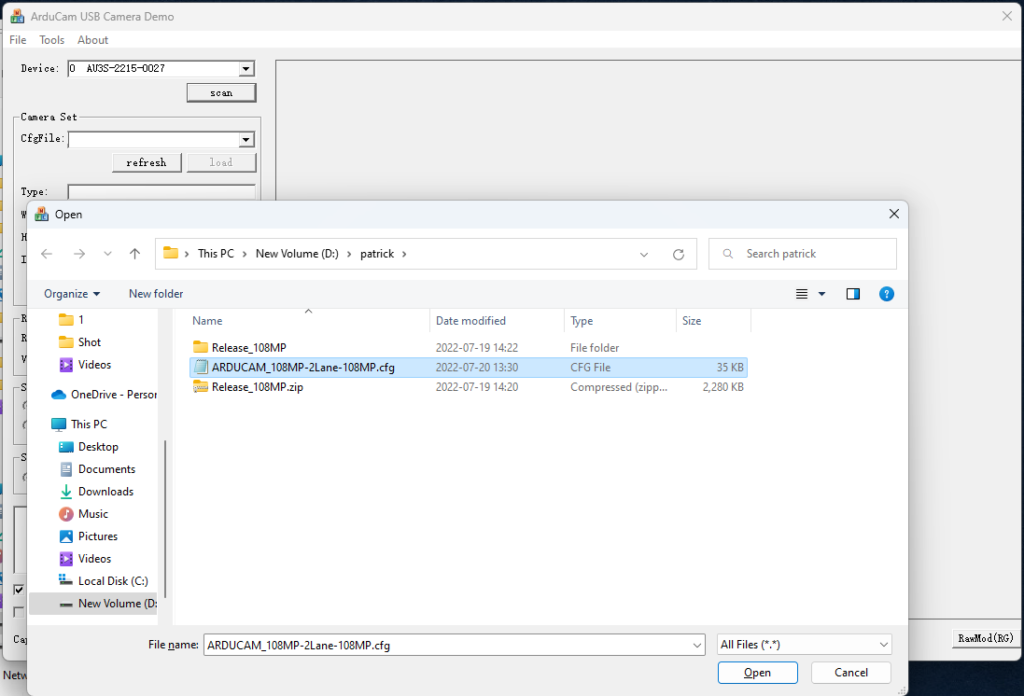
Step 3. Click “File” > “Open”, and select the config file.
Step 4. Click “load”, then click “open”.
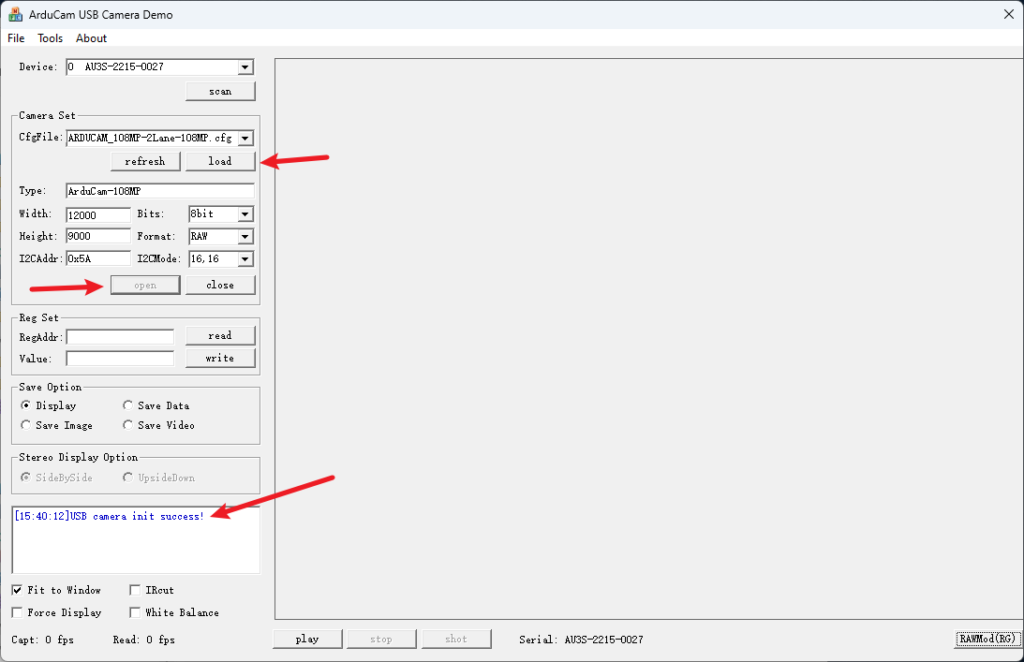
There should be a message saying “USB camera init success!”
Step 5. Click “play”, and you should see a live preview of the camera.
Step 6. Click “Tools”, and then click “Controls”.
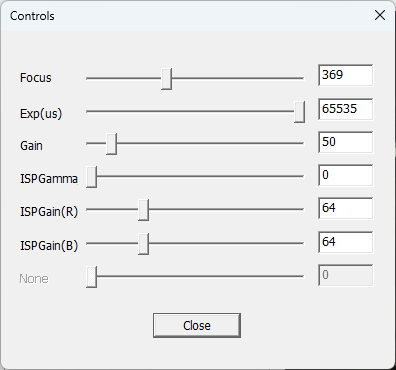
Here you can make some adjustments:
Focus: set the focus.
Exp: set the exposure.
ISPGamma: Toggle the gamma settings.
ISPGain(R): Set a value of the red channel.
ISPGain(B): Set a value of the blue channel.
Step 7. Click “shot” to take a photo.
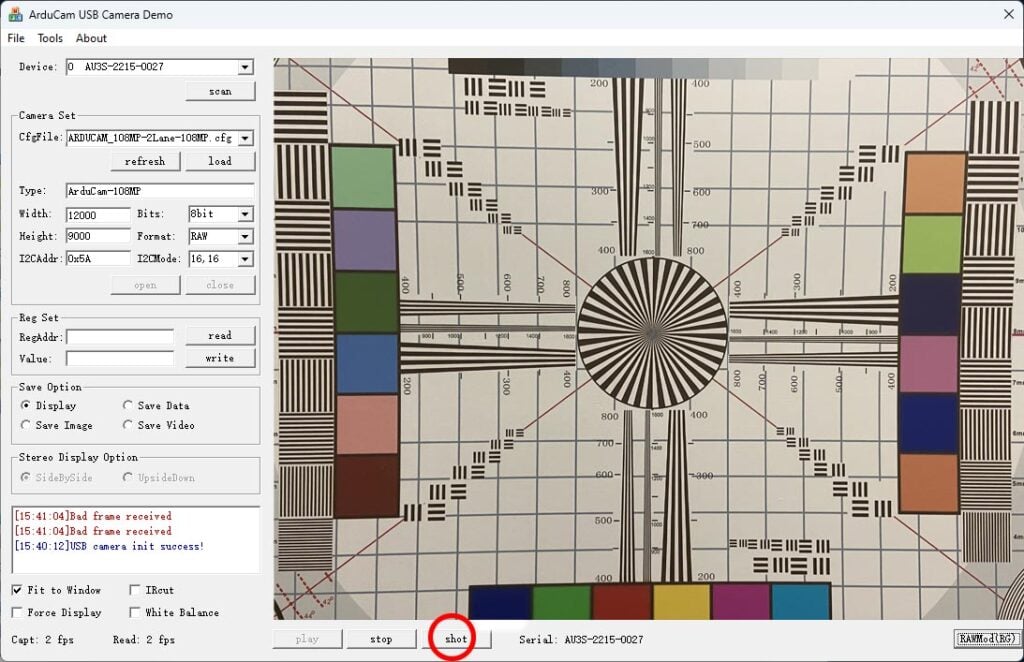
Locate the GUI program, and you can find the image inside the “shot” folder.