Shared Network Configuration
Host Network Configuration (Windows):
Method 1: Use Tftp64 tool to set up host sharing Method 2: Set up WLAN network sharing
Configuring a Host Network Share Using Tftpd64
1. Prerequisites
Configure the Network Adapter with a Static IP
Use the SetIP.exe utility to configure the required network adapter with a fixed static IP address.
-
Double-click
SetIP.exeto launch the utility, then click Yes when prompted for administrator privileges.
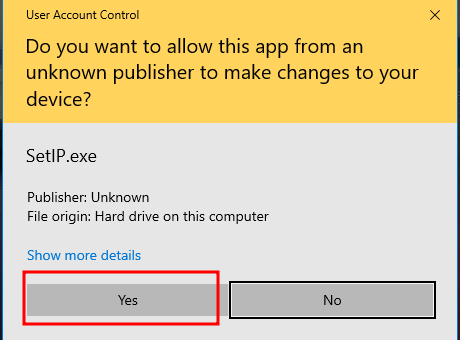
-
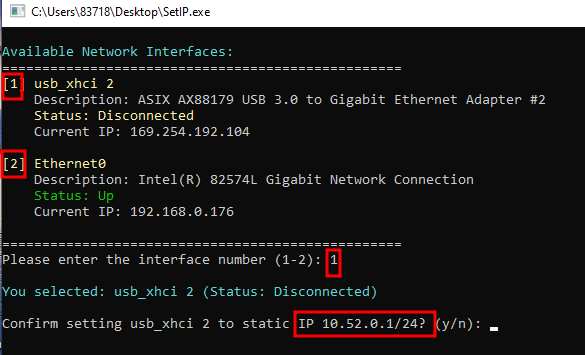
Select the network adapter connected to the all-in-one system.
In this example, select network adapter 1 (USB 3.0) by entering1and pressing Enter.
-
The selected adapter will be configured with the following fixed static IP address:
- IP address:
10.52.0.1 - Subnet prefix:
/24 - Subnet mask:
255.255.255.0
- IP address:
-
Enter
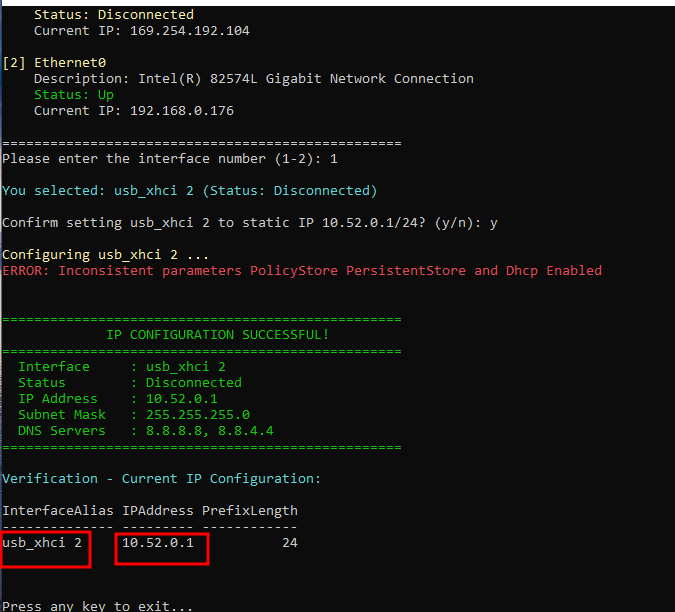
yto confirm the configuration. Once the configuration is completed, press any key to exit the utility.
2. Install Tftpd64
Install the Tftpd64 software before proceeding.
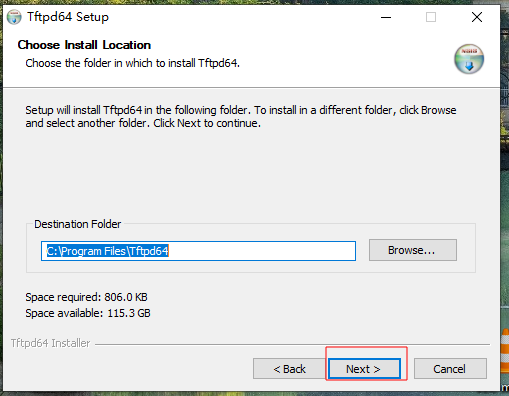
Double Click the file to install the software, click Next
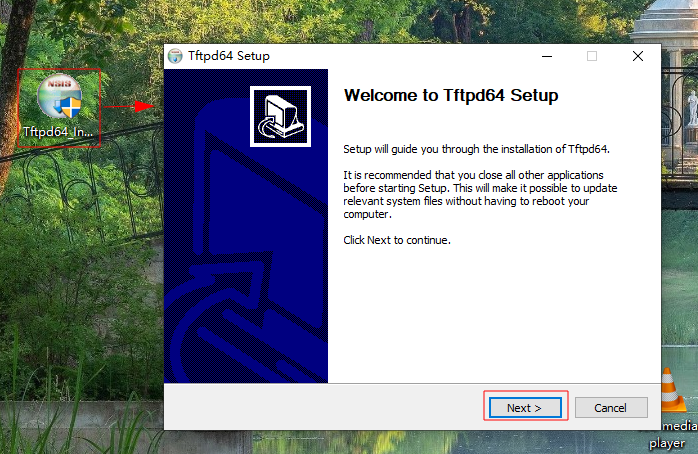
Then click Next
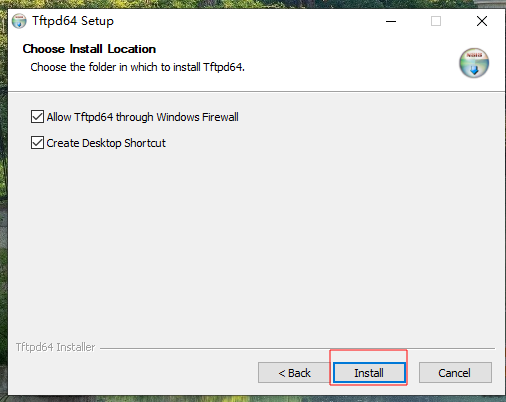
Then click Install
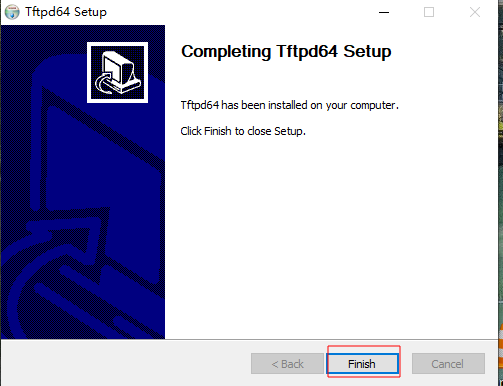
Then click Finish
3. Configure Tftpd64
Enable the DHCP Server
-
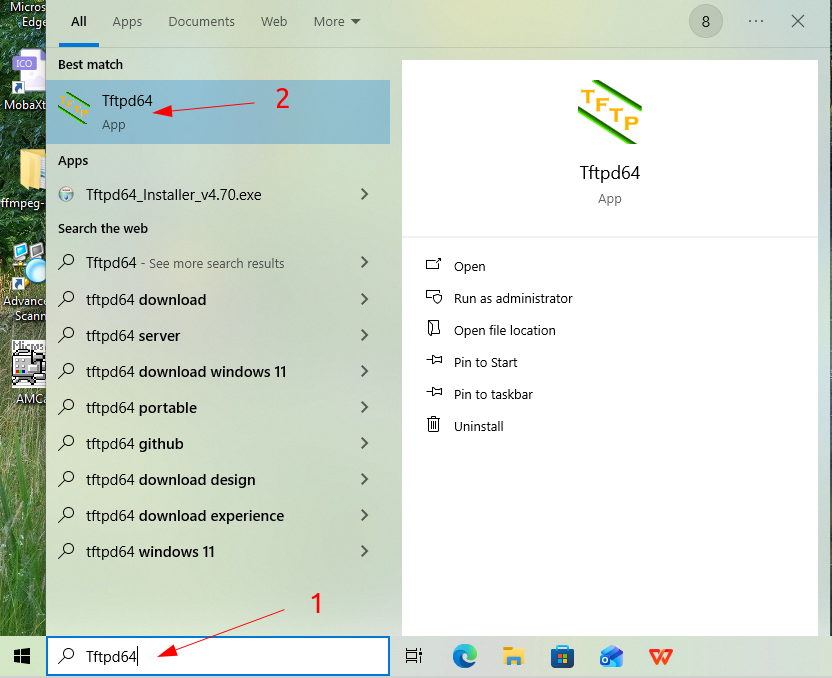
Open the Windows search box, enter Tftpd64, and launch the application.
-
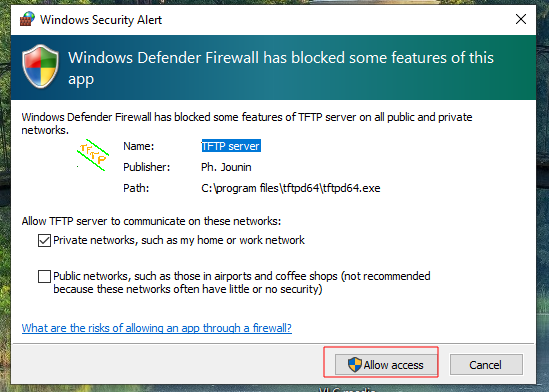
If Windows Firewall displays a network access prompt, click Allow access.
-
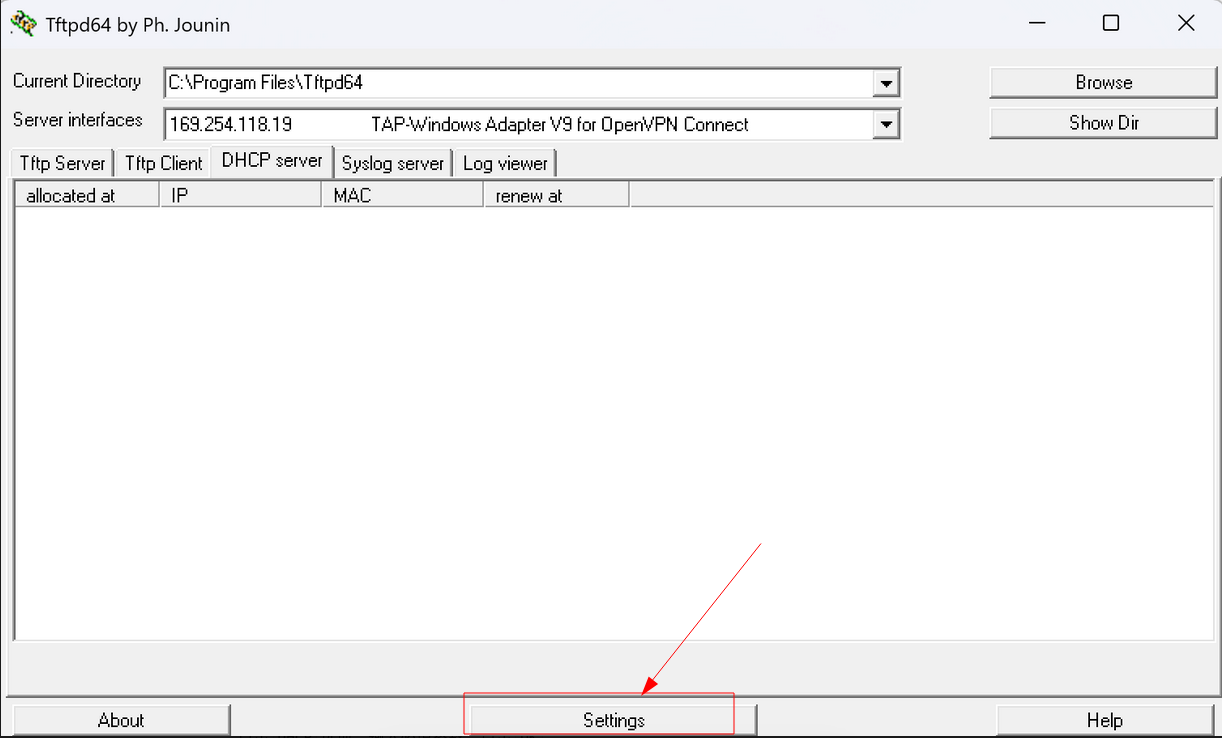
In Tftpd64, click Settings.
-
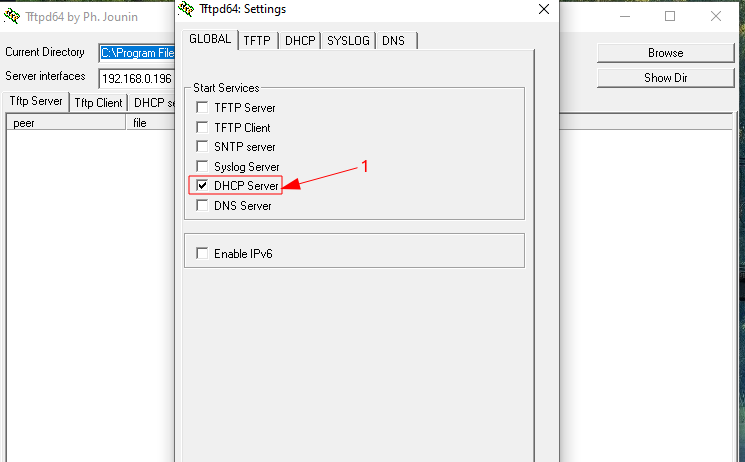
In the Tftpd64: Settings window, open the GLOBAL tab and enable DHCP Server only. Disable other services if they are not required.
-
Open the DHCP tab and configure the required parameters. Select the network adapter configured with the static IP address above, then click OK.
DHCP Parameter Configuration
Configure the following parameters:
| Parameter | Value | Description |
|---|---|---|
| IP pool start address | 10.52.0.100 |
The first IP address assigned to connected devices. |
| Size of pool | 50 |
The number of IP addresses available in the DHCP pool. The pool will range from 10.52.0.100 to 10.52.0.149. |
| Mask (Opt1) | 255.255.255.0 |
The subnet mask for the DHCP network. |
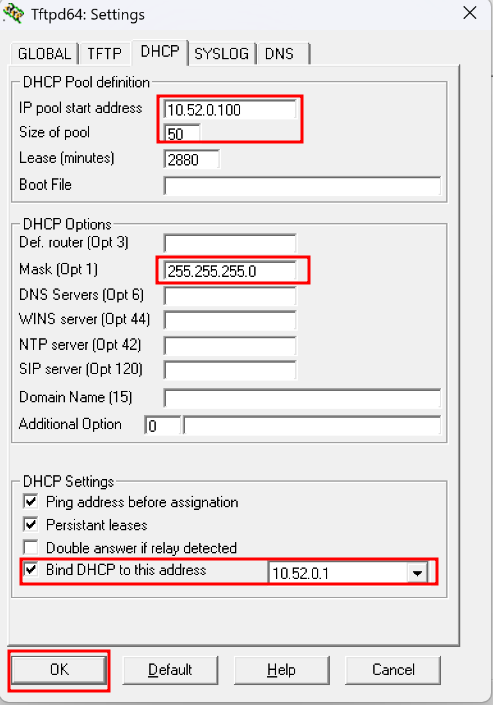
After entering the parameters, click OK again to apply the configuration.
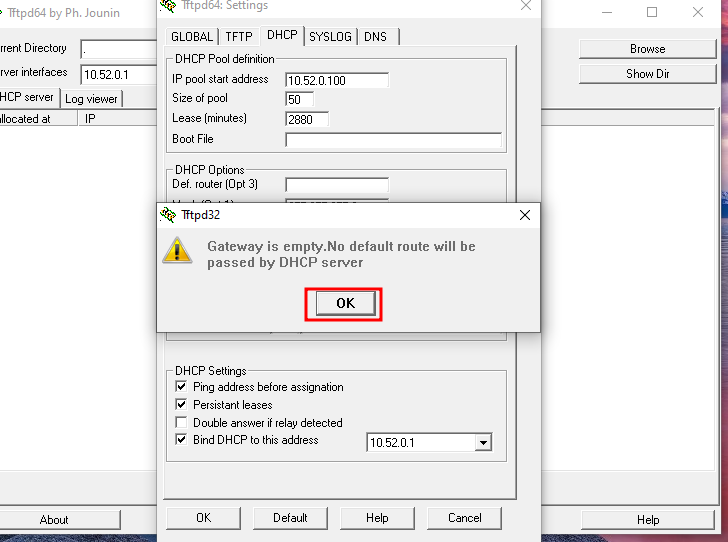
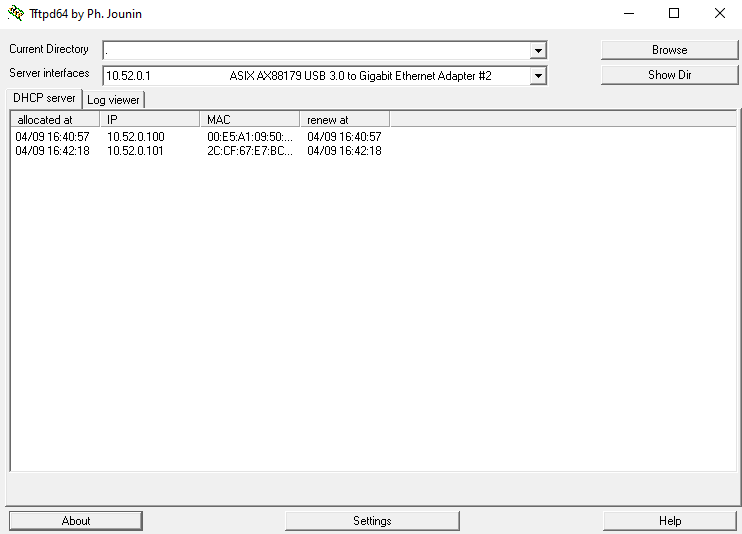
The selected network adapter will now operate as a DHCP server and automatically assign IP addresses to connected devices.
Note
The all-in-one system must be **power-cycled** after enabling the DHCP server so that it can obtain an IP address from the DHCP server.
4. Disable the DHCP Server
After the required network operation has been completed, disable the DHCP server.
-
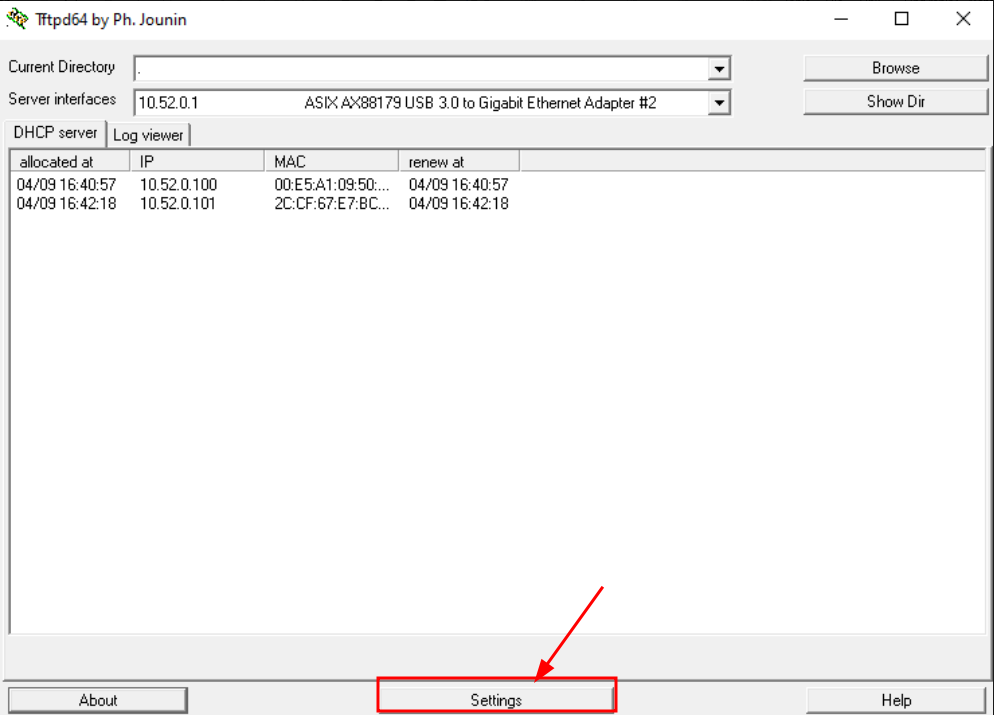
In Tftpd64, select the network adapter on which the DHCP server was enabled.
-
Click Settings.
-
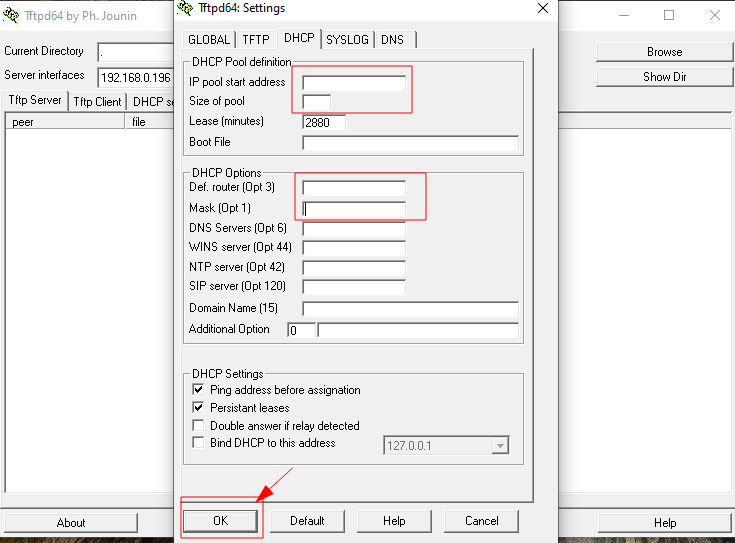
Open the DHCP tab.
-
Clear all configured DHCP parameters.
-
Click OK to apply the changes.
5. Remove the Static IP Configuration
After disabling the DHCP server, restore the network adapter to automatic IP configuration.
- Open Windows Network Settings.
- Select Ethernet.
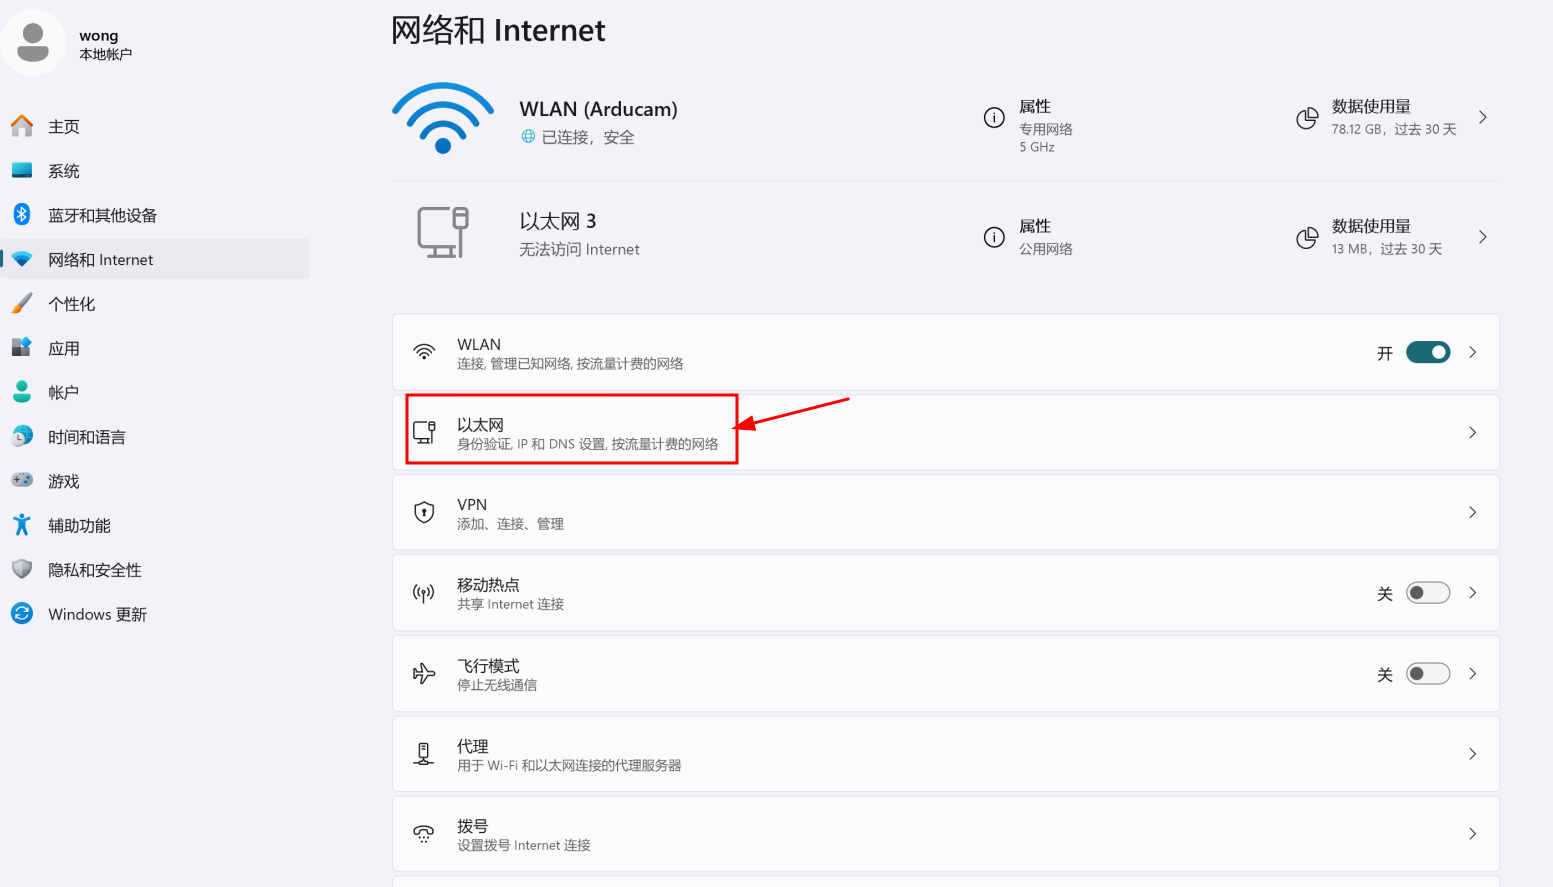
- Locate the network adapter configured with the IP address
10.52.0.1. - Click Edit.
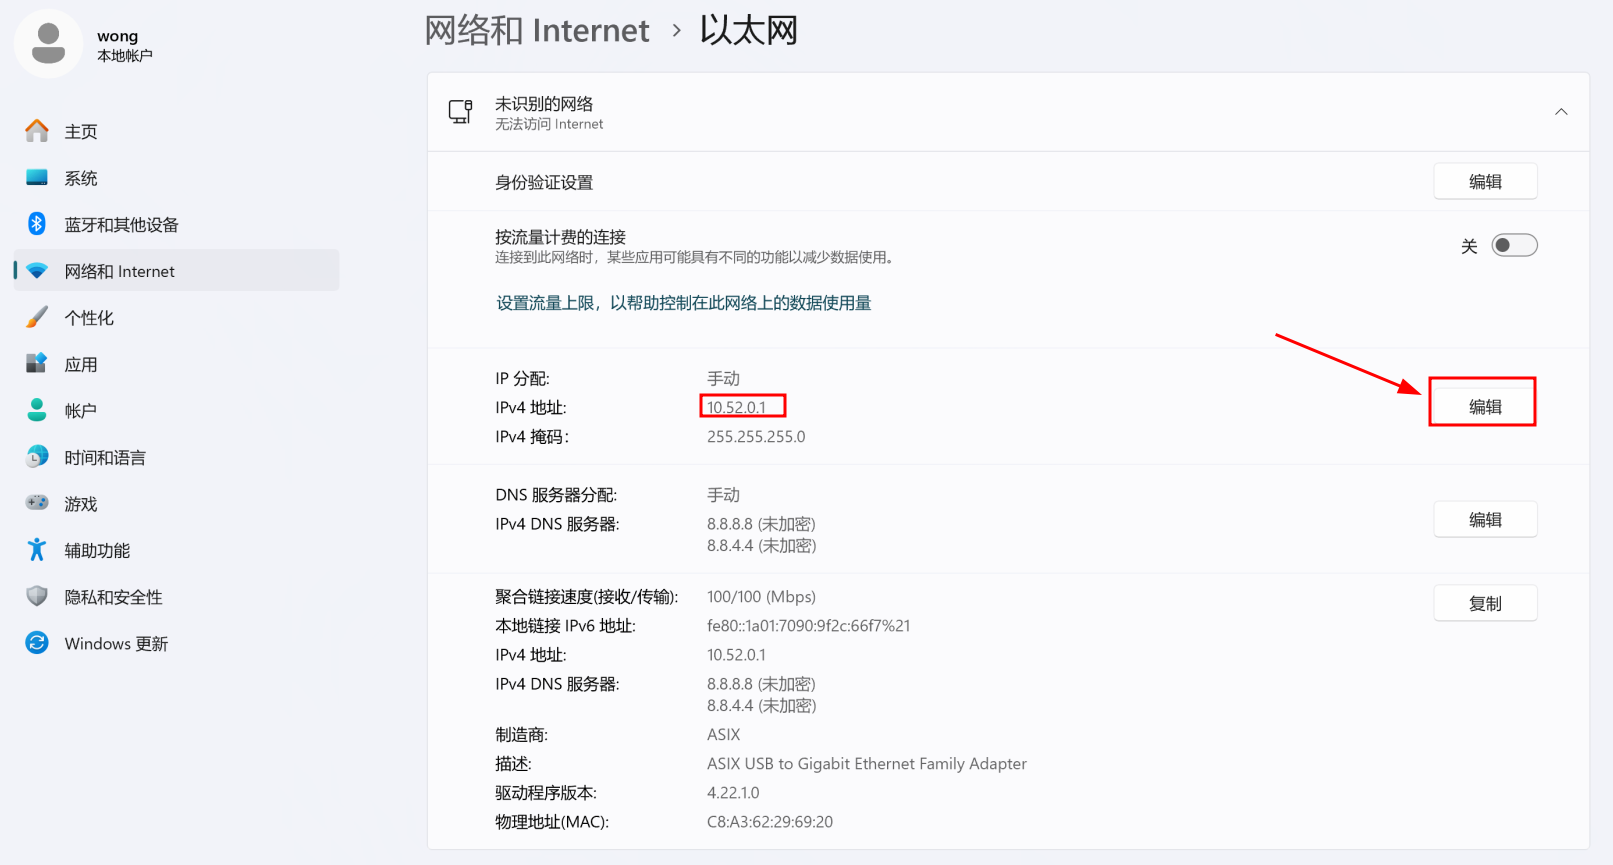
- Open IP settings.
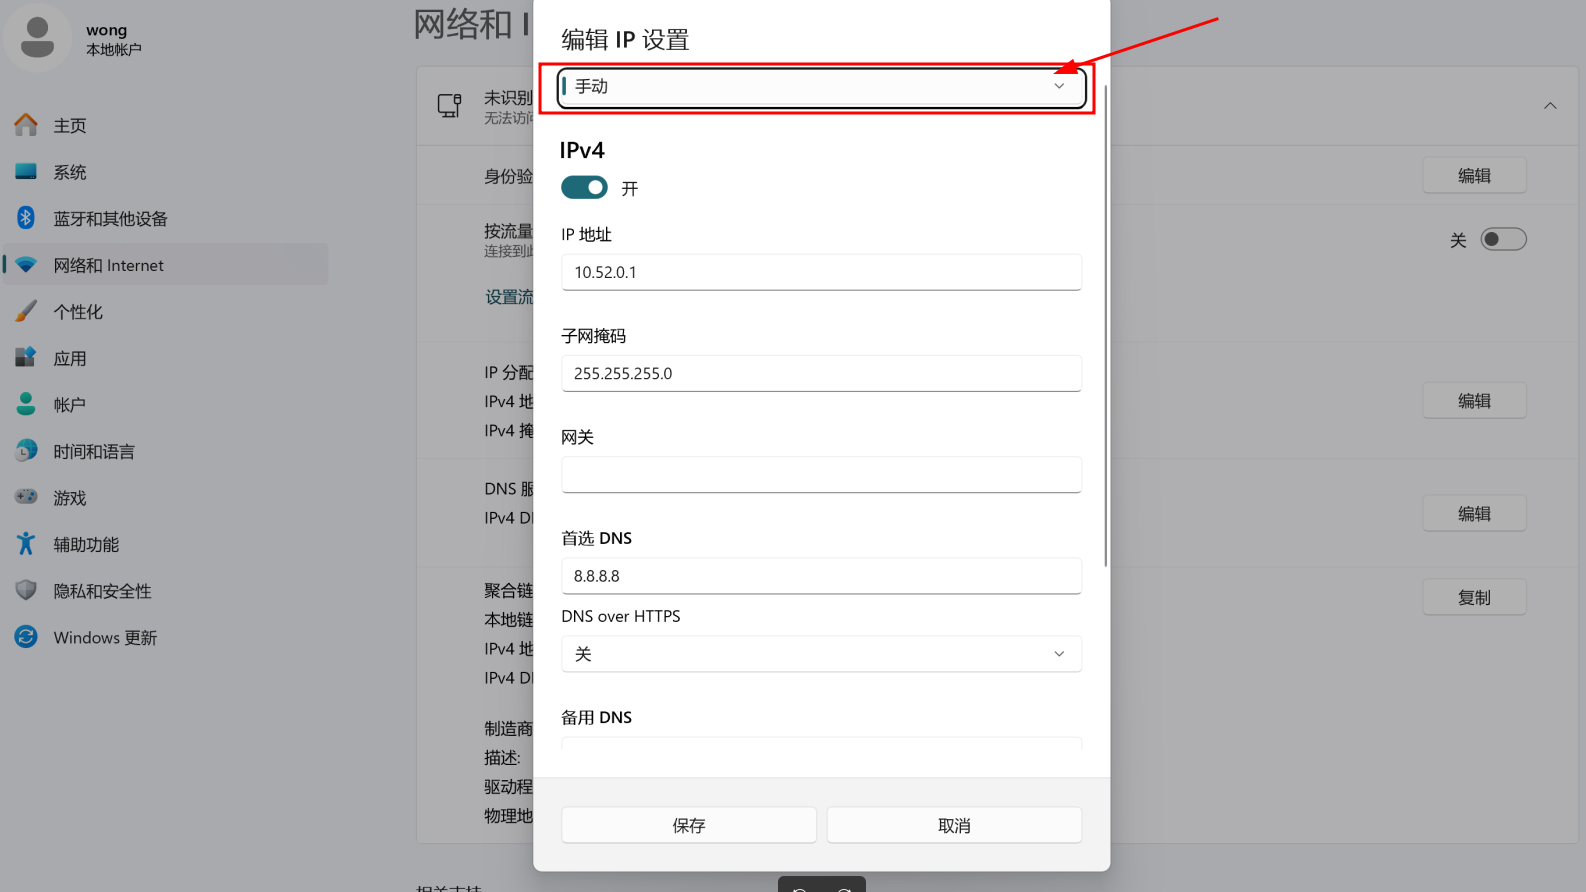
- Change the IP assignment method to Automatic (DHCP).
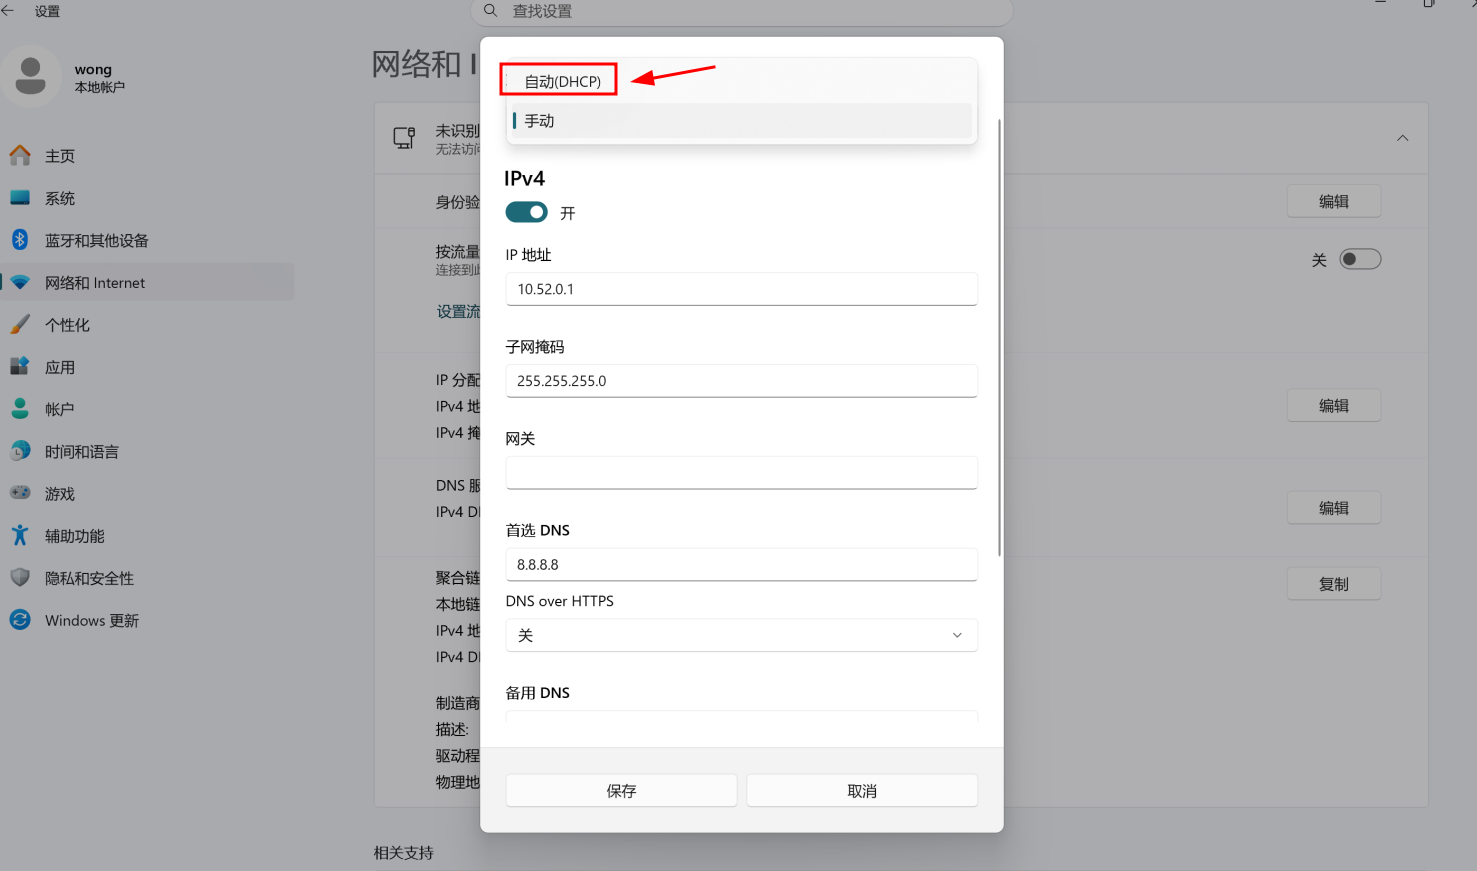
- Click Save.
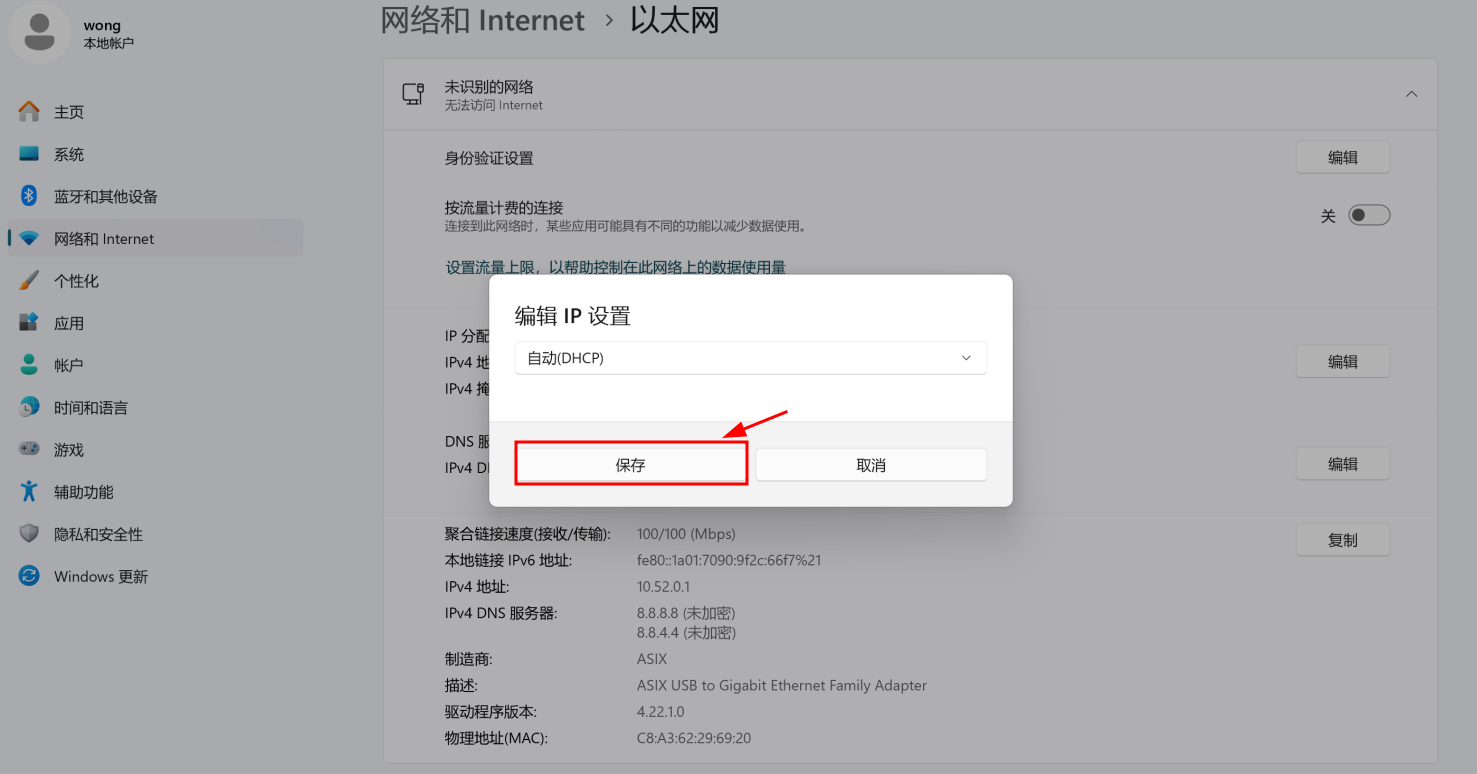
The network adapter will now obtain its IP configuration automatically from the network's DHCP server.
Set up WLAN Network Sharing
Start Menu→ Search "wlan" → OpenWLAN Settings

- Click
Hardware Properties

- Click
Editnext to "More adapter options"

- Select
Sharingtab

- Enable:
☑Allow other network users to connect through this computer's Internet connection
🔽Home networking connection: SelectEthernet 4 - Click
OK→ Configuration complete


Why "Ethernet 4"?
This selection depends on which network interface connects to the POE switch. In this demo:
Ethernet 4= USB network adapter connected to switch

Note
Please reconnect IMX500 AI Device after network configuration.
Host Network Configuration (Linux):
- Open
Wired Settings

- Click the "+" sign to bring up the
New Profilewindow.

- Click "IPv4", select "Shared to other computers", and click "Add

- At this point, "Profile 2" was available.

- Click "Profile 2" to complete the shared network configuration
