Quick Start Guide
Abstract
This page is mainly designed and developed for the Quick Start Guide of Arducam cameras on NVIDIA Jetson Nano and NVIDIA Jetson Xavier NX. For another NVIDIA Jetson Platforms, please refer to the following index to land in the corresponding pages:
Quick Start Guide for Arducam Cameras on NVIDIA Jetson Orin Nano/NX
Quick Start Guide for Arducam Cameras on NVIDIA Jetson AGX Orin
Hardware Connection
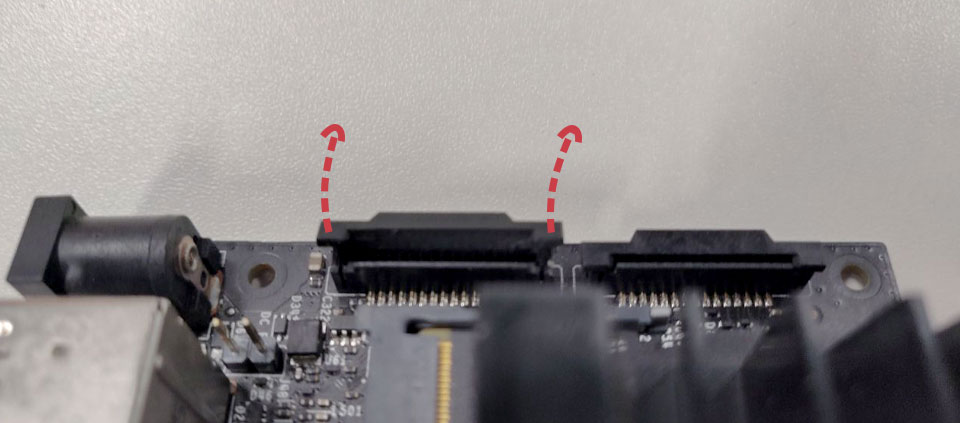
A. Locate the camera connector (CSI). It’s on the side of the carrier board, opposite to the GPIO pins.
B. Pull up on the plastic edges of the camera port. Do it gently to avoid pulling it off.
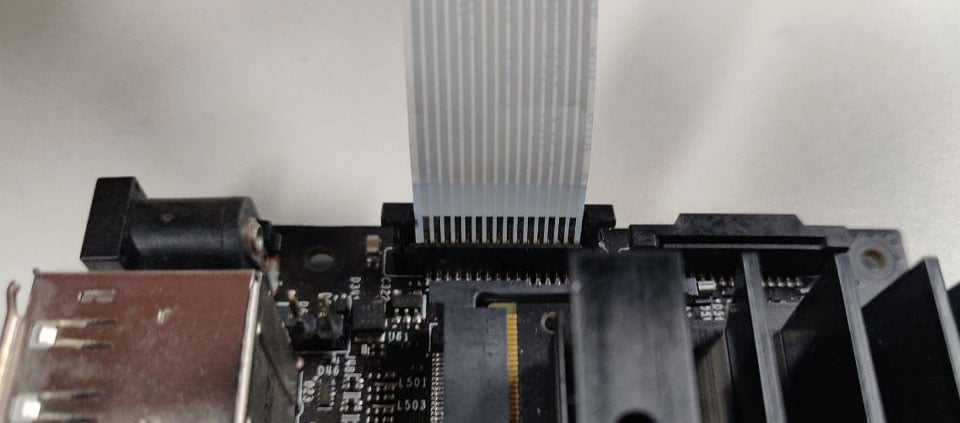
C. Push in the camera ribbon. Make sure the contacts are facing the heatsinks.
Do not bend the flex cable, and make sure it’s firmly inserted into the bottom of the connector.
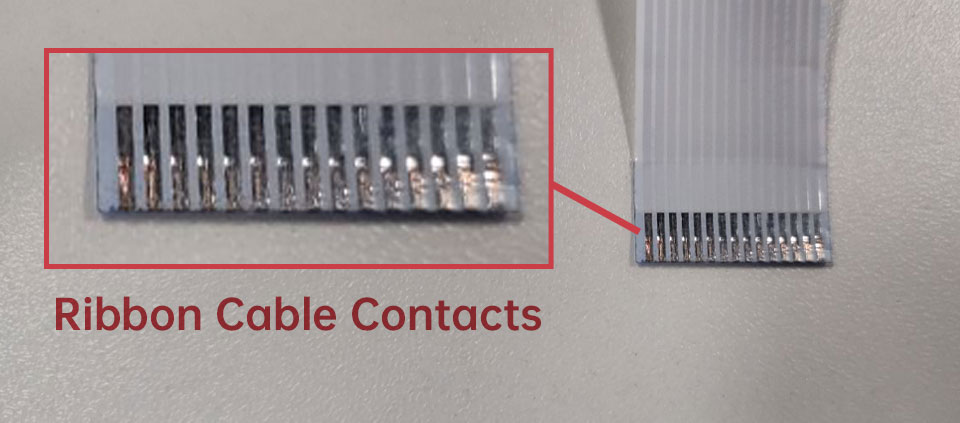 Ribbon Cable Contacts – 15pin-15pin
 Silver Contacts facing inside to the heatsinks
 Ribbon cable fully inserted to the bottom of the CSI connector
D. Push the plastic connector down. Do it while holding the flex cable until the connector is back in place.
Software
Supported Platforms and JetPack L4T versions
Please refer to the following doc for specific supported Platforms and JetPack versions:
Supported Platforms and JetPack Version - Arducam Camera for NVIDIA Jetson
Install driver
For the Jetvariety Camera, you need to install the following steps:
Jetvariety camera Board list:
| Resolution | Camera Module |
|---|---|
| 0.3MP | OV7251 |
| 2MP | OV2311 |
| 1MP | OV9281 |
| 2.3MP | AR0234 |
| 18MP | AR1820 |
| 21MP | IMX230 |
Note
Before you install the Jetvariety driver, please refer to the Jetpack suppourted version. Kindly note if your Jetpack version is not in the list of it, you need to re-burn your OS to the supported Jetpack version.
Step 1. Download the bash scripts
Step 2. Install the driver
Use arducam_displayer app to access camera
1.Check and validate the camera connection
Make sure you have installed the camera driver before you proceed.
- Check whether the camera is detected
You should find new video devices from /dev/videoX (X might vary from 0 ~ N).
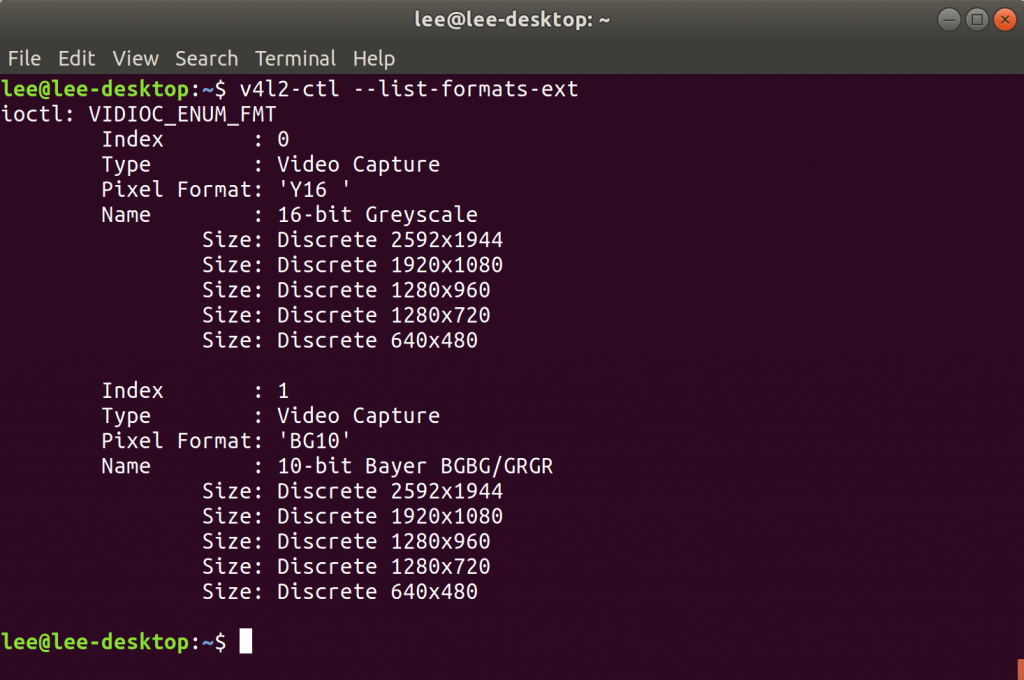
- Check the video format supported
Install the v4l-utils package:
Determine which format and resolution the current camera supported:
2.Run the camera
Some of the video preview software tools like VLC player only supports formats like GRAY, YUV etc., it might not support Bayer format. In this case we provide a python demo script to illustrate how to open and preview our cameras with OpenCV. In the demo code the most important three steps should be followed.
Note
The official SD Card Image provided by Nvidia comes with a Python version of OpenCV version 4.1.1.
Designate the VideoCapture apiPreference parameter as CAP_V4L2
Disable the RGB conversion
Shift the data bit to match with the camera real output bit width and do color conversion when necessary.
- Install v4l2 python module
for Python3.x:
for Python2.7:
Tip
If you want to install pip for both python3.x and python2.7, install python3 pip first, then python2.7 pip, otherwise the pip command will be overwritten by pip3. You can use pip -- version and pip3 --version to check if the pip version is correct.
- Download the demo code
- Check the help message of the parameters
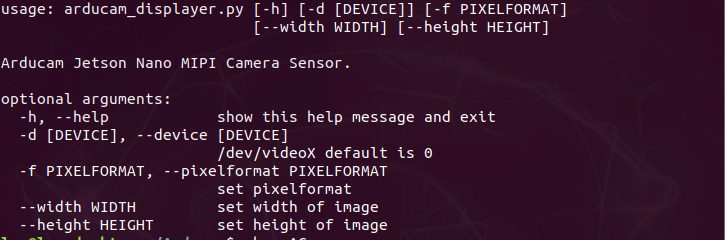
- Run the Demo
3.Read the sensor register
Arducam MIPI Camera driver for Jetson Nano support accessing the registers of the camera sensor and driver board by ioctl. Refer to rw_sensor.c and rw_sensor.pyfor an example of how to use it.
- rw_sensor.py help file

- rw_sensor.py demo
Read a single register
Read multiple registers
Write a single register
Write multiple registers
Use Gstreamer to access camera
1.View the Pixel format
2.Preview
If you want to use ssh connection, please export DISPLAY=:0
gst-launch-1.0 v4l2src device=/dev/video0 ! video/x-raw, format=GAY8, width=2560, height=800 ! videoconvert ! xvimagesink
format: Select the Pixel format (v4l2-ctl --list-formats-ext— Pixel format).
width,height:Select the resolution (v4l2-ctl --list-formats-ext— Size).
ximagesink: Preview. If does not work, please try ximagesink (xvimagesink), glimagesink, d3dvideosink (Windows).
3.Capture video
gst-launch-1.0 v4l2src device=/dev/video0 ! 'video/x-raw,format=(string)GRAY8,width=(int)2560,height=(int)800' ! nvvidconv ! 'video/x-raw(memory:NVMM), format=(string)I420' ! omxh264enc ! 'video/x-h264, stream-format=(string)byte-stream' ! h264parse ! qtmux ! filesink location=test.mp4 -e
format: Select the Pixel format (v4l2-ctl --list-formats-ext— Pixel format).
width,height:Select the resolution (v4l2-ctl --list-formats-ext— Size).
4.Streaming
4.1 Streaming Sever
gst-launch-1.0 v4l2src device=/dev/video0 ! video/x-raw,format=GRAY8,width=2560,height=800 ! nvvidconv ! 'video/x-raw(memory:NVMM), format=(string)I420' ! omxh264enc profile=high cabac-entropy-coding=true insert-sps-pps=true iframeinterval=60 ! 'video/x-h264, level=(string)4.2, stream-format=(string)byte-stream' ! tcpserversink host=0.0.0.0 port=5001 -v
4.2 Streaming Client
Please exit the virtual machine created with anacondac, or you can install conda install gst-libav -c conda-forge
gst-launch-1.0 -v tcpclientsrc host=0.0.0.0 port=5001 ! decodebin ! fpsdisplaysink sync=false text-overlay=false
or
autovideosink: Preview. If does not work, please tryximagesink(xvimagesink),glimagesink,d3dvideosink(Windows).
Display in VLC
Warning
Some cameras support using VLC to capture images. But please notice that some formats will not be supported by VLC.
Before Using
Please first check if your camera formats can be supported.
# input the command to check the camera formats
sudo apt-get install -y v4l-utils
v4l2-ctl --list-formats-ext
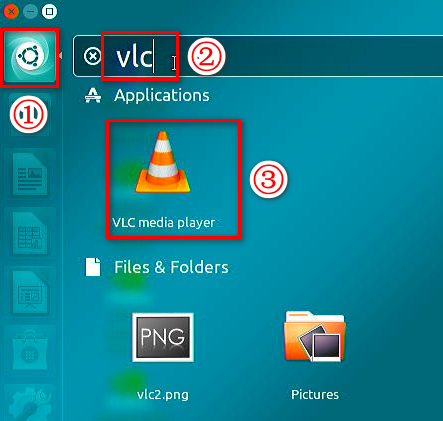
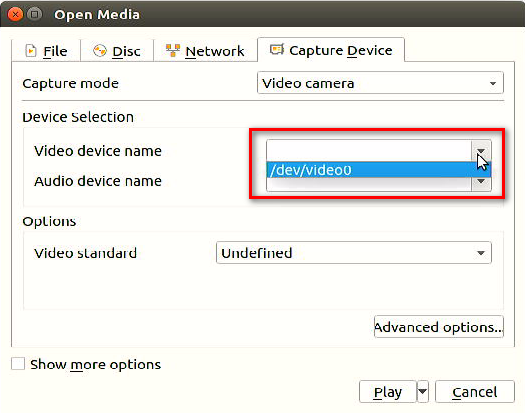
Using VLC
Open VLC media player
- Display the image
Press Ctrl+C
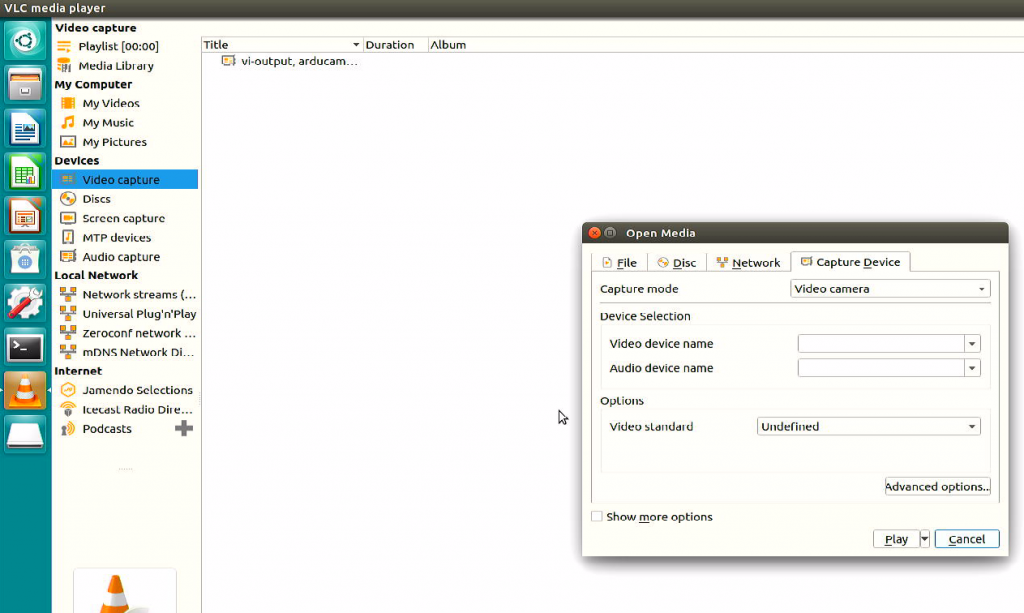
【Video device name】→ select "/dev/video0"→ click 【Play】.
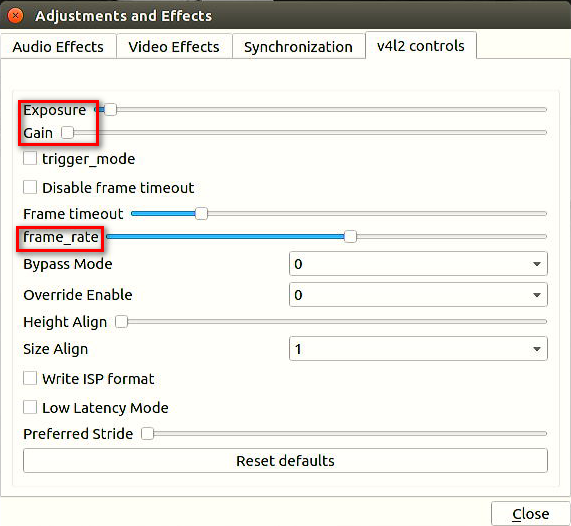
- Adjust exposure, gain, and frame rate
Press Ctrl+E, drag the sliders at "Exposure", "Gain" and "Frame_rate" to make adjustments under the "v4l2 control" tab.